I’d like to follow up my previous post with a more detailed explanation of how I pieced the composite image together and achieved the final look. Certain aspects of Photoshop, or photo editing in general, may seem like black art but in this case the process is fairly straightforward. I use two common image editing programs:
- Adobe Photoshop Lightroom 4 (currently at v4.3)
- Adobe Photoshop CS5
As I mentioned in the last post I started the process of taking this image with the final product in mind, simplifying the editing process considerably.
 The first step, as in all my post-production, was to import the images into Lightroom. For those who don’t know, Lightroom is an extremely versatile program that provides a near-complete workflow from import, sort, edit, print, upload plus simple tools for generating slide shows, webpages and books. I do 95% of my editing in Lightroom and usually only go to Photoshop for complicated edits like cloning and healing or anything where layers are required.
 With the image of the blue room I adjusted the levels to get the brightness/contrast I wanted. I tuned the blue colour of the room with a white balance adjustment and the hue/saturation/luminance controls. I also used this control to reduce the red and orange saturation on my face.
 If you recall from the previous post I took a second image of the blue room with the snooted flash removed. I copied all of the adjustments from above over to this image. With the red room, I made minimal adjustments. I tweaked the white balance and increased saturation. I added some blacks to increase contrast.
 When finished in Lightroom I opened the three images as layers in a single Photoshop file in the following order: empty blue room > blue room with me > red room. I selected the three layers and used the Auto-Align Layers tool (in Automatic mode) to remove any misalignment from slight camera movements between shots.
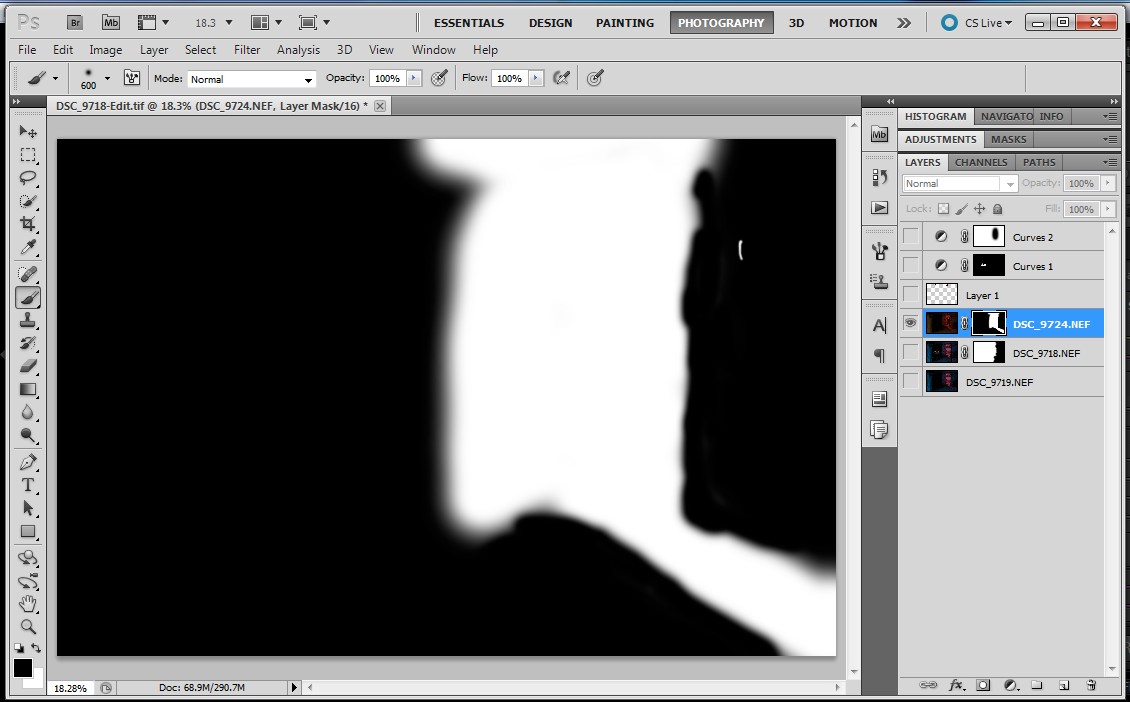
  I masked off the right side of the “blue me” layer (to allow the underlying empty room to come through). The first image below is the resulting layer and the second image is the mask used to create it.
 The red room required a more complex mask to keep the red on the door and floor but not spill onto the door frame on the right side.
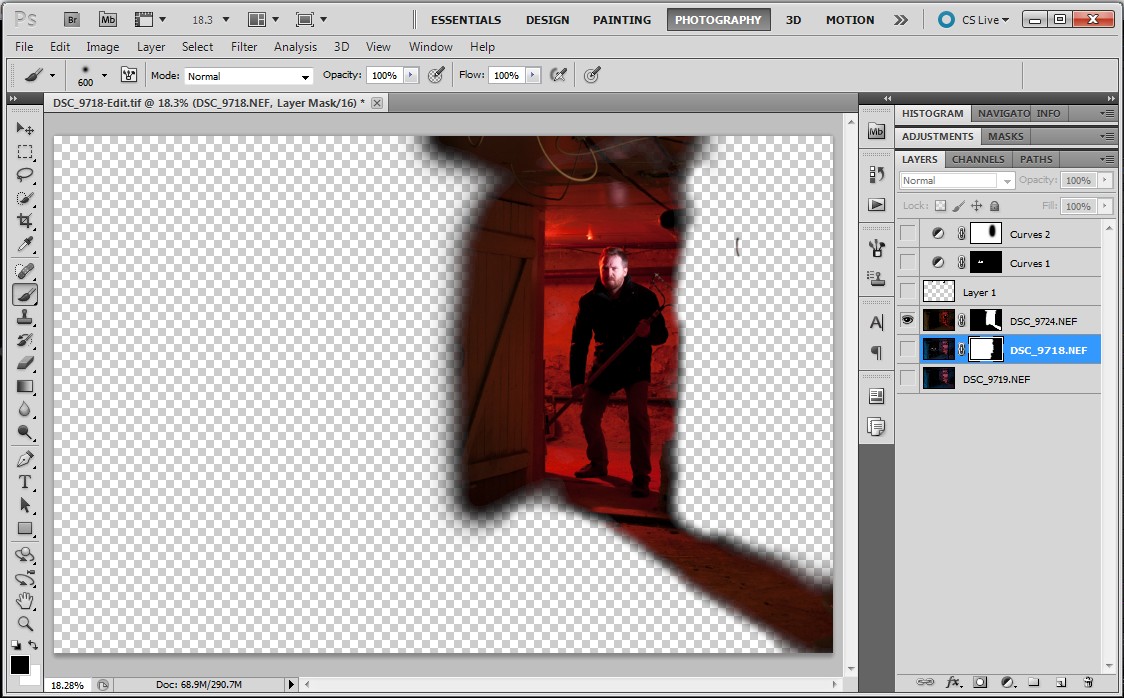
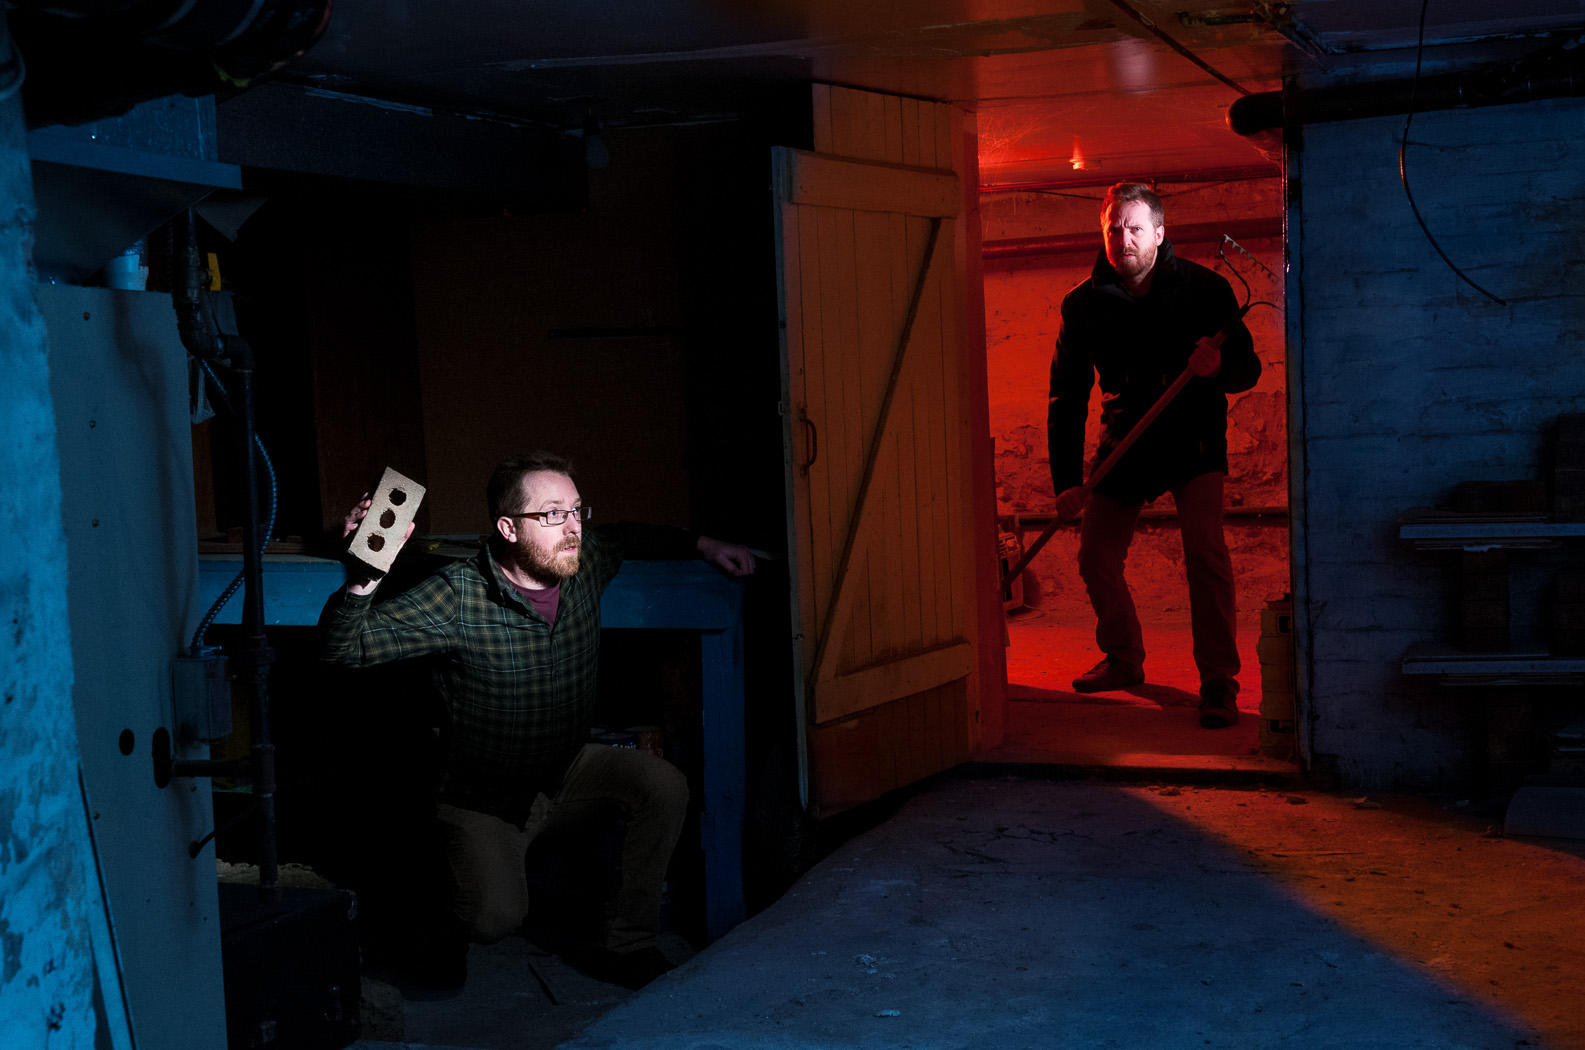
 The three layers, when all visible, appear like this:
 My next step was to remove blemishes such as the smoke alarm in the blue room and some messy cables. For this I created a new layer above the three image layers. I set the healing brush and clone stamp tools to sample from all layers below. The edits appeared in the new layer, leaving the underlying layers untouched. This method makes the removal of healing/cloning edits much simpler because they can be deleted from the self-contained layer. Here is the layer containing the edits.
 As a final adjustment I added a curves adjustment, again as a new layer but masked off the red room.
 Here is the final image in Photoshop:
 Finally, I opened the image up in Lightroom and cropped on a slight angle to add a bit of drama.Thanks for reading!
