New Batch of Developed Film

Last week I got a few rolls of film back from Dwayne’s, mostly shot on the Bronica ETRS. Here are a few scans I did over the weekend. The colour shots are Fuji Provia 100 and the black and white are Kodak Tri-X 400. They were all scanned with my Epson V500 and tweaked in Photoshop CS5.

img110 img108 img115 img098 img091 img114 img112 img099 img111 img103

ObG Thursdays – Lincoln Memorial

This week’s Oldie-but-Goodie comes from a trip Mitzy and I took to Washington DC last summer. On a blazing hot day, we took refuge in the Lincoln Memorial where I took this photo with the D300s and Tokina 11-16mm f/2.8.

Lincoln MemorialI used a few photographic tricks to make this image. First was my choice of perspective. I used the Tokina 11-16mm at 11mm to capture the vast interior. The room was also full of people but Mitzy pointed out this excellent vantage point that was completely tourist free! Compare above to the image below. It’s hard to believe that they were taken just a few minutes apart:

DSC_3716To capture the full tonal range of the space I used an HDR technique. I took five images, each separated by 1EV and combined the -2, 0 and +2EV into an HDR image in Photoshop’s HDR Pro tool. Here are the three images that fully encompass the darkest and brightest tones.

DSC_3728 DSC_3730 DSC_3732

The combined image looked like this:

DSC_3728-Edit-2Once the HDR was created I tweaked the brightness/contrast and fixed the vertical perspective in Lightroom.

ScreenHunter_16 Mar. 20 21.09And that’s it! A unique perspective of a familiar landmark, captured with full tonal range.

Blending with Soft Light – A Quick and Simple Way to Increase Contrast and Saturation in Photoshop

DSC_0292-Edit-2Today I’d like to show you a really effective, but simple, way to boost contrast and saturation in an image by walking through how I arrived at the above image. The trick is using a layer blending mode called ‘Soft Light’. Photoshop has the ability to blend different layers with each other using a number of methods. The Soft Light mode works like this:

  • Areas that are brighter than 50% grey get ‘screened’, meaning they become lighter depending on the lightness of the lower layer.
  • Areas that are darker than 50% grey get ‘multiplied’, meaning they become darker depending on the darkness of the lower layer.

I’ll demonstrate. Here is a layer in Photoshop that is a simple gradient going from white to black, left to right. In the middle is 50% grey.ScreenHunter_16 Mar. 12 20.32If I add an adjustment layer on top of this, say ‘Levels’, and change its blending mode to Soft Light the lights get lighter and the darks get darker depending on how light or dark they are. In the middle, 50% grey, is unaffected. In the image below, the top half has been blended with Soft Light. The bottom half is the same as the previous image. Notice that the gradient becomes more steep… the transition between white and black is shorter. This is an increase in contrast.ScreenHunter_16 Mar. 12 20.35In an image with colour, Soft Light blending can also increase saturation. I’ll demonstrate with an image. First, I’ll show the image as it is first pulled out of Lightroom into Photoshop.ScreenHunter_13 Mar. 12 19.57If I add a Levels layer and blend it with Soft Light the contrast and saturation increase dramatically.ScreenHunter_15 Mar. 12 19.57I can scale the effect back by lowering the opacity. Here I’ve set it to 47%:ScreenHunter_15 Mar. 12 19.58I’m finding that there’s still too much of an effect on Mitzy so I’ll paint some grey into the layer mask over her. Grey will decrease the opacity of the mask by another 50% where I’ve painted it in.ScreenHunter_16 Mar. 12 20.00I’m happy with how the Soft Light blending has improved the image so let’s finish it off. First, I’ll remove some of the messy details in the bottom right corner using the Spot Heal Brush in a new layer.ScreenHunter_16 Mar. 12 20.04Next I’ll brighten Mitzy a bit further using a curves tool, masked so it only affects her.ScreenHunter_16 Mar. 12 20.05Here, I’ve decided that I want to bring a bit more of the contrast back in to the background so I increase the opacity of the Soft Light layer.ScreenHunter_16 Mar. 12 20.06Finally, I add a bit more contrast into the right side of the image with a masked Curves tool. The image is done!ScreenHunter_16 Mar. 12 20.08So there have it. Soft Light blending. Quick and simple!

Meet Easton Nathanael Persaud

Nat and Lauren, some of my best friends, have a new member of the family as of February 7. Easton Nathanael is an adorable baby boy and I feel so lucky to have met him when he was just 8 hours old. Lauren and Nat had Mitzy and me over on Saturday to take some photos of the new family of 4. I haven’t had a lot of experience with baby photography but I love shooting their kids. Their daughter, Harper, has become quite the photogenic toddler especially now that she’s warmed up to me. Here is one of my favourites (D7000 with AF-S 35mm f/1.8 @ f/2.8 1/200s ISO 400):DSC_9809-Edit-2To give a bit of editing history, here is the image when first imported into Lightroom.DSC_9809-2In Lightroom I did a few tweaks to prepare the shot for editing in Photoshop, namely

  • highlight reduction/shadow boost
  • reduced clarity/increased sharpness
  • vibrance reduction
  • lens correction
  • ‘Camera Portrait’ camera calibration

This is how the photo looked coming out of Lightroom:DSC_9809In Photoshop I removed some dry skin and red patches (under the nose and the lines on the shoulder). I used the color correction tool to shift some of the magenta tones in the skin towards the green and some local reduction of red saturation. I tried out a new Photoshop preset (a gift from a friend) to get the final look.

Enjoy!

The Making of a Scary Basement Photos – Part 2 (Editing)

I’d like to follow up my previous post with a more detailed explanation of how I pieced the composite image together and achieved the final look. Certain aspects of Photoshop, or photo editing in general, may seem like black art but in this case the process is fairly straightforward. I use two common image editing programs:

  • Adobe Photoshop Lightroom 4 (currently at v4.3)
  • Adobe Photoshop CS5

As I mentioned in the last post I started the process of taking this image with the final product in mind, simplifying the editing process considerably.

DSC_9718-Edit-5The first step, as in all my post-production, was to import the images into Lightroom. For those who don’t know, Lightroom is an extremely versatile program that provides a near-complete workflow from import, sort, edit, print, upload plus simple tools for generating slide shows, webpages and books. I do 95% of my editing in Lightroom and usually only go to Photoshop for complicated edits like cloning and healing or anything where layers are required.

ScreenHunter_02 Jan. 11 16.42With the image of the blue room I adjusted the levels to get the brightness/contrast I wanted. I tuned the blue colour of the room with a white balance adjustment and the hue/saturation/luminance controls. I also used this control to reduce the red and orange saturation on my face.ScreenHunter_03 Jan. 11 16.44If you recall from the previous post I took a second image of the blue room with the snooted flash removed. I copied all of the adjustments from above over to this image. With the red room, I made minimal adjustments. I tweaked the white balance and increased saturation. I added some blacks to increase contrast.ScreenHunter_04 Jan. 11 16.46When finished in Lightroom I opened the three images as layers in a single Photoshop file in the following order: empty blue room > blue room with me > red room. I selected the three layers and used the Auto-Align Layers tool (in Automatic mode) to remove any misalignment from slight camera movements between shots. ScreenHunter_06 Jan. 11 16.52I masked off the right side of the “blue me” layer (to allow the underlying empty room to come through). The first image below is the resulting layer and the second image is the mask used to create it.ScreenHunter_05 Jan. 11 16.51ScreenHunter_08 Jan. 11 16.52The red room required a more complex mask to keep the red on the door and floor but not spill onto the door frame on the right side.ScreenHunter_09 Jan. 11 16.53 ScreenHunter_10 Jan. 11 16.53The three layers, when all visible, appear like this:ScreenHunter_10 Jan. 11 16.54My next step was to remove blemishes such as the smoke alarm in the blue room and some messy cables. For this I created a new layer above the three image layers. I set the healing brush and clone stamp tools to sample from all layers below. The edits appeared in the new layer, leaving the underlying layers untouched. This method makes the removal of healing/cloning edits much simpler because they can be deleted from the self-contained layer. Here is the layer containing the edits.ScreenHunter_11 Jan. 11 16.54As a final adjustment I added a curves adjustment, again as a new layer but masked off the red room.ScreenHunter_11 Jan. 11 16.55Here is the final image in Photoshop:ScreenHunter_12 Jan. 11 16.56Finally, I opened the image up in Lightroom and cropped on a slight angle to add a bit of drama.DSC_9718-Edit-5Thanks for reading!

Trying a New HDR Technique with 32-Bit TIFFs

Today I came across a new high dynamic range (HDR) technique that combines Photoshop’s HDR tool with a feature that was included in the Lightroom 4.1 update that I hadn’t noticed before: the ability to edit 32-bit TIFF images. As a first attempt I processed this image (from a walk on the Lake Erie shore at Fort Erie on Christmas Eve):

DSC_9164-Edit-2The process I used was:

  • I took a series of images (minimum three) with different exposures to capture the full dynamic range of the scene. Using a tripod is best although the HDR tool in Photoshop automatically aligns the images. For the images used to create the HDR above I shot handheld with autobracketing on the D7000 for -1, 0 and +1 EV exposure compensation.
  • In Lightroom 4.1 (or newer) I did some minor tweaking of the images to prepare them for the HDR tool. First I applied automatic distortion, vignette and chromatic aberration corrections for the 35mm f/1.8 DX. Next I changed the calibration profile from ‘Adobe Standard’ to ‘Camera Neutral’ in order to reduce the contrast. Finally I adjusted the exposure settings to ensure that the darkest image included the full range of tones in the highlights and the brightest image covered the full range of tones in the shadows. The images looked like this:

DSC_9164 DSC_9165 DSC_9166

  • I exported the three images to the HDR tool in Photoshop using the ‘Merge to HDR Pro in Photoshop’ command and saved the resulting combined image as a 32-bit image. Note that Lightroom cannot read 32-bit PSD files so it is best to configure Lightroom to export as a TIFF to Photoshop.
  • With the new 32-bit file back in Lightroom I could begin editing. At first glance, the image doesn’t seem to have any more information in it than before the HDR conversion but that is because all 32 bits of data can’t be displayed at once.  Instead, it is best to think of the file as a RAW with an enormous amount of information in the highlights and shadows. Pulling the Shadows slider all the way to +100 and the Highlights slider to -100 and a reduction of the Exposure slider to taste gives the following image. This is a good demonstration of the amount of data present, but not quite a final image. 32-bit Quick AdjustWith some further tweaking in Lightroom (exposure controls, curves, saturation/vibrance, sharpening) I got reached this point:

DSC_9164-ColourAt this point I wasn’t too happy with the banding in the sky… something I’ll have to figure out for future images. In the end I opted to convert to black and white for a darker feel.

DSC_9164-Black and WhiteAnd there it is, a simple HDR technique that doesn’t use any of the tone mapping features of common methods. I prefer this approach to those with tone mapping primarily because I have full control over the edit.

Creating a Wedding Party Composite with Flash

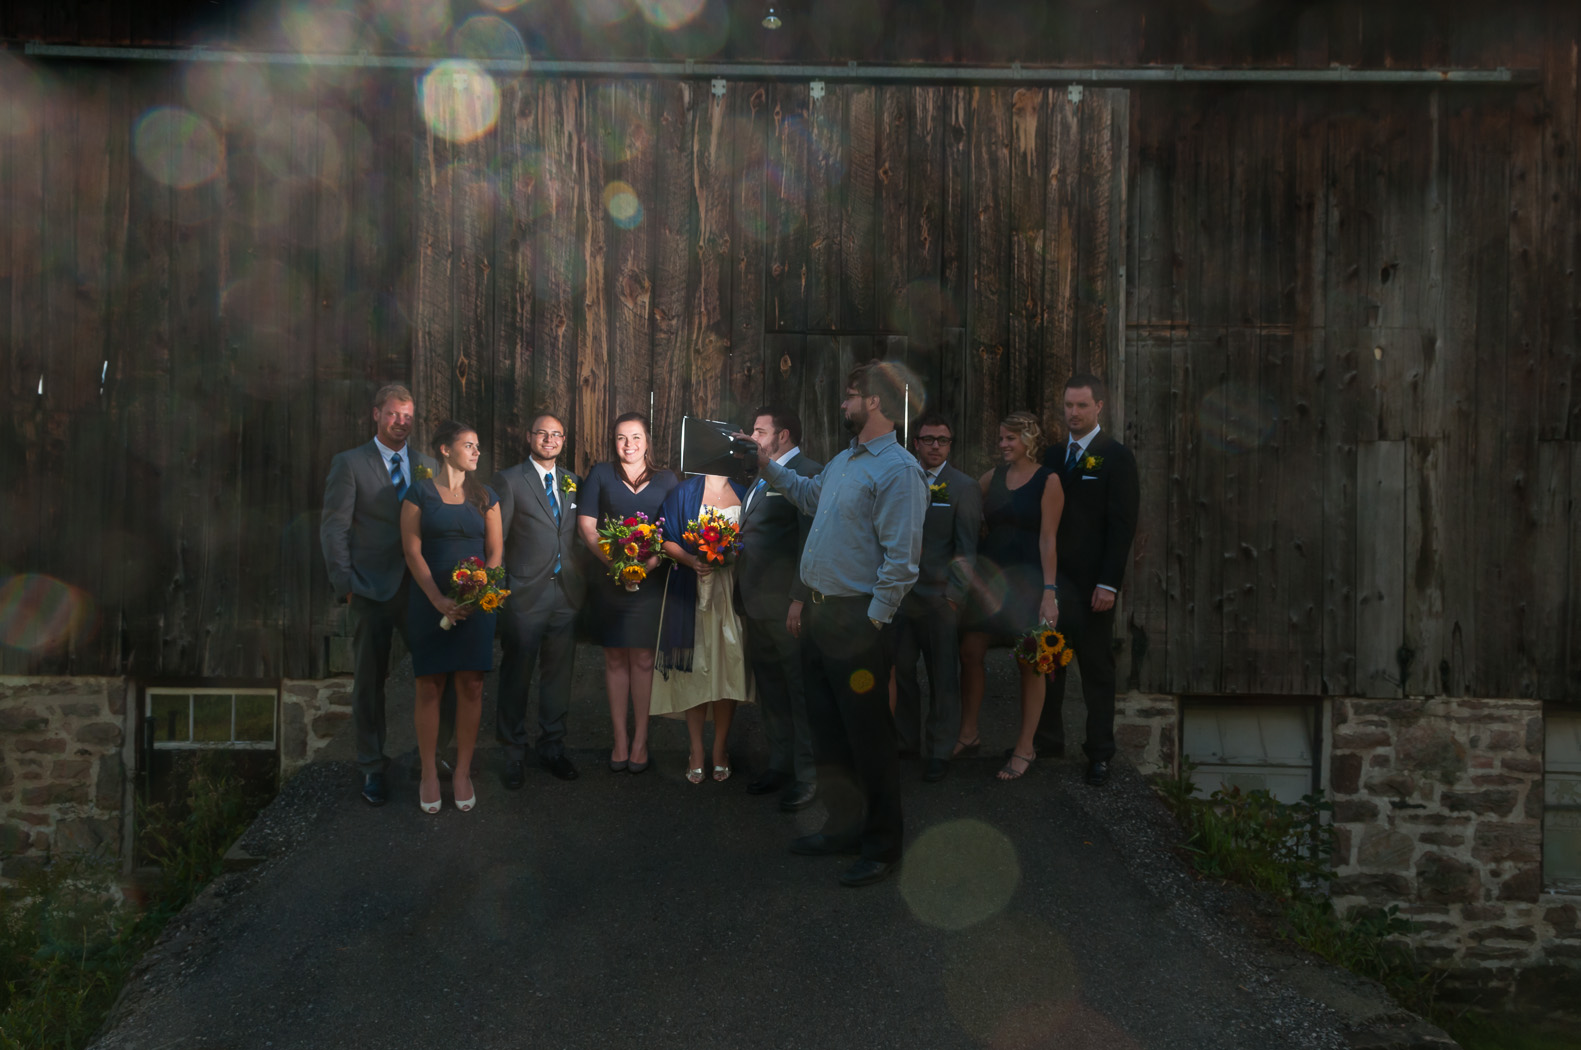
I’ve had a request to explain in more detail how I achieved the wedding party composite from yesterday’s post. I borrowed the idea from Ryan Brenizer, who uses this technique very effectively to achieve dramatic (but even) lighting over a group of people. This would be extremely difficult with a single or pair of flashes in a single image, especially on the fly and in the wild.

Here’s how it’s done.

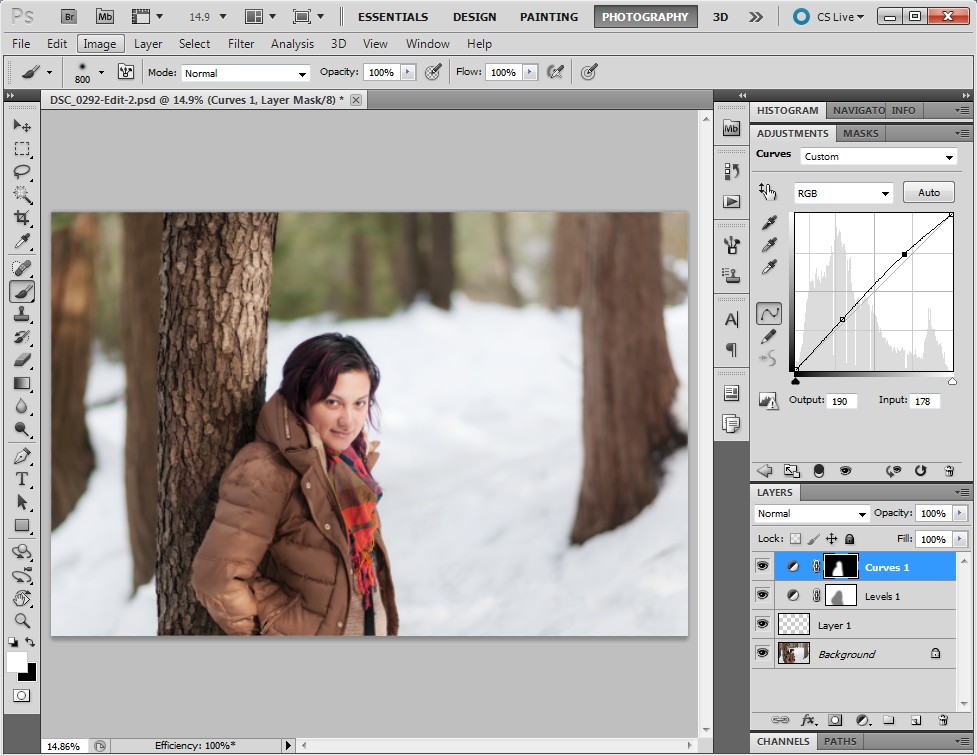
First I set the camera (D300s with AF-S 17-55mm f/2.8 @ 17mm) on a tripod to keep the framing the same between each shot. I used manual mode to ensure consistent exposure. Settings of ISO 200, f/8, 1/250s gave this look:

DSC_6107

The ambient light is at least a stop underexposed, which is right where I wanted it. The next step was to set up the flash. I used a Nikon SB-900 set to wireless TTL control (the Nikon CLS system is powerful and complicated… something I’m sure I’ll delve into explaining in another post) and triggered with the on-board flash. To diffuse and soften the light, I added my favourite light mod, the Lumiquest Softbox LTz. This softbox mounts to the flash with velcro and folds up to the size of a 17″ laptop, which most camera bags nowadays have a slot for. Portt, who was assisting me that day, held the flash up close to each pair of people and I took a shot for each position.

DSC_6111DSC_6112


DSC_6113DSC_6114DSC_6115

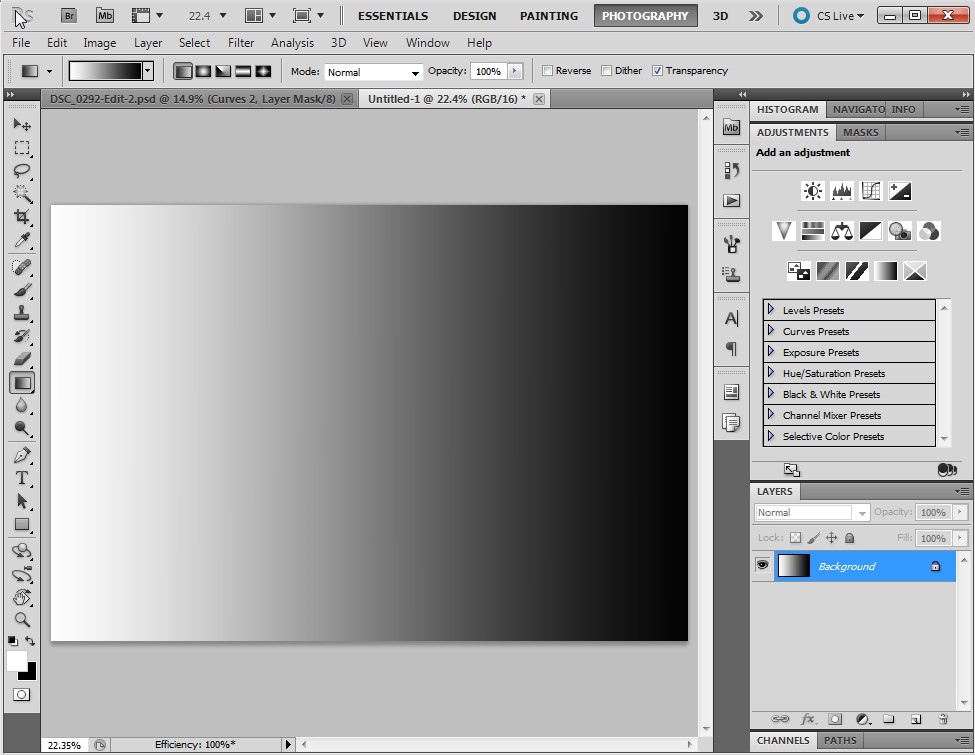
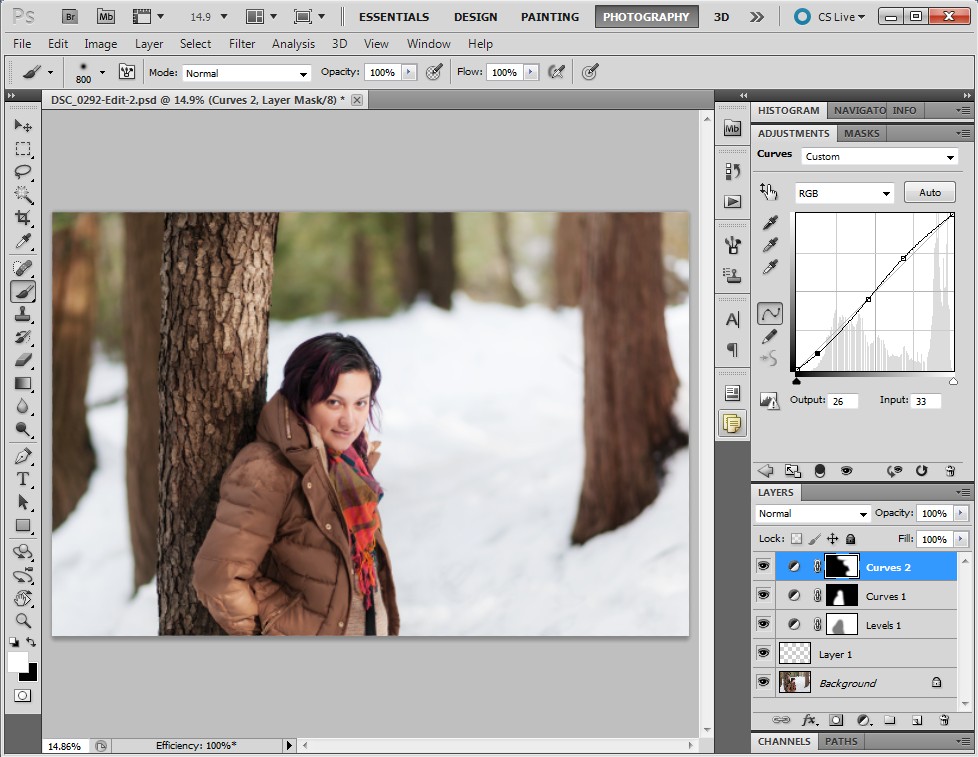
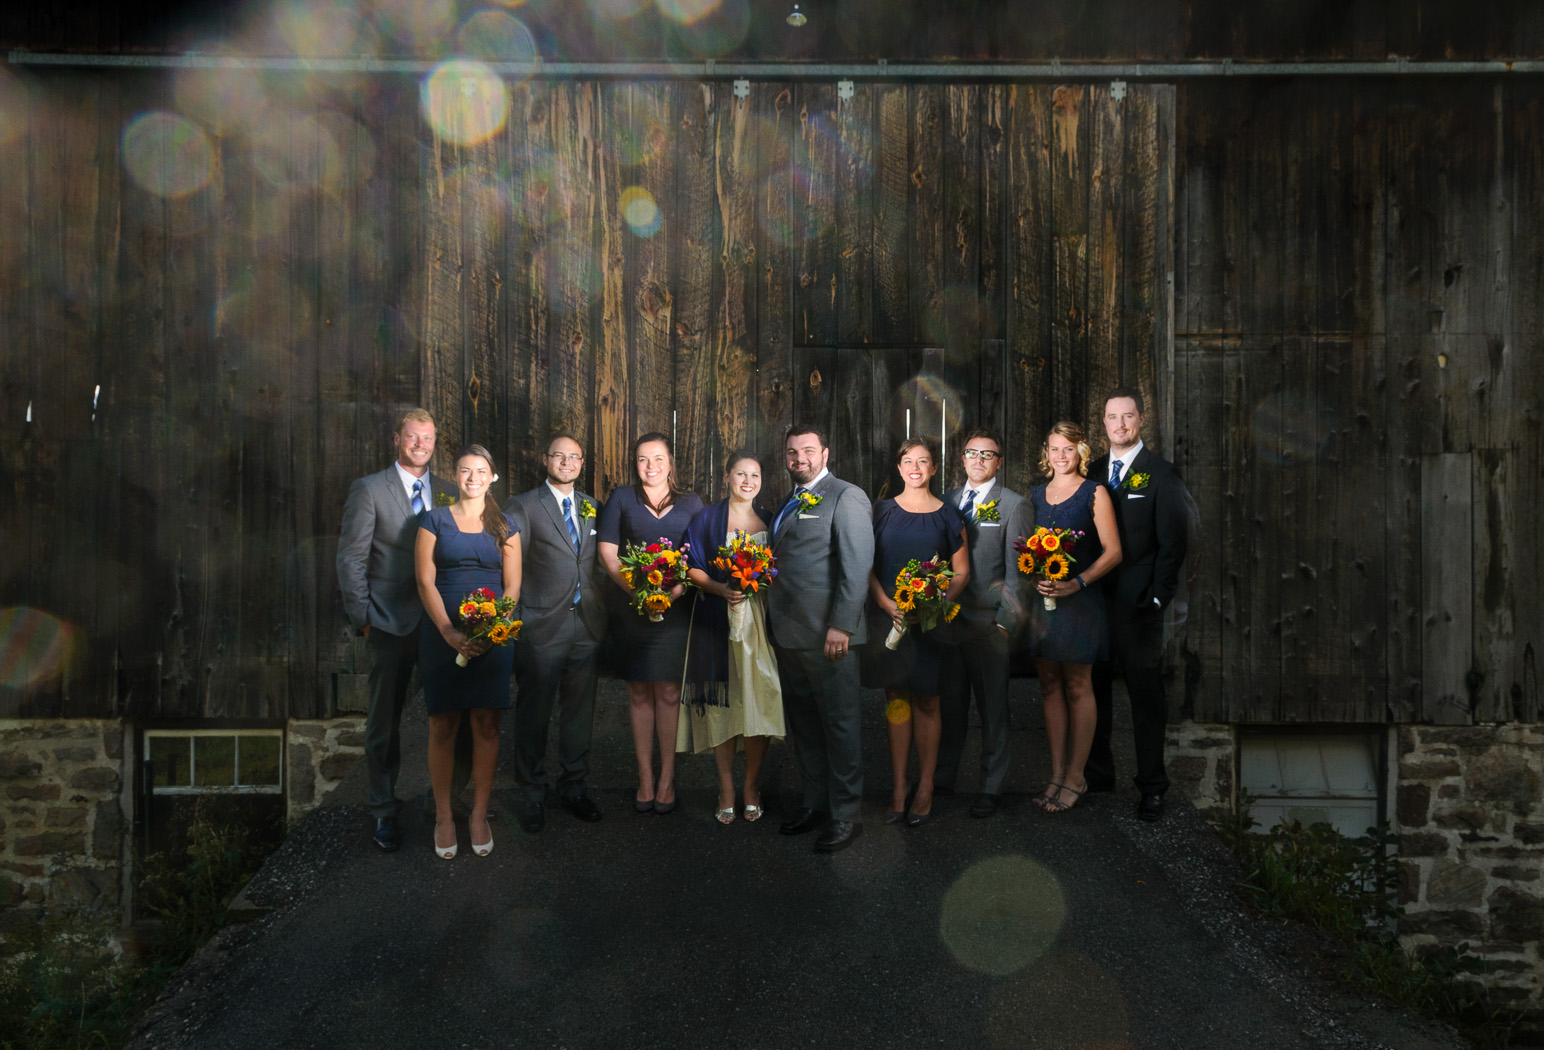
In Lightroom, I batch processed the five images for exposure, lens correction, sharpening and then opened them in Photoshop as layers in a single file. Using the first image as a base layer, I painted in the relevant bits from the successive layers and finished things off with some global and local curves and dodging/burning. Here’s the final image:

DSC_6111-Edit

To get this look in a single image would have required some pretty tricky lighting, both to light each person evenly and to control the spill on the background. In all, the composite took just a few minutes to shoot and less than half an hour in Photoshop. An added bonus to shooting each pair separately is that I can focus on just two faces at a time (i.e. no blinkers).