


Tag Archives: HDR
The Chapel on the Rock – First photo from my trip to Denver/Boulder Colorado
This past week I visited Denver and Boulder Colorado for my cousin Simon’s wedding. The trip was fantastic and I’ll have lots and lots of images and stories to share over the next couple of weeks. To start things off, here is a photo of one of the highlights of the trip. My aunt Glynis took me to this church, near Allenspark, after a long drive into the mountains at Rocky Mountain National Park. The Chapel on the Rock deserved a full HDR treatment (otherwise the mountains and sky would have been completely washed out).
I shot this with the D300s and Tokina 11-16mm f/2.8 Pro DX. Five shots at f/8, each separated by 1 stop.
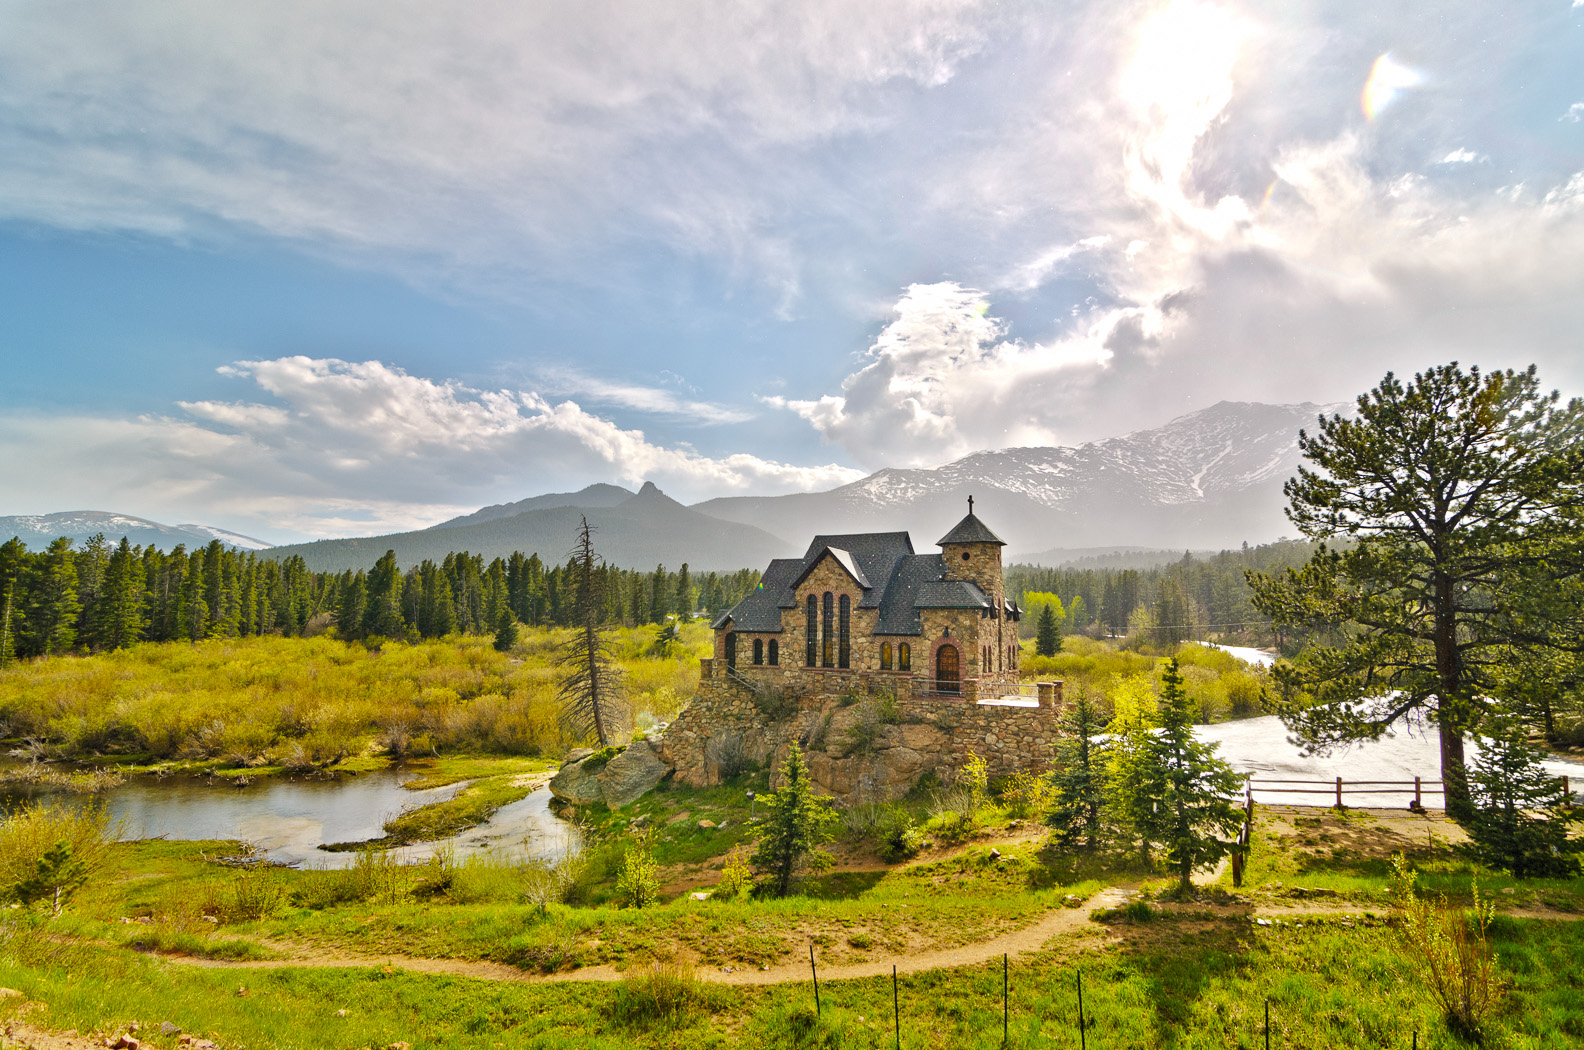
Chapel on the Rock near Allenspark, CO
An Afternoon with a DeLorean
My friend Justin owns a DeLorean. Actually he owns two DeLoreans. The day after shooting the wedding this weekend, Portt and I met up with Justin in West Montrose so the car could pose with the covered bridge. I both envy and don’t envy Justin. On the plus side he owns two classic 80’s supercars. On the other hand, wow did a lot of people stop and ask to pose with the car. He must get that a lot.
The light was moving back and forth constantly between overcast and bright sun. Bracketing each shot allowed me to capture the full range of tones with the option of HDR later on. I decided to go the HDR route with the posed shots. They may be a bit over done but I think they have the “car ad’ look to them. I went even heavier in the processing on the last shot. I was trying my best to pan, but with a wide angle FOV (19mm) the effect isn’t too pronounced.
Nikon D300s with AF-S 17-55mm f/2.8.


Blog Week Day 1 – View from Rattlesnake Point
Tonight is the first night of my (possibly ill-fated) plan to post every night for a week. I’m starting the week off with an HDR composite from the top of Rattlesnake Point near Milton, ON. This shot is made up of 5 images, each separated by 1 EV of exposure. HDR processing was done in Photoshop CS5.
Since I tend to pack on the light side when walking I rarely have access to a tripod, something that is normally helpful for HDR photography. My trick is to set the camera to shoot at its highest frame rate (7fps on the D300s, or something around 3fps in 14-bit mode) and hold it as steady as possible. That way I minimize movement between frames.
Another trick I use is to program the lower function button to control exposure bracketing, as the D300s doesn’t have a dedicated bracket button. With the button pressed I can control the number of frames (2-9) with the rear dial and the exposure steps (0.3-1 EV) with the front.
Here’s the final shot with the D300s and Tokina 11-16mm f/2.8 at 11mm f/8 ISO 100.

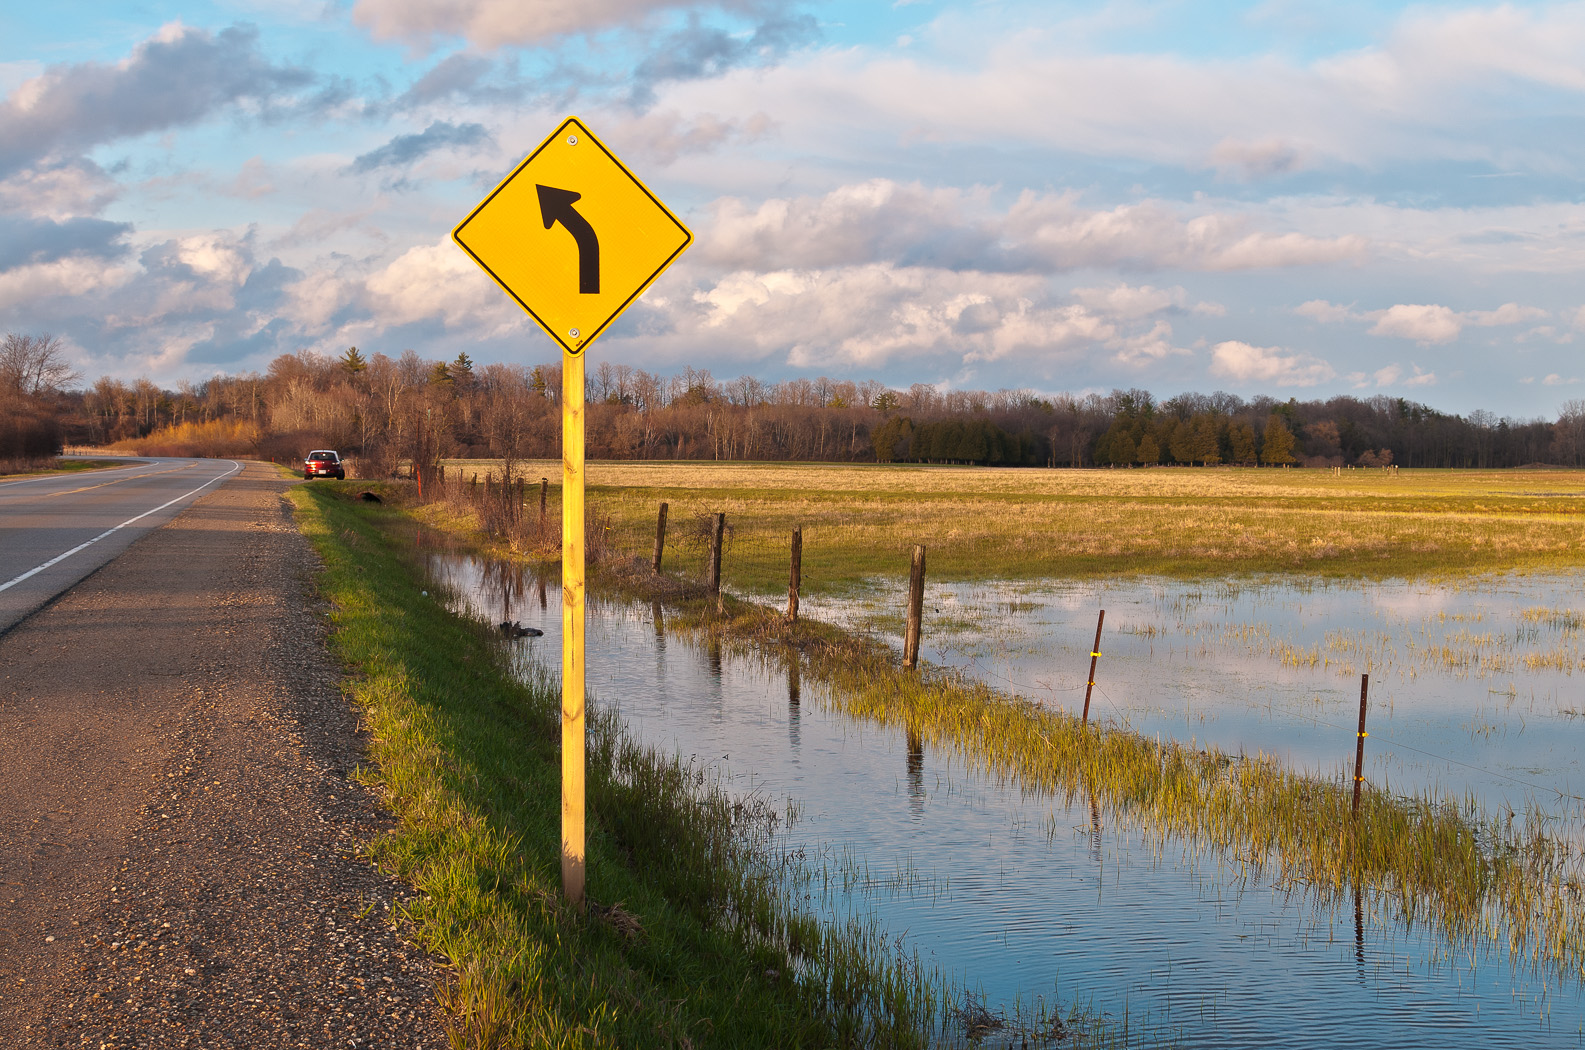
A Flooded Field – Two Golden Hour HDRs
Driving to Guelph last week I came across this flooded field with just the right clouds and just the right lighting. Each shot is a high dynamic range (HDR) composite of three images separated with a stop of exposure difference between each. Yes, that’s my Mazda 3 parked up ahead in the first image.
I should also mention that I was on my way to a formal dress-up cocktail party, so I was in a full suit and dress shoes. I’m sure the passing cars must have had a laugh…
D300s with AF-S 35mm f/1.8 DX at f/8 ISO 200.

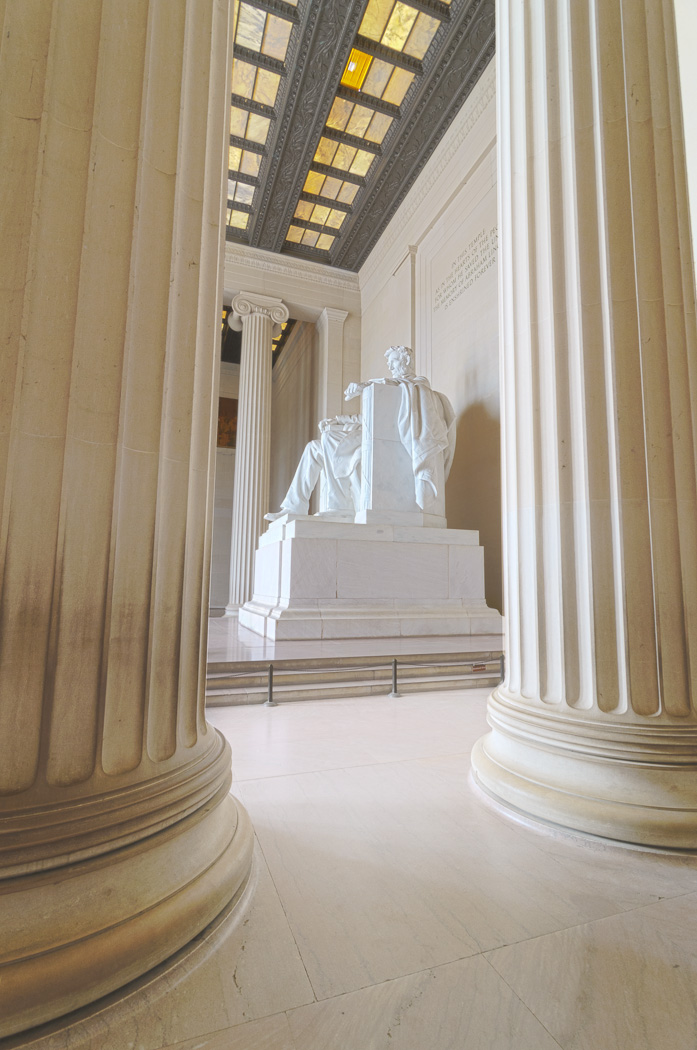
ObG Thursdays – Lincoln Memorial
This week’s Oldie-but-Goodie comes from a trip Mitzy and I took to Washington DC last summer. On a blazing hot day, we took refuge in the Lincoln Memorial where I took this photo with the D300s and Tokina 11-16mm f/2.8.
 I used a few photographic tricks to make this image. First was my choice of perspective. I used the Tokina 11-16mm at 11mm to capture the vast interior. The room was also full of people but Mitzy pointed out this excellent vantage point that was completely tourist free! Compare above to the image below. It’s hard to believe that they were taken just a few minutes apart:
 To capture the full tonal range of the space I used an HDR technique. I took five images, each separated by 1EV and combined the -2, 0 and +2EV into an HDR image in Photoshop’s HDR Pro tool. Here are the three images that fully encompass the darkest and brightest tones.


The combined image looked like this:
 Once the HDR was created I tweaked the brightness/contrast and fixed the vertical perspective in Lightroom.
 And that’s it! A unique perspective of a familiar landmark, captured with full tonal range.
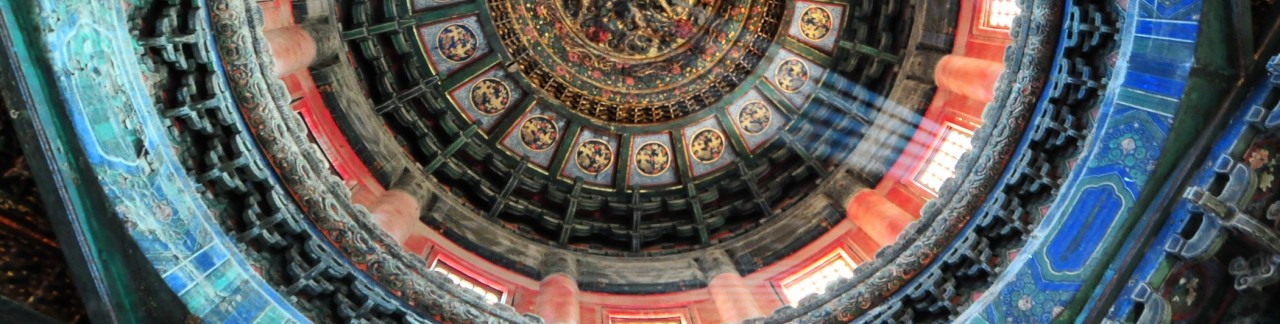
ObG Thursdays – Top of the Great Wall
Today’s Oldie-but-Goodie post comes from a year ago this week when I was high up on the Great Wall of China. I was in China for work (lots of photos here) and stayed for a few days to meet up with my friends Mark and Ling in Wuqing, on the south side of Beijing. They were wonderful hosts and on the second day of my visit they hired a car to take us to the Great Wall north of Beijing. The driver got a little lost and ended up taking us to a different section of the wall than we’d intended but we didn’t complain. This mountain pass, known as Juyongguan Pass, had a great ring of wall that went up the north side (Badaling) and back down again, across the valley and then up and down the south side. The climb was steep and grueling.
I had with me the D300s, AF-S 35mm f/1.8, Tokina 11-16mm f/2.8 and a borrowed AF-S 18-135mm f/3.5-5.6 and made good use of them all. The day was extremely hazy and visibility was a lot worse than the photos make it out to seem. When editing I added a huge amount of contrast and saturation to keep them from looking washed out.
The shot below was with the 11-16mm at 11mm 1/125s f/9 ISO200. Although it doesn’t look it, I composed this as a 4-shot high dynamic range (HDR) image. Each of the images that went into it were separated by a 1EV exposure difference. I found that the HDR process brought out a richness of colour that wasn’t there in the individual shots. To add separation between the individual mountain peaks and the foreground I did some dodging and burning with the curves tool and blending duplicate layers with soft light and screen modes. I used added a bit of glow to add an ethereal feel.
Trying a New HDR Technique with 32-Bit TIFFs
Today I came across a new high dynamic range (HDR) technique that combines Photoshop’s HDR tool with a feature that was included in the Lightroom 4.1 update that I hadn’t noticed before: the ability to edit 32-bit TIFF images. As a first attempt I processed this image (from a walk on the Lake Erie shore at Fort Erie on Christmas Eve):
 The process I used was:
- I took a series of images (minimum three) with different exposures to capture the full dynamic range of the scene. Using a tripod is best although the HDR tool in Photoshop automatically aligns the images. For the images used to create the HDR above I shot handheld with autobracketing on the D7000 for -1, 0 and +1 EV exposure compensation.
- In Lightroom 4.1 (or newer) I did some minor tweaking of the images to prepare them for the HDR tool. First I applied automatic distortion, vignette and chromatic aberration corrections for the 35mm f/1.8 DX. Next I changed the calibration profile from ‘Adobe Standard’ to ‘Camera Neutral’ in order to reduce the contrast. Finally I adjusted the exposure settings to ensure that the darkest image included the full range of tones in the highlights and the brightest image covered the full range of tones in the shadows. The images looked like this:


- I exported the three images to the HDR tool in Photoshop using the ‘Merge to HDR Pro in Photoshop’ command and saved the resulting combined image as a 32-bit image. Note that Lightroom cannot read 32-bit PSD files so it is best to configure Lightroom to export as a TIFF to Photoshop.
- With the new 32-bit file back in Lightroom I could begin editing. At first glance, the image doesn’t seem to have any more information in it than before the HDR conversion but that is because all 32 bits of data can’t be displayed at once. Instead, it is best to think of the file as a RAW with an enormous amount of information in the highlights and shadows. Pulling the Shadows slider all the way to +100 and the Highlights slider to -100 and a reduction of the Exposure slider to taste gives the following image. This is a good demonstration of the amount of data present, but not quite a final image.
 With some further tweaking in Lightroom (exposure controls, curves, saturation/vibrance, sharpening) I got reached this point:
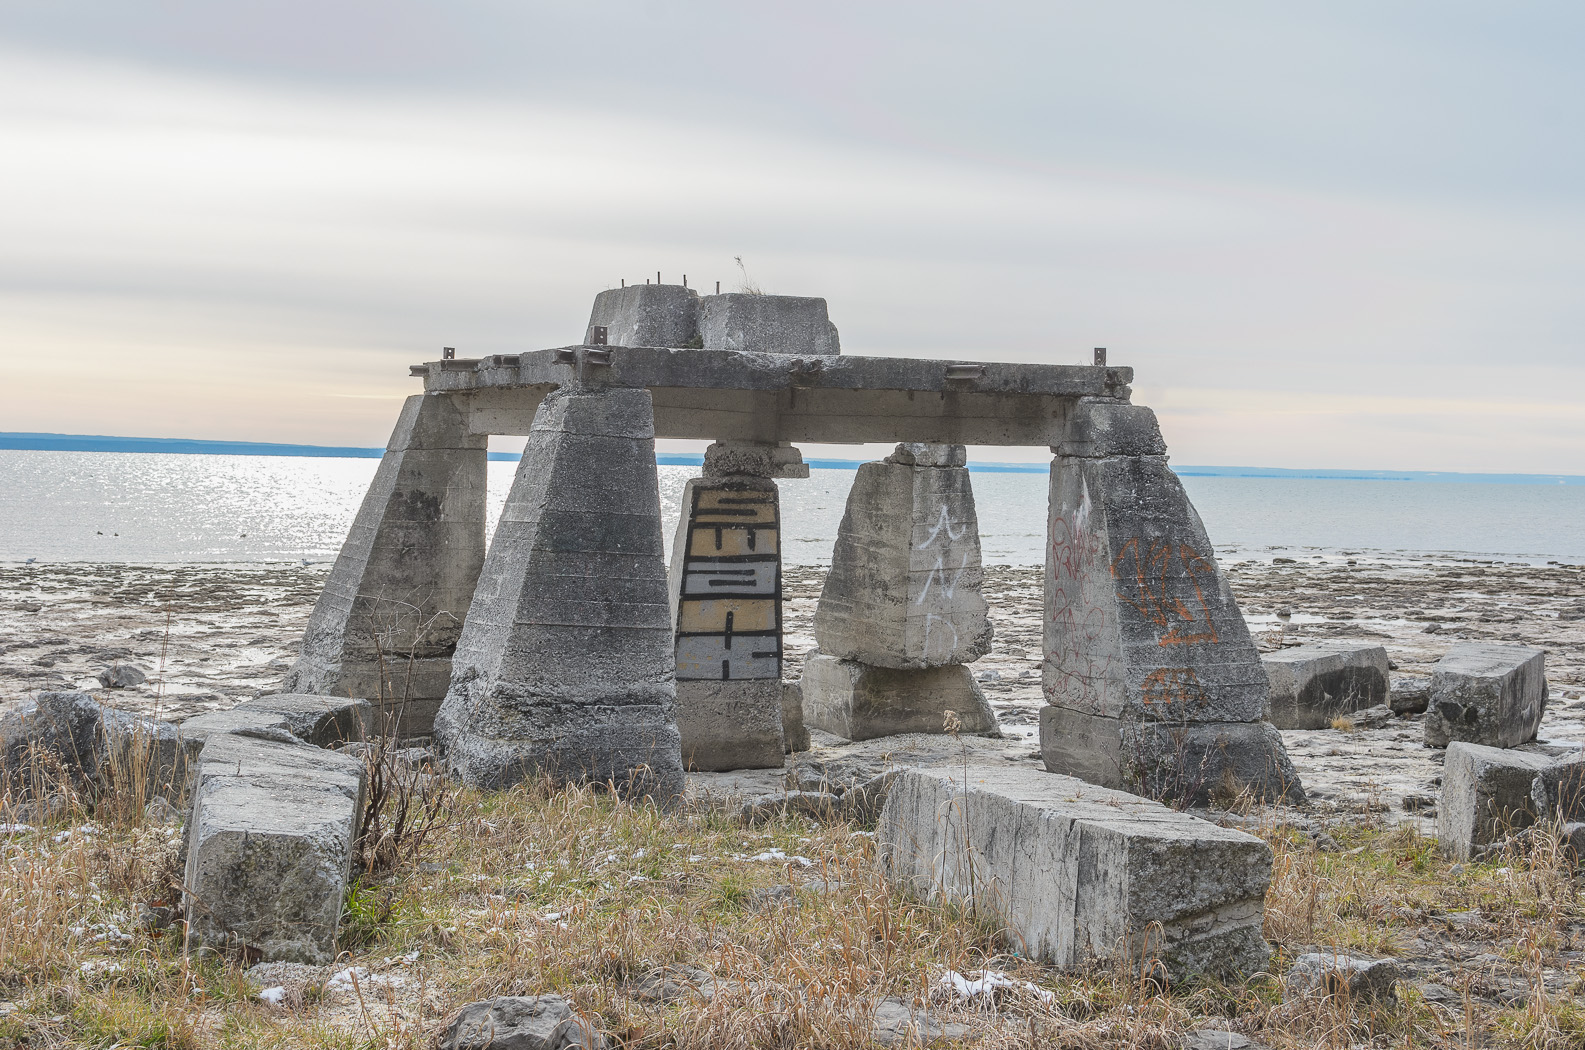
 At this point I wasn’t too happy with the banding in the sky… something I’ll have to figure out for future images. In the end I opted to convert to black and white for a darker feel.
And there it is, a simple HDR technique that doesn’t use any of the tone mapping features of common methods. I prefer this approach to those with tone mapping primarily because I have full control over the edit.
