Multiple Exposure Mode with Nikon D810

A couple of months ago I was researching neutral density filters for long exposure landscape photography when I came across a forum post describing an alternative. I learned that Nikon’s DSLRs will add a number of exposures together (the maximum depends on the body) into a NEF RAW file with what they call “Multiple Exposure” mode. The summation of the set of images into a single file has an effect similar to a long exposure. In some cases it has an even bigger effect because you can control the delay between each exposure, something useful when blurring moving clouds, for example. The advantage of doing this in camera is that the output is a RAW file, making it much more editable (or so I’d expected).

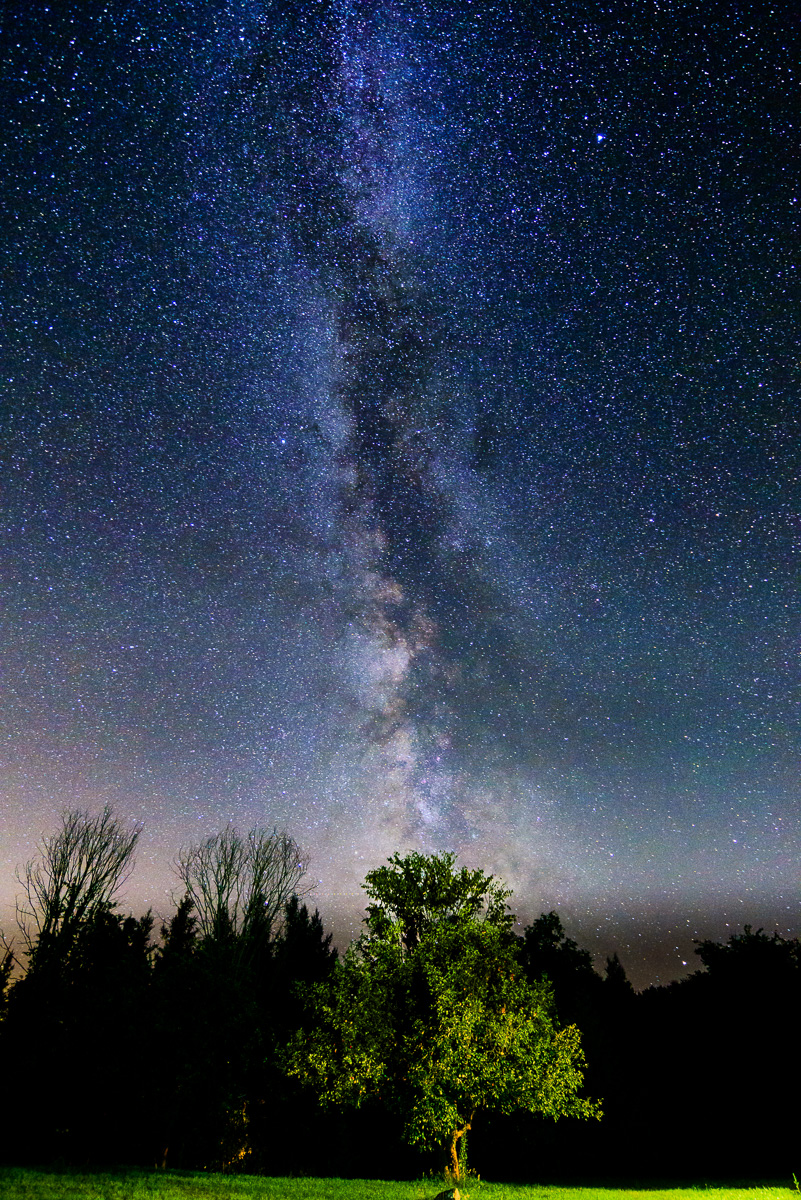
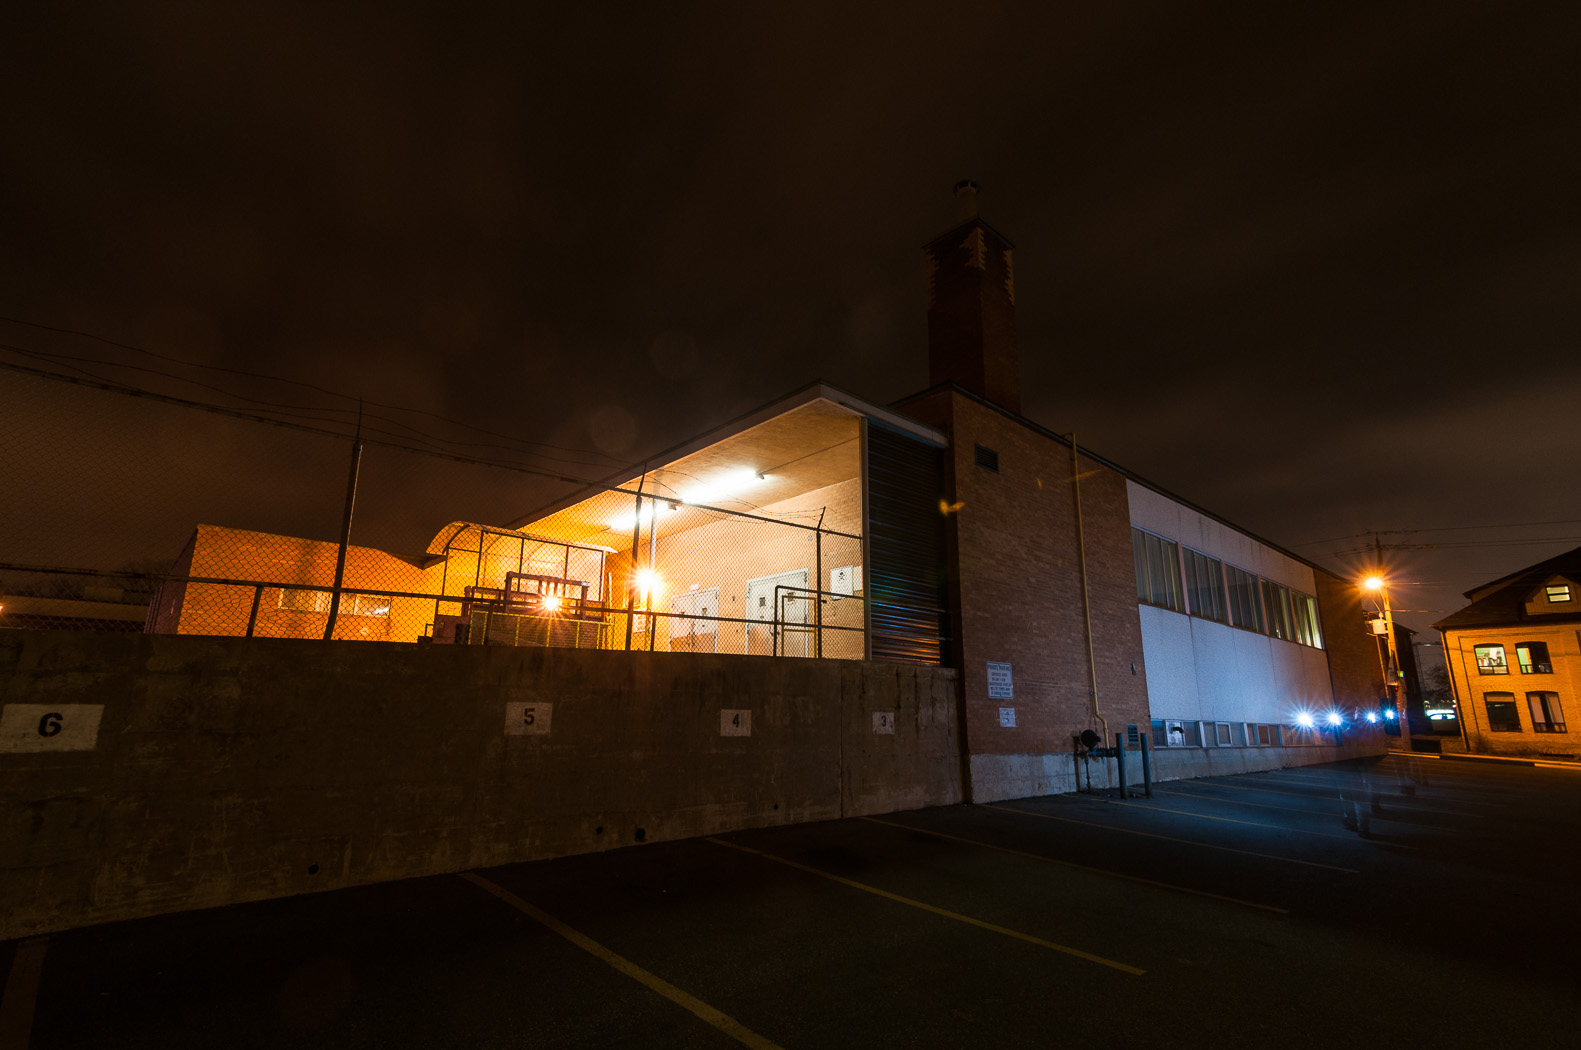
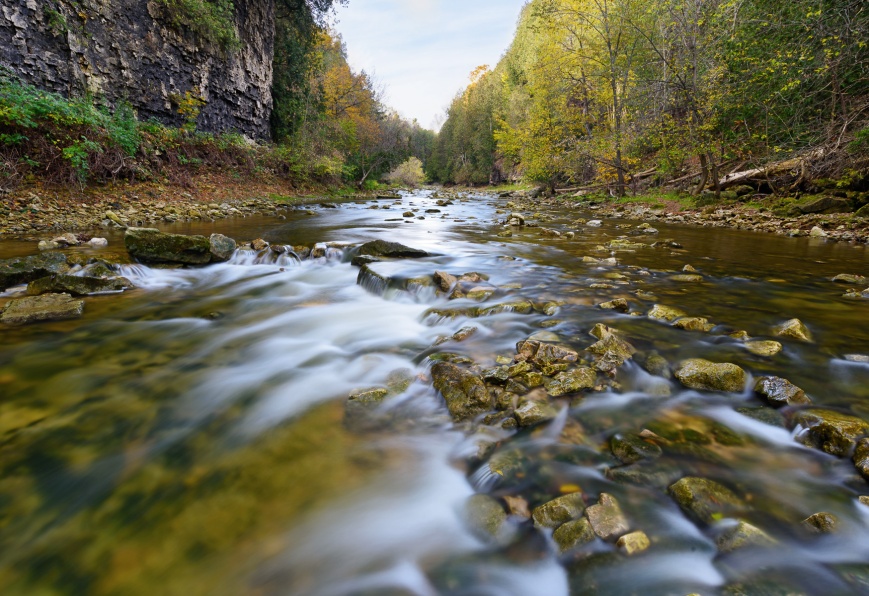
I first tried out the mode in Elora, Ontario in the gorge where the Irvine Creek meets the Grand River. I brought water sandals so that I could stand in the river and my tripod with ball head for quick and easy framing. I mainly used the AF-S 18-35mm f/3.5-4.5g on the D810. I added a circular polarizer to cut down on glare, remove reflections from the water and slow down the shutter speed by a couple of stops.

I shot at in aperture priority, f/11 to f/16 at ISO Low 1 (ISO 31). Shutter speeds varied from 0.5 to 1.6 seconds. After framing and taking a test image I  set the camera to sum 10 shots with auto gain on. With auto gain the camera takes 10 shots, each at 1/10th of the total exposure (I assume shutter speed) and then adds them together to match the total exposure as if it had been one shot. In fact, the EXIF data reports the conditions as if it had been one photo. I was pretty happy with the way the photos looked! The water was blurred but the non-moving scenery was nice and sharp. After downloading the images to my computer and trying some edits in Lightroom my happiness faded.

The first thing I noticed was the that blacks were heavily clipped and stayed totally black with adjustments. Later I found that sections of water were posterized. The D810 is a camera with fantastic dynamic range and this was something I’d never seen before. Here is an example:

DSC_8831-2

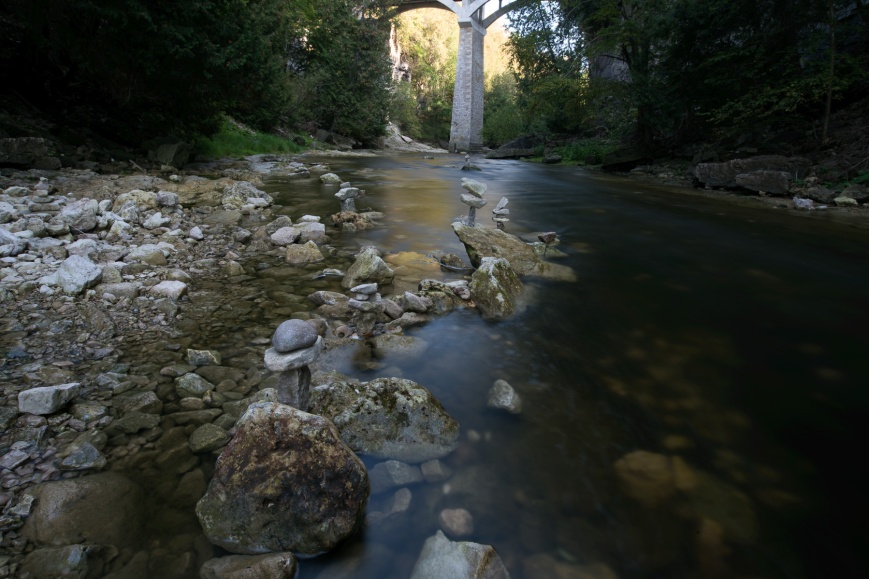
Above is the NEF using just Lightroom’s default import settings. Below is the image after some normal edits.

DSC_8831

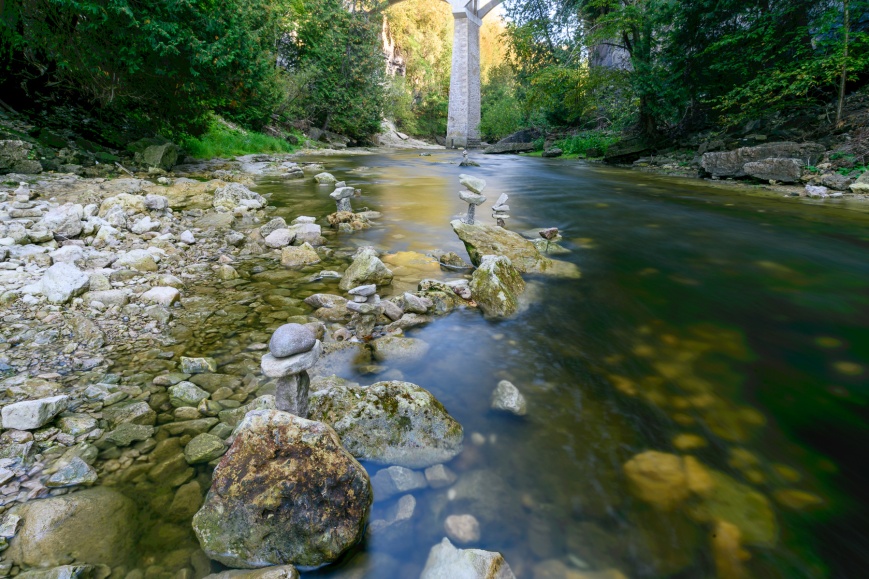
Here are a couple of crops, showing clipping at the top left and posterization on the bottom left.

I had a hunch. I checked the image settings and confirmed that I was shooting in 12 bits. The D810 is capable of generating 14 bit files but I don’t use them because I’ve honestly never needed to. However, in multiple exposure mode each of the images that make up the final image is shot underexposed.

In 12 bits images there are 4096 DN (digital numbers, or signal levels). Let’s say a very dark object uses 10 DN in a 12 bit image. Now, when shooting in multiple exposure mode with 10 images, that 10 DN object is only going to be 1 DN in each of the images because the exposure is 1/10th of normal. 1 DN is well into the noise floor and could even show up as 0 DN (i.e. clipped). When adding the 10 images together, all those noise-limited pixels remain clipped or at least heavily affected by noise. 14 bit images have 16384 DN worth of information. The same dark object that was 10 DN in 12 bit mode would be 40 DN in 14 bit mode. At 1/10th of the exposure you’d have 4 DN of signal, which is much less likely to clip.

Likewise, smoothly varying features like water and sky lose a lot of data when underexposed and can become posterized.

To test my theory I took a series of shots, all underexposed by about 3 stops. They all started off like this:

DSC_8836

I then brightened each image to a normal exposure. First I’ll show the two images that were not multiple exposure (left is 12 bit and right is 14 bit):

Apart from slight exposure difference, they’re pretty much the same. Now, the 10 shot multiple exposure images (again, 12 bits on the left and 14 bits on the right):

The 12 bit image is horrible! The 14 bit image is pretty good. Looking closely it’s still not perfect compared to the single 14 bit image but still passable. I haven’t found any discussion of this condition online which is why I’m writing this post.

With my newfound knowledge, I returned to Elora a few weeks later and this time shot entirely in 14 bit mode. I think the outcome was much better!

DSC_9201-Edit-2

Thanks for reading!

Photographing the Milky Way

As much as I loved the D700, and I really did love it, the excellent high ISO of the d750 has opened up some new doors. One of these doors, a completely new one to me,  is night sky astrophotography. Specifically the Milky Way. Although only subtly visible to the naked eye, a long exposure brings out all of the rich texture and hues that can span from horizon to horizon. Southern Ontario for the most part isn’t particularly dark but even a couple of hours north of the 401 corridor the light pollution dies down enough to get a decent shot.

The trick to getting a good capture of the milky way is to keep the signal to noise ratio high, with a wide aperture, long exposure and clean high ISO performance. As with all photos of objects in the night sky, the exposure must be short enough to keep them from being blurred by that the rotation of the earth. Fortunately there is a simple rule of thumb. Divide the number 500 by the lens’ focal length to get the maximum shutter speed to avoid blur. For example, when using an 18mm lens, the longest shutter speed is 28 seconds. This formula applies to full frame cameras. With an APS sensor, divide the shutter speed further by 1.5.

A steady tripod is also critical to getting sharp photos. For focusing, set the camera to live view, manual focus and zoom the display to a bright star or planet. It’s best to shoot with a cable release or at least in self timer mode to minimize camera shake.

Don’t expect an epic photo straight out of the camera, this type of image takes some extreme post processing. Here’s an example before any editing, followed by the finished product. The shot was taken with the D750 and AF-S 18-35mm f/3.5-4.5 G (18mm, f/3.5, 25 seconds, ISO 6400).

f/3.5, 25 seconds ISO 6400 (out of camera)

f/3.5, 25 seconds ISO 6400 (out of camera)

f/3.5, 25 seconds ISO 6400 (after extensive edits)

f/3.5, 25 seconds ISO 6400 (after extensive edits)

There will always be a colour caste in the original image due to light pollution, high ISO noise and white balance settting. After adjusting colour, the image will need some heavy contrast enhancement and careful use of shadow/highlight sliders (if using lightroom) and a good dose of saturation. Careful noise reduction and sharpening is key too.

Now, of course I’m finding some limitations with my equipment (surprise surprise). My brightest wide lens is f/3.5 at 18mm. Nikon makes an outstanding 20mm f/1.8 that’s pretty tempting but I don’t think I can justify getting a new lens just for taking photos of stars!  Anyway, I’ve been getting great results with what I already have in my bag. Here are another few examples, all with the D750 and 18-35mm at 18mm. The first is a panorama of 6 shots.

milky_way-2dsc_1910-edit-3dsc_2155-edit

Studio Cat Portraits

Last weekend I tried using my new background kit (stands + white seamless) to shoot some portraits of our cats, Gracie and Professor Noam Chomsky. For the key light I used an Alien Bee B800 with gridded beauty dish from camera right, somewhat close to the posing stool. A Paul C Buff Brollie Box on a 2nd B800 was the fill light, set back from camera left. Both lights were set to equal output power, so distance controlled the intensity on the cats. The background light was a 3rd B800 with barn doors to control the spill.

“Posing” the cats was an exercise in patience. While Gracie eventually chilled out on the stool and let me get a long series of shots, Chomsky had no interest. The lamb skin helped but I still only had 10 seconds after setting him down before he’d run away to the bedroom.

I shot withe the D700 + AF-S 85mm f/1.8 G on a tripod and cable release, allowing me to shoot from the floor between the camera and cats.

lighting-diagram-1424550337DSC_5827 DSC_5819 DSC_5832 DSC_5822

Uncle George Runs 100,000 Miles

This morning my uncle George, who has been running since 1967, ran his 100,000th mile. That’s a bit over four times around the world! To celebrate he called on all of his running friends to be with him as he hit this amazing milestone.

You can read a great article here.

Naturally, I celebrated by taking a photo.  Below I show two versions of the same scene. The first is with the Nikon AF-S 18-35mm G at 18mm on the D300s. The second is a panorama of 7 shots with the Nikon 135mm f/2 DC on the D700…. a drastically different perspective.

Which do you prefer?

D300s with Nikon AF-S 18-35mm f/3.5-4.5 G at 18mm

D300s with Nikon AF-S 18-35mm f/3.5-4.5 G at 18mm

D700 with Nikon 135mm f/2 DC. 7 shot stitched panorama.

D700 with Nikon 135mm f/2 DC. 7 shot stitched panorama.

Blog Week Day 5 – Farewell to Waterloo Bowling Lanes

Tomorrow night Waterloo’s last bowling alley, Waterloo Bowling Lanes, will close its doors. Soon it will be demolished with a 7 story condo taking its place. I, along with many other Waterloons, are saddened by this. The lanes have been open since 1949 and will be sorely, sorely missed. There’s something special about a run down 5-pin bowling alley. Nostalgic Canadiana, maybe.

Last night, Mitzy and I made light painted composite images of the building to honour its closing. The technique is the same as the one shown here, with 5-10 shots making up each composite.

D300s with Tokina 11-16mm f/2.8 PRO DX at 11mm f/11 4s ISO 200

DSC_1183-Edit DSC_1193-Edit

Blog Week Day 3 – Catlantis

Day Three!

On the weekend I did a little photo shoot with Milosz for our new musical project, Catlantis. This particular photo is a bokeh panorama comprised of a full SEVENTY shots with a wide open Nikon AF-S 85mm f/1.8. My technique for making this kind of image, often known as a Brenizer Method composite, is to set the camera to small JPEG, manual focus, manual exposure and fixed white balance (not AUTO). There’s no need in having a large size JPEG as each shot will only make up a small part of the final. Manual focus, exposure and fixed white balance are important to keep the same look from shot to shot.

I use either Photoshop or Microsoft ICE to do the stitching. ICE seems to handle more complicated stitches better than Photoshop and has a very simple operation where you just drag the series of shots into it and let it run.

So here it is, my biggest Brenizer yet. Shot with the D300s with AF-S 85mm f/1.8G at f/1.8 1/500s ISO 100.

DSC_1018_stitch-Edit

ObG Thursdays – I Spy a Spider

This week’s oldie-but-goodie comes from the front porch where last summer a spider took residence. I got creative with the lighting here, using a full three strobes. I controlled the strobes with Nikon’s CLS (Creative Lighting System) using the built-in flash as the controller.

The main light was a Nikon SB-900 with 1/4 CTO gel (the one that is supplied with the flash) and a Nikon SB-700 and Metz 48 AF-1 were both used as rim lights, un-gelled. I programmed the CLS settings in the camera as follows:

  • Overall exposure compensation was 0 EV
  • Main light was dialed down to -0.7 EV (on Group A) and had a 1/4 CTO gel
  • Rim lighting was increased to +0.7 EV (both on Group B)

Happily I also had a Mitzy to stand behind the web!

The photo was taken with the D300s with AF-S 60mm f/2.8 G Micro at f/8 1/100s ISO 400.

DSC_7857

And here’s a bonus close up.

DSC_7834-2

ObG Thursdays – Old Post Office Light Painting Composite

Lighting a large scene with just one flash is something I’d wanted to try for a while and finally got around to it with this shot in today’s Oldie-but-Goodie.

This photo is a composite of six shots, stitched together in Photoshop CS5. In each, I lit a different part of the building using a single SB-900 flash with the standard diffuser cap. I fired the flash using the test button and in most of the shots I fired it multiple times. The camera (Nikon D300s wtih Tokina 11-16mm) was set to manual exposure (f/8 8s ISO 100) and manual focus and set on a tripod in the parking lot. The long exposure allowed the camera to capture the ambient light but also gave me the time for the flash fires.

Here are the shots that went into the composite. In the first four I lit both the concrete and brick walls.

DSC_9339 DSC_9340 DSC_9341 DSC_9342 In the next two I tried to light the smoke stack by zooming the flash in to 200mm. The flash lost a lot of power at that distance and even with multiple fires it was difficult to light the stack.

DSC_9345 DSC_9346At this point the images look like a mess with many points of light and many Owens. However, by choosing which part of each image I wanted to come through using layer masks I could clean this up considerably. Below I show a capture from Photoshop with each of the images and their corresponding layer mask. Notice that for the most part only a small area (the white region of the layer mask) is used in the composite.

ScreenHunter_16 Apr. 11 07.19In the end I did have to remove a few stray flash bursts and Owen limbs here and there using the healing brush and clone tools. Finally, with a curves adjustment to brighten the lower mid-tones, I ended up with this!

DSC_9339-EditAs this was my first ‘light painted’ composite, I did learn a few lessons. Most importantly, it was difficult in a few instances to remove my ghost from the image. Next time around I would use brighter flashes and stand further away from the subject to not catch as much of the reflection. Distance would also help broaden the spot as it falls on the surface. Overall though, I was happy with this first attempt!

OBG Thursdays – The Flash (with 4 Flashes)

Today’s Oldie-but-Goodie is a fun little ‘portrait’ of an action figure. After reading about some cool lighting setups for defining muscle I wanted to try it out on a real live muscular person. Unfortunately, I am not this person…

7313886510_b9be4a5d09_oThe Flash (fittingly) would have to stand in for me. This shot is actually one of the more complicated lighting setups that I’ve done. It uses four flashes in total and each of them is modified. The principle of the lighting is to use a softbox in a ‘tabletop’ position, meaning that it sits directly above the subject pointing straight down. The direction of light causes the muscles to cast strong shadows, adding definition. With just this one light, the shadows are quite strong. Rim lighting or fill lighting can lift the shadows.

For this shot I used the lighting diagram below:

lighting-diagram-1363206547A Lumiquest Softbox LTZ on SB-900 sits directly above the subject (even though in the diagram it’s placed slightly in front) and points down. For rim lighting I use two more strobes. On the right is a SB-700 with a grid spot. On the left is a Metz 48 AF-1 with a grid spot.

For the backround I used a fourth light, an Alienbees B800 with 22″ beauty dish with a diffuser sock placed over it. I’ve had a lot of fun placing this light modifier directly into photos as a creative element in the past.

The SB-900 used for tabletop lighting has a Full CTO gel on it. The Metz 48 AF-1 on the left is gelled with a light blue. In hindsight, the blue was probably unnecessary as it doesn’t look much different from the non-gelled flash (see the highlights on his waist at left and right).

The final shot was with the D300s and AF-S 60mm f/2.8 G Micro at f/13 1/125s ISO 100. The B800 with beauty dish was set to minimum power and is still quite bright at f/13 ISO 100. The tabletop light is at 1/2 power and the two rims are 1/16 power.

Blending with Soft Light – A Quick and Simple Way to Increase Contrast and Saturation in Photoshop

DSC_0292-Edit-2Today I’d like to show you a really effective, but simple, way to boost contrast and saturation in an image by walking through how I arrived at the above image. The trick is using a layer blending mode called ‘Soft Light’. Photoshop has the ability to blend different layers with each other using a number of methods. The Soft Light mode works like this:

  • Areas that are brighter than 50% grey get ‘screened’, meaning they become lighter depending on the lightness of the lower layer.
  • Areas that are darker than 50% grey get ‘multiplied’, meaning they become darker depending on the darkness of the lower layer.

I’ll demonstrate. Here is a layer in Photoshop that is a simple gradient going from white to black, left to right. In the middle is 50% grey.ScreenHunter_16 Mar. 12 20.32If I add an adjustment layer on top of this, say ‘Levels’, and change its blending mode to Soft Light the lights get lighter and the darks get darker depending on how light or dark they are. In the middle, 50% grey, is unaffected. In the image below, the top half has been blended with Soft Light. The bottom half is the same as the previous image. Notice that the gradient becomes more steep… the transition between white and black is shorter. This is an increase in contrast.ScreenHunter_16 Mar. 12 20.35In an image with colour, Soft Light blending can also increase saturation. I’ll demonstrate with an image. First, I’ll show the image as it is first pulled out of Lightroom into Photoshop.ScreenHunter_13 Mar. 12 19.57If I add a Levels layer and blend it with Soft Light the contrast and saturation increase dramatically.ScreenHunter_15 Mar. 12 19.57I can scale the effect back by lowering the opacity. Here I’ve set it to 47%:ScreenHunter_15 Mar. 12 19.58I’m finding that there’s still too much of an effect on Mitzy so I’ll paint some grey into the layer mask over her. Grey will decrease the opacity of the mask by another 50% where I’ve painted it in.ScreenHunter_16 Mar. 12 20.00I’m happy with how the Soft Light blending has improved the image so let’s finish it off. First, I’ll remove some of the messy details in the bottom right corner using the Spot Heal Brush in a new layer.ScreenHunter_16 Mar. 12 20.04Next I’ll brighten Mitzy a bit further using a curves tool, masked so it only affects her.ScreenHunter_16 Mar. 12 20.05Here, I’ve decided that I want to bring a bit more of the contrast back in to the background so I increase the opacity of the Soft Light layer.ScreenHunter_16 Mar. 12 20.06Finally, I add a bit more contrast into the right side of the image with a masked Curves tool. The image is done!ScreenHunter_16 Mar. 12 20.08So there have it. Soft Light blending. Quick and simple!