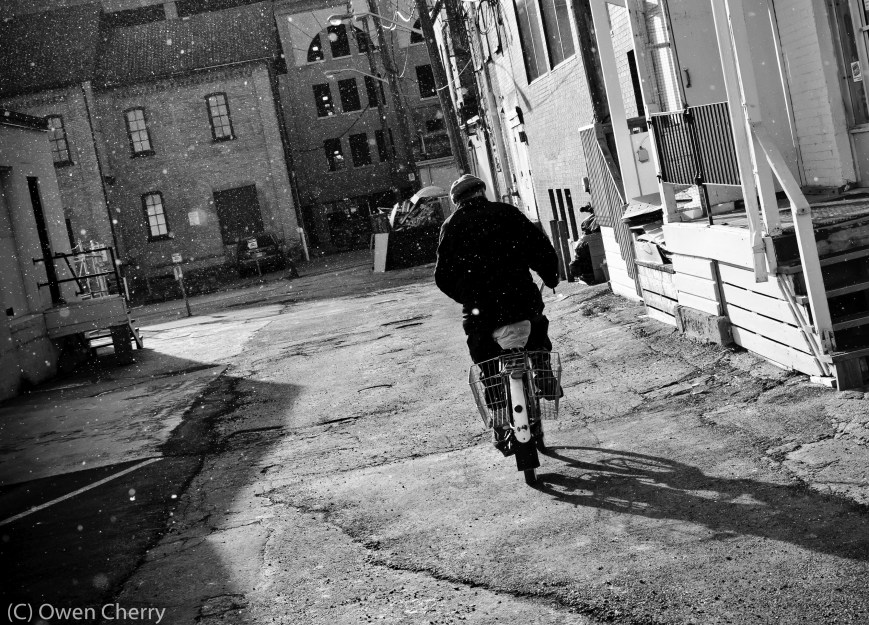
ObG Thursdays – An old man, a bike, an alley and snow.

This week’s oldie-but-goodie is a simple, straightforward and totally spontaneous photo taken on a walk to the grocery store. It’s also a perfect example of why I try to take my camera everywhere with me.

Street photography is an art form that I (and many others) romanticize. From Henri Cartier-Bresson (the father of photojournalism, according to Wikipedia) to the recently discovered of Vivian Maier (who I recommend every green, experienced or even jaded photographer study) to the modern hipster photographer, I have this romantic vision of a confident, passionate and skilled artist. They turn everyday life into images that I can stare into for hours.

Street photography is an art form that I try to succeed at but rarely do. I’ve tried to “shoot from the hip”, by setting the camera to a small aperture and wide field of view and causally holding it down chest level. Usually what I get are out of focus images of people’s shoulders or store fronts. I’ve tried standing way back with a long telephoto and taking sniper shots, often getting the ‘why is that guy with the massive lens taking my picture?’ look.

Generally, the best images have come from confidently and casually approaching an interesting scene. I make myself and the camera visible. I smile. I say thanks. Hiding the camera or hiding myself just doesn’t work as well. This method helped me get some of my favourite street shots during last year’s trip to China.

So… the photo. As I said, I was walking to the grocery store with the D300s and Nikon AF-S 35mm f/1.8 DX. This lens has a near-normal field of view and is small, light and unassuming. As I crossed the entrance to the alley the man rode past me on his bike. I turned, followed and took 3-5 shots. I didn’t have to edit the shot much, just a black and white conversion and some contrast.

D300s with AF-S 35mm f/1.8 DX, f/7.1 1/650s ISO 200.5236619258_af9e382417_o

ObG Thursdays – Photographing a Jaguar E-Type in a Barn

My good friend Portt was asked to photograph a fully-restored Jaguar E-Type for an Ebay sale. Being the “guy with the lights” and also a car nut he asked me if I wanted to come along and meet the fantastically beautiful work of art, perfection on wheels. “Yes”, I said.  I was fully expecting to park the car under a tree, near a fence, with a picturesque farm scene behind. Or on a twisty road, tunneled by tall trees. But in reality it was sitting in a dark and dusty barn basement under a tarp, boxed in by a bunch of other stored cars.

We set up the lights as best we could to not create too many hot spots and blown-out specular reflections. The key was to have the light sources as large and diffuse as possible. Since I don’t own and giant car-length softboxes or strip lights, instead I brought my umbrellas and brolly-box as close to the car as I could. For lights I used my two Alien Bees B800s and a Vivitar 285HV, all remote triggered by Paul C Buff Cybersyncs. The camera was a D300s with AF-S 17-55mm f/2.8 @ 17mm f/6.3 1/60s ISO 200.5608737566_032338f1c5_o

Meet Easton Nathanael Persaud

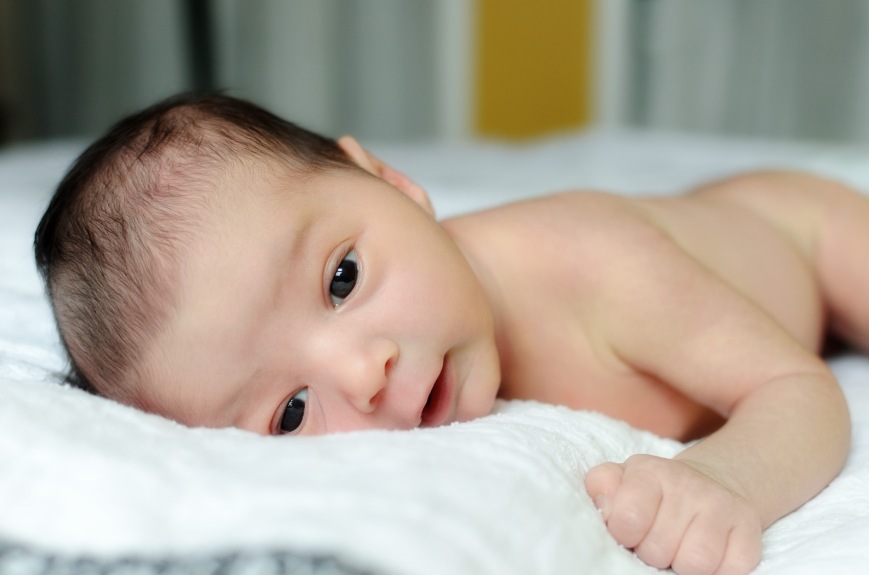
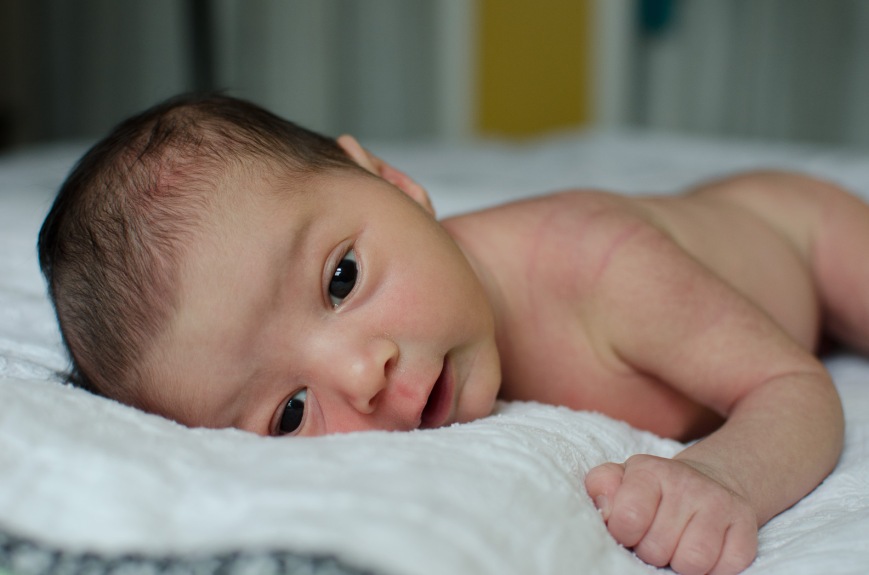
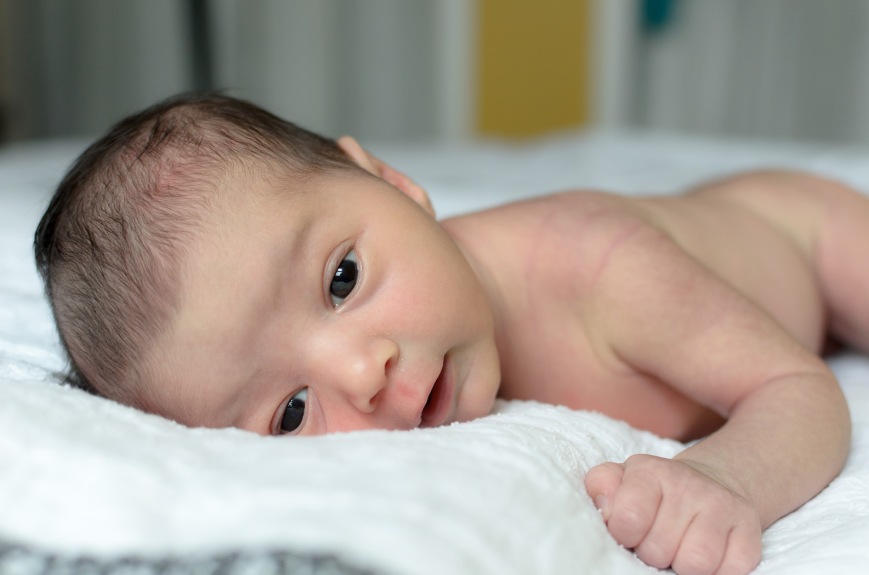
Nat and Lauren, some of my best friends, have a new member of the family as of February 7. Easton Nathanael is an adorable baby boy and I feel so lucky to have met him when he was just 8 hours old. Lauren and Nat had Mitzy and me over on Saturday to take some photos of the new family of 4. I haven’t had a lot of experience with baby photography but I love shooting their kids. Their daughter, Harper, has become quite the photogenic toddler especially now that she’s warmed up to me. Here is one of my favourites (D7000 with AF-S 35mm f/1.8 @ f/2.8 1/200s ISO 400):DSC_9809-Edit-2To give a bit of editing history, here is the image when first imported into Lightroom.DSC_9809-2In Lightroom I did a few tweaks to prepare the shot for editing in Photoshop, namely

  • highlight reduction/shadow boost
  • reduced clarity/increased sharpness
  • vibrance reduction
  • lens correction
  • ‘Camera Portrait’ camera calibration

This is how the photo looked coming out of Lightroom:DSC_9809In Photoshop I removed some dry skin and red patches (under the nose and the lines on the shoulder). I used the color correction tool to shift some of the magenta tones in the skin towards the green and some local reduction of red saturation. I tried out a new Photoshop preset (a gift from a friend) to get the final look.

Enjoy!

ObG Thursdays – Top of the Great Wall

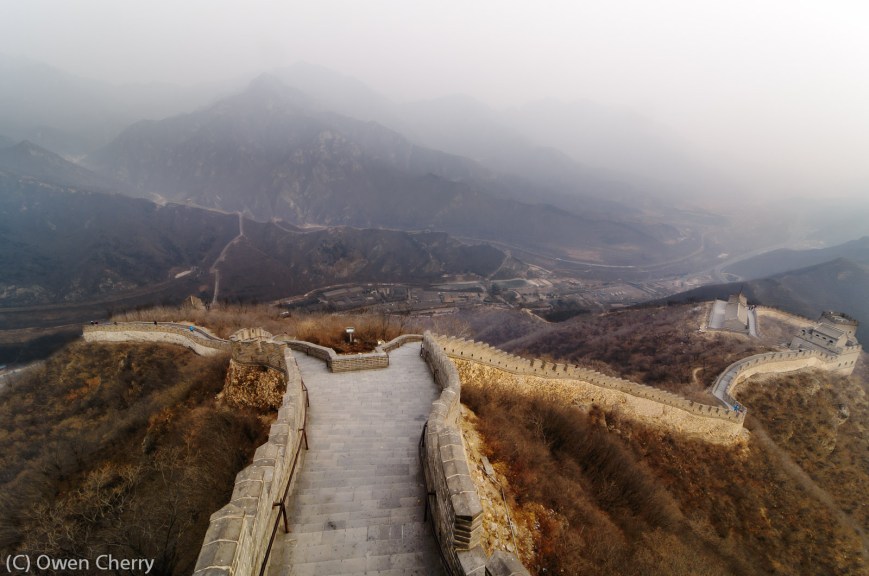
Today’s Oldie-but-Goodie post comes from a year ago this week when I was high up on the Great Wall of China. I was in China for work (lots of photos here) and stayed for a few days to meet up with my friends Mark and Ling in Wuqing, on the south side of Beijing. They were wonderful hosts and on the second day of my visit they hired a car to take us to the Great Wall north of Beijing. The driver got a little lost and ended up taking us to a different section of the wall than we’d intended but we didn’t complain. This mountain pass, known as Juyongguan Pass, had a great ring of wall that went up the north side (Badaling) and back down again, across the valley and then up and down the south side. The climb was steep and grueling.

I had with me the D300s, AF-S 35mm f/1.8, Tokina 11-16mm f/2.8 and a borrowed AF-S 18-135mm f/3.5-5.6 and made good use of them all. The day was extremely hazy and visibility was a lot worse than the photos make it out to seem. When editing I added a huge amount of contrast and saturation to keep them from looking washed out.

The shot below was with the 11-16mm at 11mm 1/125s f/9 ISO200. Although it doesn’t look it, I composed this as a 4-shot high dynamic range (HDR) image. Each of the images that went into it were separated by a 1EV exposure difference. I found that the HDR process brought out a richness of colour that wasn’t there in the individual shots. To add separation between the individual mountain peaks and the foreground I did some dodging and burning with the curves tool and blending duplicate layers with soft light and screen modes. I used added a bit of glow to add an ethereal feel.Great Wall of China

What’s in My Bag Part 1 – The Digital Kit

I thought it was about time that I do a little show and tell with the gear that I shoot with. I’ll start today with the Nikon digital kit. The two digital bodies I use are the D300s and D7000. Both are APS-C (Nikon calls this DX) bodies, meaning the sensors are smaller than a 35mm negative (or Full Frame sensor, which Nikon calls FX). This crop comes into play when looking at the focal length of a lens. A 50mm lens on an FX body has the field of view of a 50mm lens; however on a DX body is has the field of view of 50mm x 1.5 (=75mm). Thus a standard prime on FX is a short telephoto on DX. I’ll get back to this shortly. First, here is my digital kit:P1110569-EditThe bodies I’ve already mentioned. On the D7000 at the left is the Nikkor AF-S 35mm f/1.8 G and on the D300s at the right is the Sigma AF 50mm f/1.4 EX. The remaining lenses, from left to right, are Tokina 11-16mm f/2.8 (version I), Nikkor AF-S 17-55mm f/2.8 G, Tokina 50-135mm f/2.8, Nikkor AF-S 85mm f/1.8 G and Micro-Nikkor AF-S 60mm f/2.8 G. The flash at the left is a Metz 48 AF-1 and on the right is a Nikon SB-700. Not pictured is the Nikon SB-900 that I used to light the picture.

Let’s take a quick look at each of the lenses.

Nikkor AF-S 35mm f/1.8 G

This DX lens has a field of view (FOV) of 52.5mm (35mm * 1.5) and intended to be a “normal” prime, meaning that the FOV is close to that of the human eye. I find that a slightly wider FOV, something like 42-45mm equivalent, feels more natural to me. This lens is small, light and sharp sharp sharp. The bokeh is decent too. It’s fast and accurate enough to focus as well. There’s really no reason to not have this lens along with me at all times.

Sigma AF 50mm f/1.4 EX

For a 50mm this lens is huge. The filter thread is a massive 77mm. It also weighs quite a lot. It tends to over-expose on both of my bodies and can have inconsistent focus in low light situations. That said, I love it. The IQ on this lens is wonderful, even at f/1.4. With a FOV of 75mm it is just right for portraits.

Micro-Nikkor AF-S 60mm f/2.8 G

This Micro (as Nikon likes to call Macro) lens is a gem. It is the only lens I own with Nikon’s special Nanocoating, used to increase contrast and reduce flare. The optical quality at any aperture is just phenomenal. Not only that but the autofocus is lightning fast, presuming you are focussing on a subject with sufficient contrast. This lens focusses right down to 1:1 magnification (meaning that the size of an object is reproduced to exactly that size on the sensor/film). Unfortunately to get to this magnification the front of the lens must be only a few centimetres from the subject, making lighting somewhat difficult. Since the FOV on a DX body is 90mm I often use this lens for portraits (although the Sigma 50mm and Nikkor 85mm have taken on much of this responsibility).

Nikkor AF-S 85mm f/1.8 G

My newest lens, the 85mm f/1.8 fills the void of the fast telephoto lens (with a FOV on DX of 127.5mm). I have nothing but great things to say about this lens.

Tokina 11-16mm f/2.8

Back when I shot Pentax, this was at the top of my list for lenses I’d wished were available for that mount. When I switched to Nikon it went to the top of my list of lenses for my kit. This lens (a 16.5-24mm equivalent) is nice and sharp and keeps distortion pretty well in check. The chromatic aberrations are atrocious but can be easily removed in Lightroom.

An ultra-wide lens such as this is more of a specialty lens, being useful only when a very wide FOV is needed. I will commonly use it in weddings when I want a grand view of the church or hall or in landscapes when I want plenty of foreground but still keep the background in view.

Nikkor AF-S 17-55 f/2.8 G

This 25.5-82.5mm equivalent lens is by far the most versatile in my bag and is my go-to lens for weddings and events. It pairs perfectly with the D300s and since both are weather-sealed I can use them in outdoors in terrible weather. Other positives for this lens are incredibly fast focus and true professional build quality. While this lens is mechanically the best I own it does have some negative aspects. Contrast and flare resistance could be better. I find that at some focal lengths the sharpness is inconsistent across the frame (something I will characterize one day with the right test charts). I’m also not a fan of how the lens pairs with the D7000. The images don’t have the clarity I like. All that said, I use the 17-55mm more than any of my other lenses because of its versatility and reliability.

Tokina 50-135mm f/2.8

When I shot with Pentax gear one of my favourite lenses was the DA* 50-135mm f/2.8. Fortunately, Tokina sells a version of the lens for Nikon. The Tokina copy has all the sharpness of the Pentax, rivalling Nikon’s 70-200mm f/2.8 and f/4 zooms. Mechanically, I have no complaints and the focus is accurate and fast enough. I do wish the lens had more contrast and flare resistance but both can easily be fixed in Lightroom/Photoshop.

Now that I’ve presented my digital kit, a few trends are apparent. Notice that I don’t use any “slow” lenses, with my maximum apertures ranging from f/1.4 to f/2.8. Fast glass gives me the low light shooting ability that I need for weddings and concerts. I also have more DX lenses (35mm, all three zooms) than FX lenses (50mm, 60mm, 85mm). I’ve found that FX lenses are just too expensive for what I need. The Nikkor 24-70mm, for example, is 50% more expensive than my 17-55mm on the used market. Likewise, to buy a good 70-200mm f/2.8 I’d be looking at $1500-$2000 vs the $500-600 that the Tokina 50-135mm cost. Yes, I do lust of the exotic FX glass but for now I’m quite happy with what I have.

Any thoughts or comments?

The Tragically Hip at the Aud – More Photos

This post is a follow-up to last week’s about my impromptu shoot at a Tragically Hip show at the Kitchener Auditorium. I thought I’d show a bunch more photos but also give a few tips and tricks.

Let’s start with packing gear. Because I hadn’t ever shot at an indoor stadium show and had no idea what kind of vantage point I’d have, I brought nearly everything (11-16, 17-55, 50-135, 35, 50, 85 and both the D300s and D7000… oh, and some strobes and light modifiers too). I really didn’t know if I would even have the chance to change lenses during the shoot but I wanted to be safe. At the time I also didn’t know the extent of the shoot…. would I be covering just the show? or maybe shooting the band afterwords? would the writer need some details to support an interview? In the end, when I found that I would just be shooting the first three songs, I opted for a simple and versatile setup that would need no lens swapping. I put the AF-S 17-55 f/2.8 on the D300s and the Tokina 50-135 f/2.8 on the D7000 and left the rest in the car.

Concert photography presents a few technical challenges due to the extreme contrast and colour of light and fast-moving performers. In the concerts I’m used to shooting, there is barely enough light to shoot 1/60s with a wide open lens at ISO 1600; however during this show there was ample light. I chose to shoot at ISO 1600 with the lenses wide open or near-wide open but was able to get very fast shutter speeds like 1/250s. Freezing the subjects was a breeze.

When shooting a concert the hall is usually quite dark and the subjects quite bright. Imagine trying to properly expose a backlit penguin in the snow and then invert the light and dark. The camera will want to expose for the shadows and completely blow out the subjects. When shooting wide angle with the D300s I dealt with this extreme contrast by setting the exposure compensation to -1EV and crossing my fingers. For the most part it worked and I got a lot of keepers. With the D7000 and 50-135 I used the spot meter instead of the matrix meter. I actually have the function button programmed to quickly switch to spot meter while pressed. Occasionally I would combine the spot meter with the AE-L (exposure lock) when I needed to recompose.

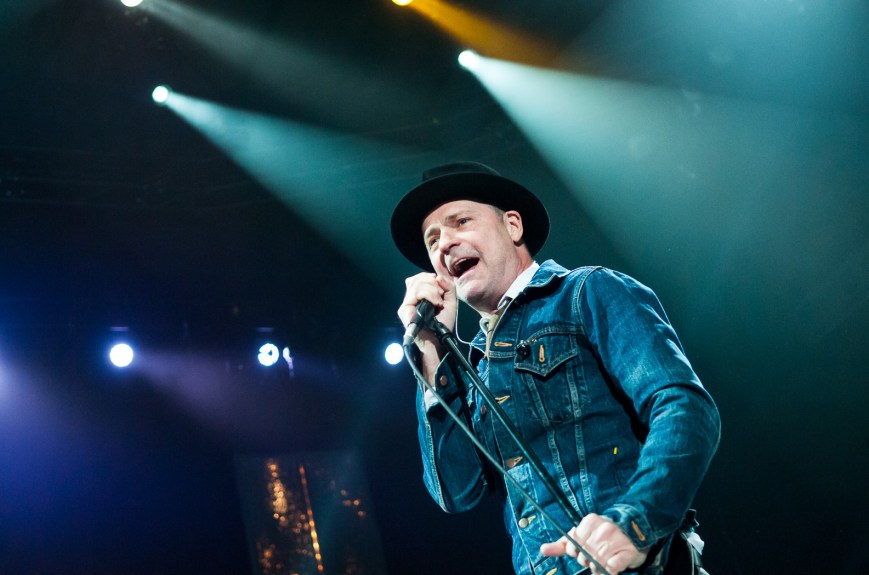
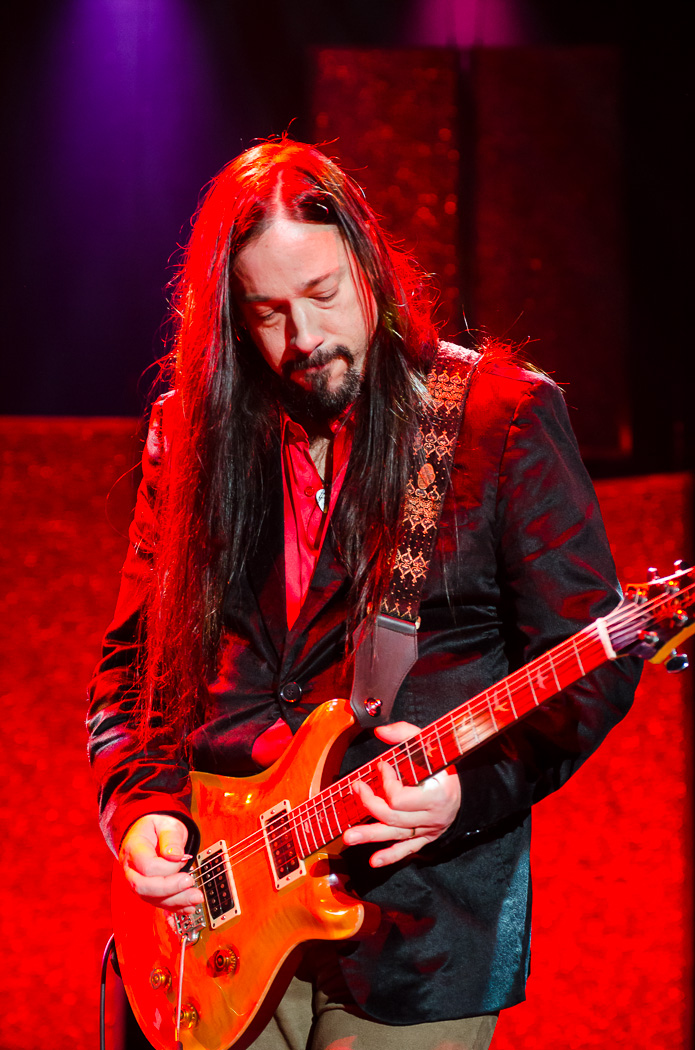
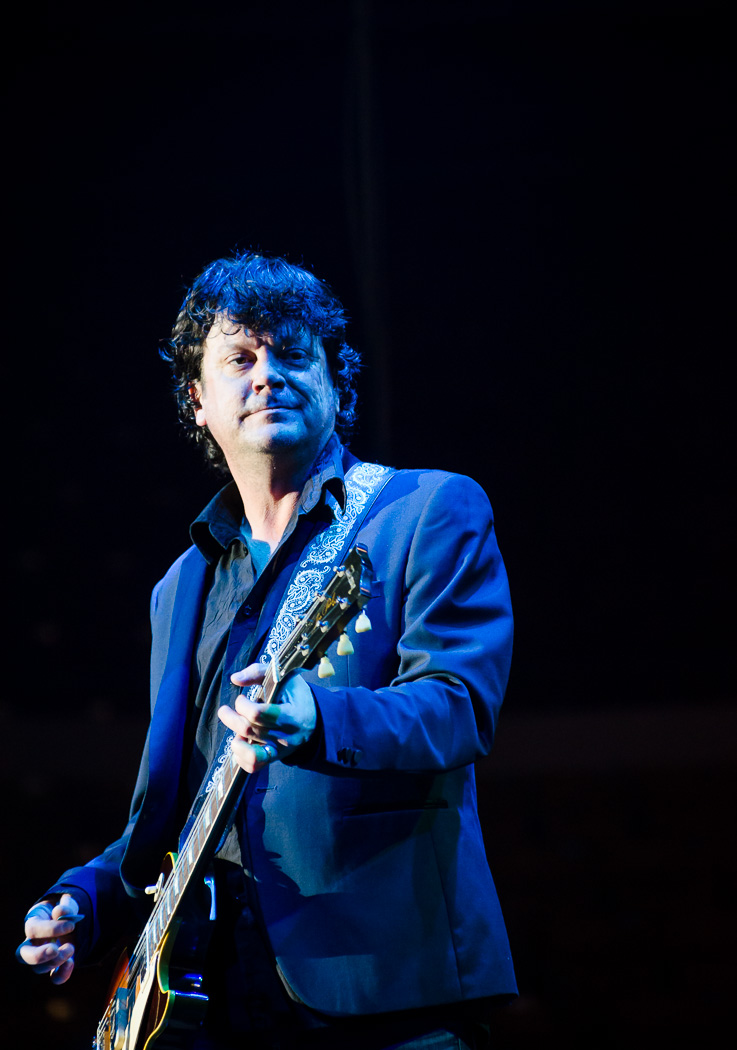
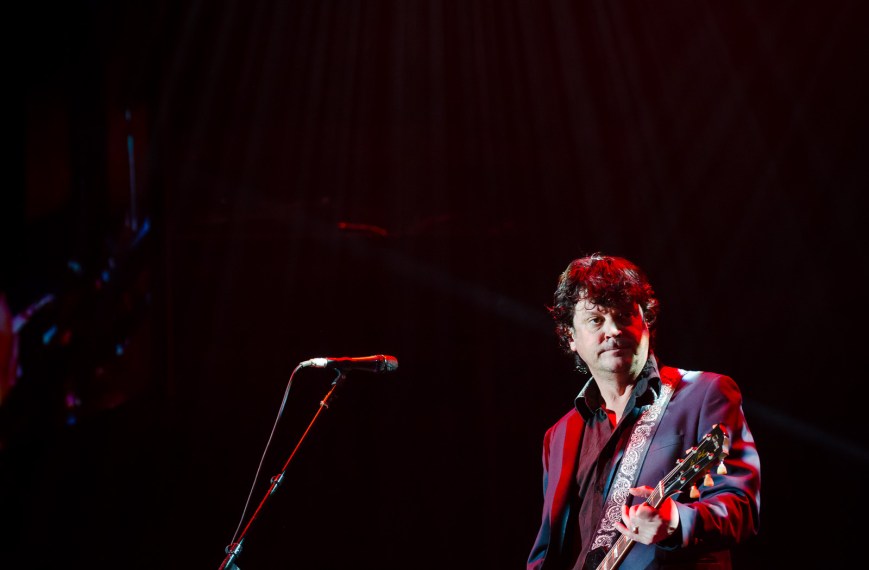
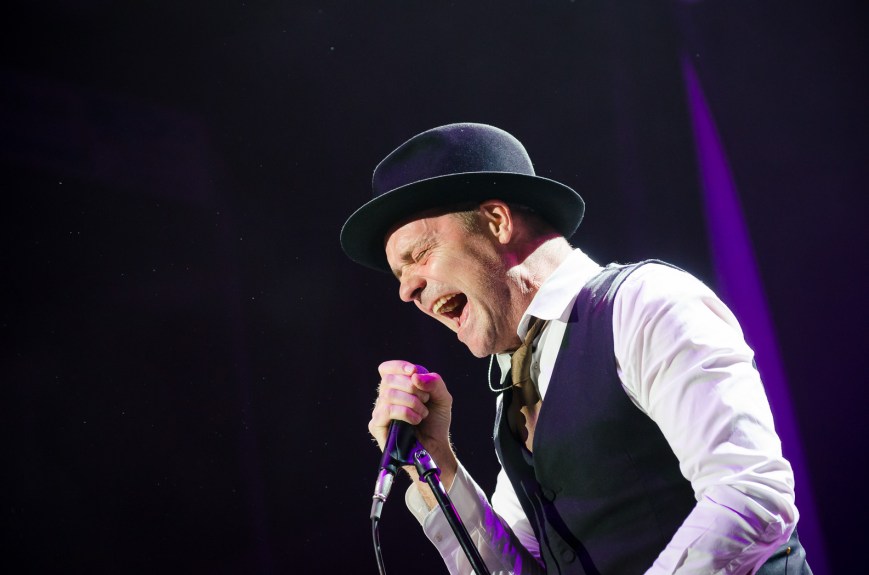
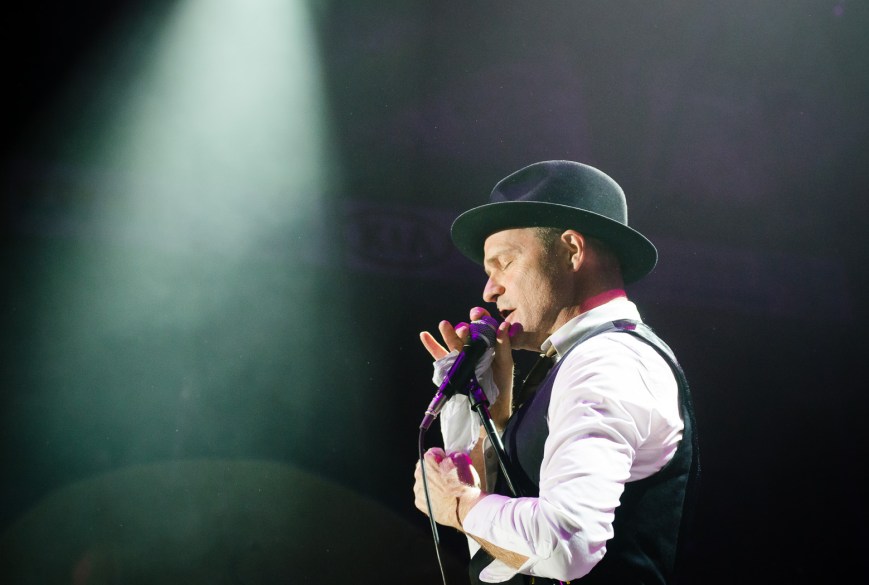
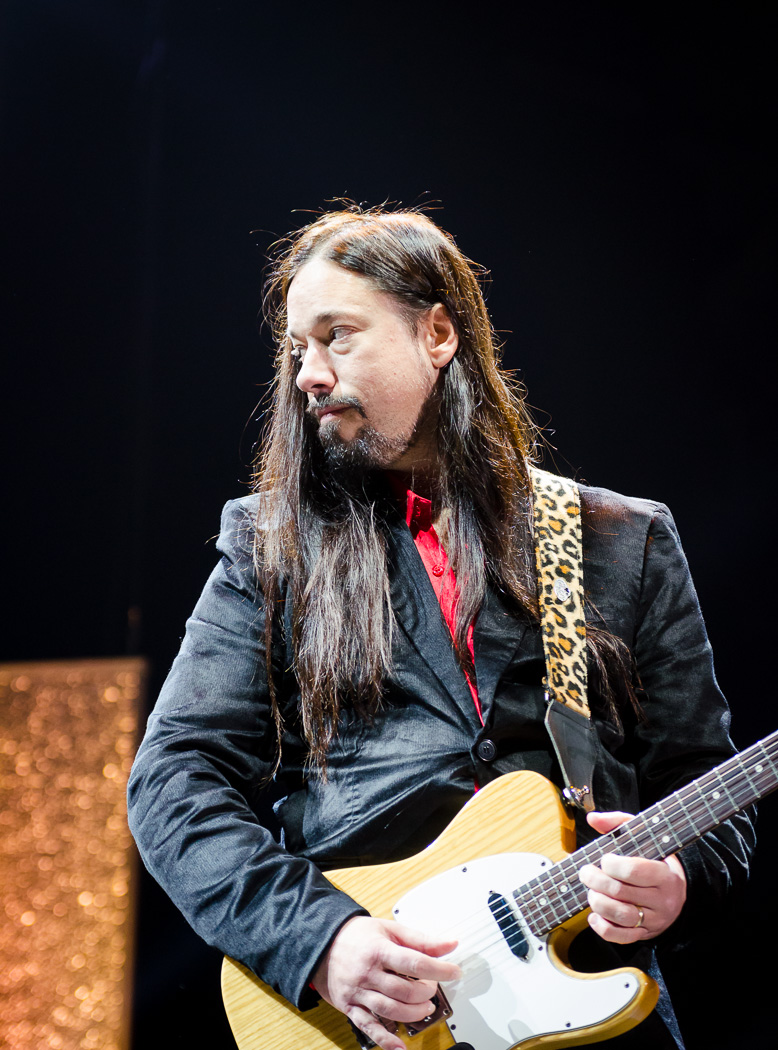
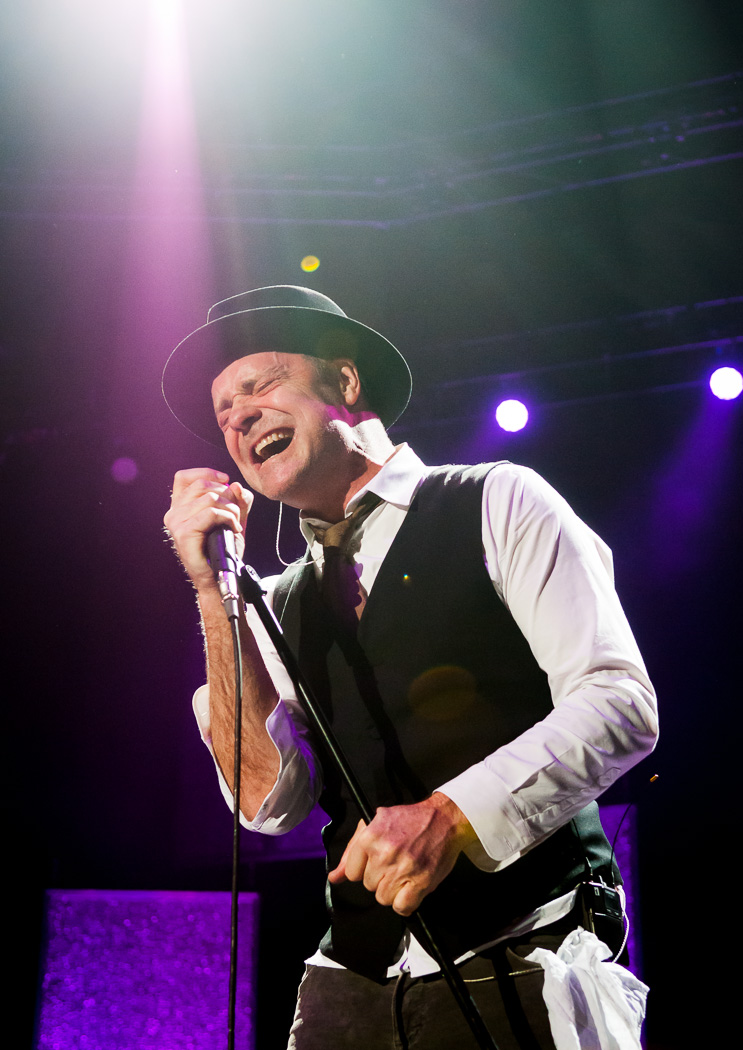
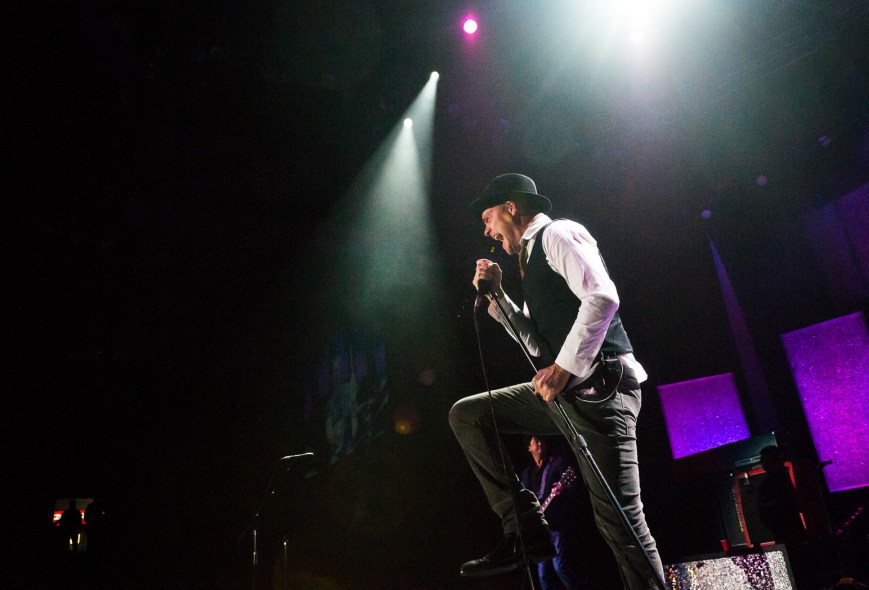
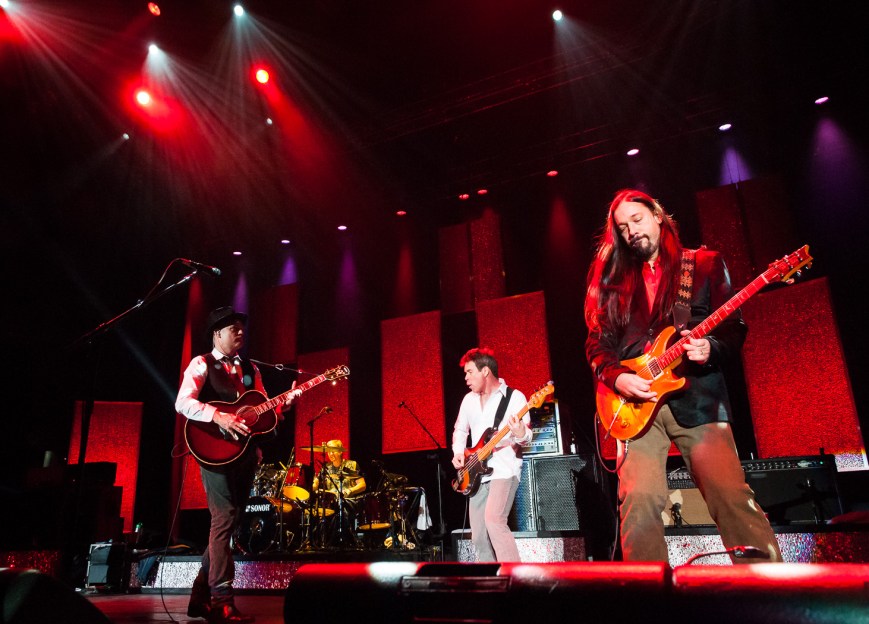
In all I got 20-25 shots that I consider keepers (not bad for three songs). Here is a selection.Tragically Hip - Feb 5 2013-18Tragically Hip - Feb 5 2013-2 Tragically Hip - Feb 5 2013-17 Tragically Hip - Feb 5 2013-16 Tragically Hip - Feb 5 2013-14 Tragically Hip - Feb 5 2013-13 Tragically Hip - Feb 5 2013-11 Tragically Hip - Feb 5 2013-10 Tragically Hip - Feb 5 2013-9 Tragically Hip - Feb 5 2013-7 Tragically Hip - Feb 5 2013-6 Tragically Hip - Feb 5 2013-5 Tragically Hip - Feb 5 2013-4 Tragically Hip - Feb 5 2013-3 Tragically Hip - Feb 5 2013-20 Tragically Hip - Feb 5 2013-21 Tragically Hip - Feb 5 2013-22

Tragically Hip at the Aud – Impromptu Shoot

Last night while cooking dinner I got notification from my friend Nathan that a Vancouver blog, http://www.unnomdeguerre.com/, was looking for a photographer. The Tragically Hip were playing at the Aud in Kitchener (with The Arkells) opening. Not being a huge fan of the Hip (and really keen for a relaxing night in) I reluctantly agreed to do the shoot. I had less than an hour notice and hadn’t even eaten yet but I did make it to the venue in time for the Hip to start (sadly missing The Arkells’ opening slot).

I was also only allowed to shoot the first three songs so I had to pack strategically. There wouldn’t be much time to change lenses, so i settled on using the 17-55mm f/2.8 on the D300s and the Tokina 50-135mm f/2.8 on the D7000.

I’ll put some more shots up in the future, along with some technical pointers, once I’ve made my way through the 350+ shots I took within my 20 minute window. Here’s a standout from my initial glean through the set:Tragically Hip


Rachel and Jeremy’s Victoria Park Pavilion Wedding

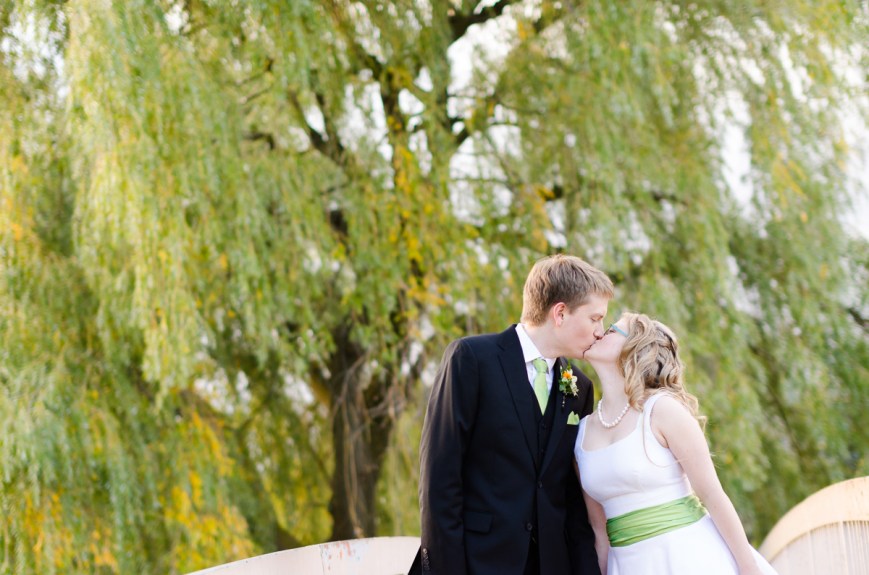
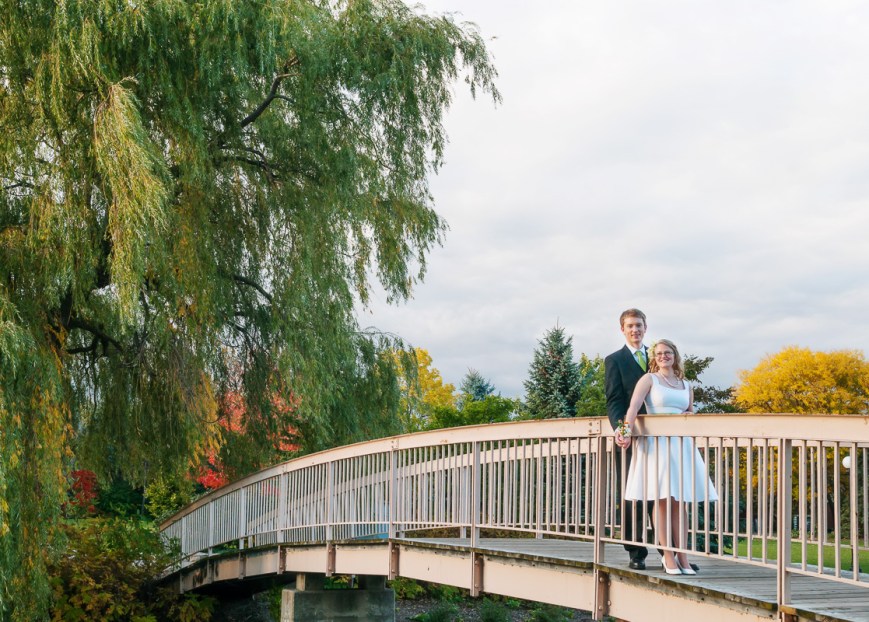
In early October I was fortunate to photograph the wedding of my good friend (and former roommate), Rachel, at the Pavillion in Kitchener’s Victoria Park. Rachel and Jeremy’s fun-loving personalities brought many unique elements to their wedding including adorable decorations, a crochet wedding cake and a live photo booth projected on the stage.

RachelandJeremy-331The ceremony began with a workout routine for the audience and included a science experiment (with safety glasses, of course), vows read by the audience and a fantastic victory lap at the end. Natural light on the stage was low, so I lit the ceremony with two Alien Bees AB800 lights bounced onto opposite sides of the vast ceiling. This setup provided enough light for the processional/recessional as well, making my job a lot easier!RachelandJeremy-166 RachelandJeremy-219 RachelandJeremy-244 RachelandJeremy-249I took the massive wedding party outside for a photo in front of the pavilion. Not having a ladder, I held the D300s with AF-S 17-55mm f/2.8 above my head and took a series of images at 17mm f/5.6 adjust the framing slightly for each shot. I learned this trick watching a newspaper photographer cover a large crowd scene with his D2h. He held the camera high up and shot at max frame rate while moving panning the camera up/down/left/right.RachelandJeremy-310Alone with the bride and groom (along with videographers and Mike Portt, who was assisting) I captured these images. The first is a panorama of many shots with the D7000 and Sigma 50/1.4 at f/1.4.RachelandJeremy-329The next are with the Sigma and a rented AF-S 24mm f/1.4, respectively. The weather was unfortunately cold and I felt bad keeping Rachel and Jeremy outside even for the short time that I did.RachelandJeremy-397 RachelandJeremy-392After portraits, I set up the Alien Bees again for lighting the rest of the evening. By placing one on the stage and the other high up at the back corner I was able to light the entire room. I think I’ll write a full blog post on this technique as it has worked well for me. The studio flashes run off AC power and recharge quickly, giving consistent and reliable output.RachelandJeremy-525Here is a shot of the crochet cake followed by the “cake cutting”. RachelandJeremy-436 RachelandJeremy-462For lighting many of the candids I used my new favourite technique of holding the camera in my right hand with something wide and an off-camera strobe in my left hand. Here, I put the Lumiquest Softbox LTz on an SB-900 set to be triggered in TTL with the camera’s built-in flash. The softbox at this range puts out even and soft light, sufficient for a pair of people.RachelandJeremy-597The dance party was started off with an amazing ceilidh that got nearly everybody on their feet. Using the Alien Bees to light the room and playing with shutter speed to control the ambient light I was able to achieve a wide range of looks, from frozen motion to slow speed sync.RachelandJeremy-556 RachelandJeremy-591I’ll end this post with the cutest gift card box I’ve ever seen. Rachel and Jeremy’s wedding was a real treat and I wish them the best! Thanks for reading.

RachelandJeremy-15

Nikkor 85mm f/1.8 G Mini-Review

When I first switched from Pentax to Nikon two years ago I was excited to get my hands on the 85mm f/1.8 AF D as an affordable and compact fast portrait lens. In not too long I found a perfectly used copy on Kijiji and picked it up on a sunny Autumn Saturday. While I liked the lens overall, I didn’t LOVE it. I found the colour to be poor, high chromatic aberrations (specifically longitudinal aberrations, aka bokeh fringing) and susceptibility to flare. The straight-edged aperture blades meant that stopping down gave poor bokeh. Wide open I wasn’t fan of the bokeh either. The screw-driven autofocus, while fast, lacked the accuracy of AF-S. In the end I sold it.

This past weekend I picked up it’s replacement, the 85mm f/1.8 AF-S G. So, what does the updated lens get me?

Sharpness. Online tests have shown this lens to be extremely sharp. Photozone measures the G version to be as sharp at f/1.8 as the D is at f/2.8. In fact, the edges of the D lens don’t match the G’s edges at f/1.8 until f/4. After a week with the lens I concur. It’s consistently sharp at every aperture. Now as I’ll show later, aberrations and low depth of field do reduce the apparent sharpness at wide apertures. Below are a couple of images of the cat at f/1.8 indoors at ISO 800.

DSC_9307DSC_9312As you can see above, the bokeh is also quite nice. Here is a comparison of the same scene at different apertures (from left to right: f/1.8, f/2.8, f/4, f/5.6).

bokehThe only negative aspect of this lens that I’ve come across so far is bokeh fringing. In fact, I don’t see it as any better over the D version. The image below, at f/1.8, shows the purple and green colours that appear in either side of the focal plane.

DSC_9257Fortunately image editing software, such as Lightroom 4, have a correction tool for both lateral and longitudinal chromatic aberrations. Here is a stress condition of an extremely backlit subject both before and after Lightroom 4’s lens corrections. While the tool doesn’t remove the purple and green fringes completely it makes for a much more natural looking image.

DSC_9028DSC_9028-2I’m sure I’ll have a lot more to say about the lens in the future, but for now I’ll post a few more photos from my first week with it.

DSC_9292 DSC_9243 DSC_9241 DSC_8986-Edit DSC_8911Thanks for reading!

Owen