Last week I got a few rolls of film back from Dwayne’s, mostly shot on the Bronica ETRS. Here are a few scans I did over the weekend. The colour shots are Fuji Provia 100 and the black and white are Kodak Tri-X 400. They were all scanned with my Epson V500 and tweaked in Photoshop CS5.
Category Archives: Photos
ObG Thursdays – Vampire Prom
On a few occasions I’ve had the opportunity to shoot the fake prom event at the Starlight in Waterloo… essentially a big night club party where everybody dresses up. My part has most often been by setting up a ‘photo booth’ where individuals, couple or groups can pose together and be as goofy or sexy as they like. Today’s oldie-but-goodie comes from my favourite of these proms, back in 2010. The theme was Horror, if I remember correctly. I’m a big fan of this photo of Celeigh, both for the lighting and for the pose.
For the photo booth I set up three lights. For the main light I used an Alien Bee B800 with brolly box (an octagonal softbox that opens and mounts like a shoot-through umbrella). The light was on a stand, cinched tightly to a post. For rim lights I clamped a Vivitar 285HV about 15′ away on each side, as close to the back wall as possible. The 285HV on the left was gelled with blue and the one on the right was gelled deep red. I triggered the three lights with Cybersyncs.
The settings were Pentax K20D with FA 35mm f/1.8 LTD (the lens I miss more than any other that I’ve sold) at f/2.8 1/80s ISO200.
PS – Some more from this shoot are here: http://www.flickr.com/photos/owencherry/sets/72157623424241780/detail/
ObG Thursdays – Lincoln Memorial
This week’s Oldie-but-Goodie comes from a trip Mitzy and I took to Washington DC last summer. On a blazing hot day, we took refuge in the Lincoln Memorial where I took this photo with the D300s and Tokina 11-16mm f/2.8.
I used a few photographic tricks to make this image. First was my choice of perspective. I used the Tokina 11-16mm at 11mm to capture the vast interior. The room was also full of people but Mitzy pointed out this excellent vantage point that was completely tourist free! Compare above to the image below. It’s hard to believe that they were taken just a few minutes apart:
To capture the full tonal range of the space I used an HDR technique. I took five images, each separated by 1EV and combined the -2, 0 and +2EV into an HDR image in Photoshop’s HDR Pro tool. Here are the three images that fully encompass the darkest and brightest tones.
The combined image looked like this:
Once the HDR was created I tweaked the brightness/contrast and fixed the vertical perspective in Lightroom.
And that’s it! A unique perspective of a familiar landmark, captured with full tonal range.
OBG Thursdays – The Flash (with 4 Flashes)
Today’s Oldie-but-Goodie is a fun little ‘portrait’ of an action figure. After reading about some cool lighting setups for defining muscle I wanted to try it out on a real live muscular person. Unfortunately, I am not this person…
The Flash (fittingly) would have to stand in for me. This shot is actually one of the more complicated lighting setups that I’ve done. It uses four flashes in total and each of them is modified. The principle of the lighting is to use a softbox in a ‘tabletop’ position, meaning that it sits directly above the subject pointing straight down. The direction of light causes the muscles to cast strong shadows, adding definition. With just this one light, the shadows are quite strong. Rim lighting or fill lighting can lift the shadows.
For this shot I used the lighting diagram below:
A Lumiquest Softbox LTZ on SB-900 sits directly above the subject (even though in the diagram it’s placed slightly in front) and points down. For rim lighting I use two more strobes. On the right is a SB-700 with a grid spot. On the left is a Metz 48 AF-1 with a grid spot.
For the backround I used a fourth light, an Alienbees B800 with 22″ beauty dish with a diffuser sock placed over it. I’ve had a lot of fun placing this light modifier directly into photos as a creative element in the past.
The SB-900 used for tabletop lighting has a Full CTO gel on it. The Metz 48 AF-1 on the left is gelled with a light blue. In hindsight, the blue was probably unnecessary as it doesn’t look much different from the non-gelled flash (see the highlights on his waist at left and right).
The final shot was with the D300s and AF-S 60mm f/2.8 G Micro at f/13 1/125s ISO 100. The B800 with beauty dish was set to minimum power and is still quite bright at f/13 ISO 100. The tabletop light is at 1/2 power and the two rims are 1/16 power.
Blending with Soft Light – A Quick and Simple Way to Increase Contrast and Saturation in Photoshop
Today I’d like to show you a really effective, but simple, way to boost contrast and saturation in an image by walking through how I arrived at the above image. The trick is using a layer blending mode called ‘Soft Light’. Photoshop has the ability to blend different layers with each other using a number of methods. The Soft Light mode works like this:
- Areas that are brighter than 50% grey get ‘screened’, meaning they become lighter depending on the lightness of the lower layer.
- Areas that are darker than 50% grey get ‘multiplied’, meaning they become darker depending on the darkness of the lower layer.
I’ll demonstrate. Here is a layer in Photoshop that is a simple gradient going from white to black, left to right. In the middle is 50% grey.
If I add an adjustment layer on top of this, say ‘Levels’, and change its blending mode to Soft Light the lights get lighter and the darks get darker depending on how light or dark they are. In the middle, 50% grey, is unaffected. In the image below, the top half has been blended with Soft Light. The bottom half is the same as the previous image. Notice that the gradient becomes more steep… the transition between white and black is shorter. This is an increase in contrast.
In an image with colour, Soft Light blending can also increase saturation. I’ll demonstrate with an image. First, I’ll show the image as it is first pulled out of Lightroom into Photoshop.
If I add a Levels layer and blend it with Soft Light the contrast and saturation increase dramatically.
I can scale the effect back by lowering the opacity. Here I’ve set it to 47%:
I’m finding that there’s still too much of an effect on Mitzy so I’ll paint some grey into the layer mask over her. Grey will decrease the opacity of the mask by another 50% where I’ve painted it in.
I’m happy with how the Soft Light blending has improved the image so let’s finish it off. First, I’ll remove some of the messy details in the bottom right corner using the Spot Heal Brush in a new layer.
Next I’ll brighten Mitzy a bit further using a curves tool, masked so it only affects her.
Here, I’ve decided that I want to bring a bit more of the contrast back in to the background so I increase the opacity of the Soft Light layer.
Finally, I add a bit more contrast into the right side of the image with a masked Curves tool. The image is done!
So there have it. Soft Light blending. Quick and simple!
My Favourite Day of the Year
ObG Thursdays – Mary Hill Blues
Today’s Oldie-but -Goodie comes from summer 2007 when Jeff and I took a night-time photo trip out to Mary Hill, Ontario. We were drawn to the church, since it’s a landmark on the trip between Waterloo and Guelph. Since I’d brought along my tripod I thought it would be fun to take some moody long exposure shots of the cemetery next to the church, made extra moody by the moving clouds. I tried out a few long exposure (2-8 seconds) and found that, while the sky and church looked just as I had hoped, the figures in the cemetery were lost.
What I needed was flash. Unfortunately, both of us had forgotten to bring any batteries for the Vivitar 285HV. Jeff had the great idea of using his camera’s on-board flash to light paint the cross figure during the long exposure. We set out testing. While I took a long exposure image, Jeff walked around the figure taking pictures of it with his camera so that his built-in flash would put light just where we wanted it (more on the right side and less on the left). The image below was the best out of a half-dozen.
I finished the image with some colour/contrast enhancement and local dodging and burning to bring out the cross figure even further.
Pentax *ist DS with DA16-45mm f/4 @ 16mm f/6.7 8s ISO 200:
My Full Frame Long Weekend – Sony α850 + Sigma 50mm f/1.4
Ever since 2004, when I got my first digital camera, I have been a cropped sensor shooter. Otherwise known as APS-C, or DX to Nikon folks, cropped sensors are 18x24mm in size compared to full frame sensors, or FX in Nikon land, that are the size of 35mm film (24x36mm). With its smaller size, a DX sensor captures a smaller area of a lens’ image circle, giving a narrower field of view compared to FX. On FX a 50mm lens looks like one would expect a 50mm lens to look on film (a fairly natural field of view). A DX sensor, imaging just the central portion of the image circle, gives the field of view of a 75mm lens. A good demonstration is here.
Full frame has other benefits besides having the “right” field of view. Physics tells us that a bigger sensor will have lower noise (for a given pixel technology) and more shallow depth of field. In general a full frame camera will have a bigger viewfinder to accommodate the bigger pentaprism needed for the bigger mirror.
I love shooting film for the same reason. Lenses look like they should. The viewfinders are large and bright. I feel like I have tunnel vision when I switch back to my digital SLRs, even though the D300s and D7000 have some of the biggest viewfinders for DX bodies.
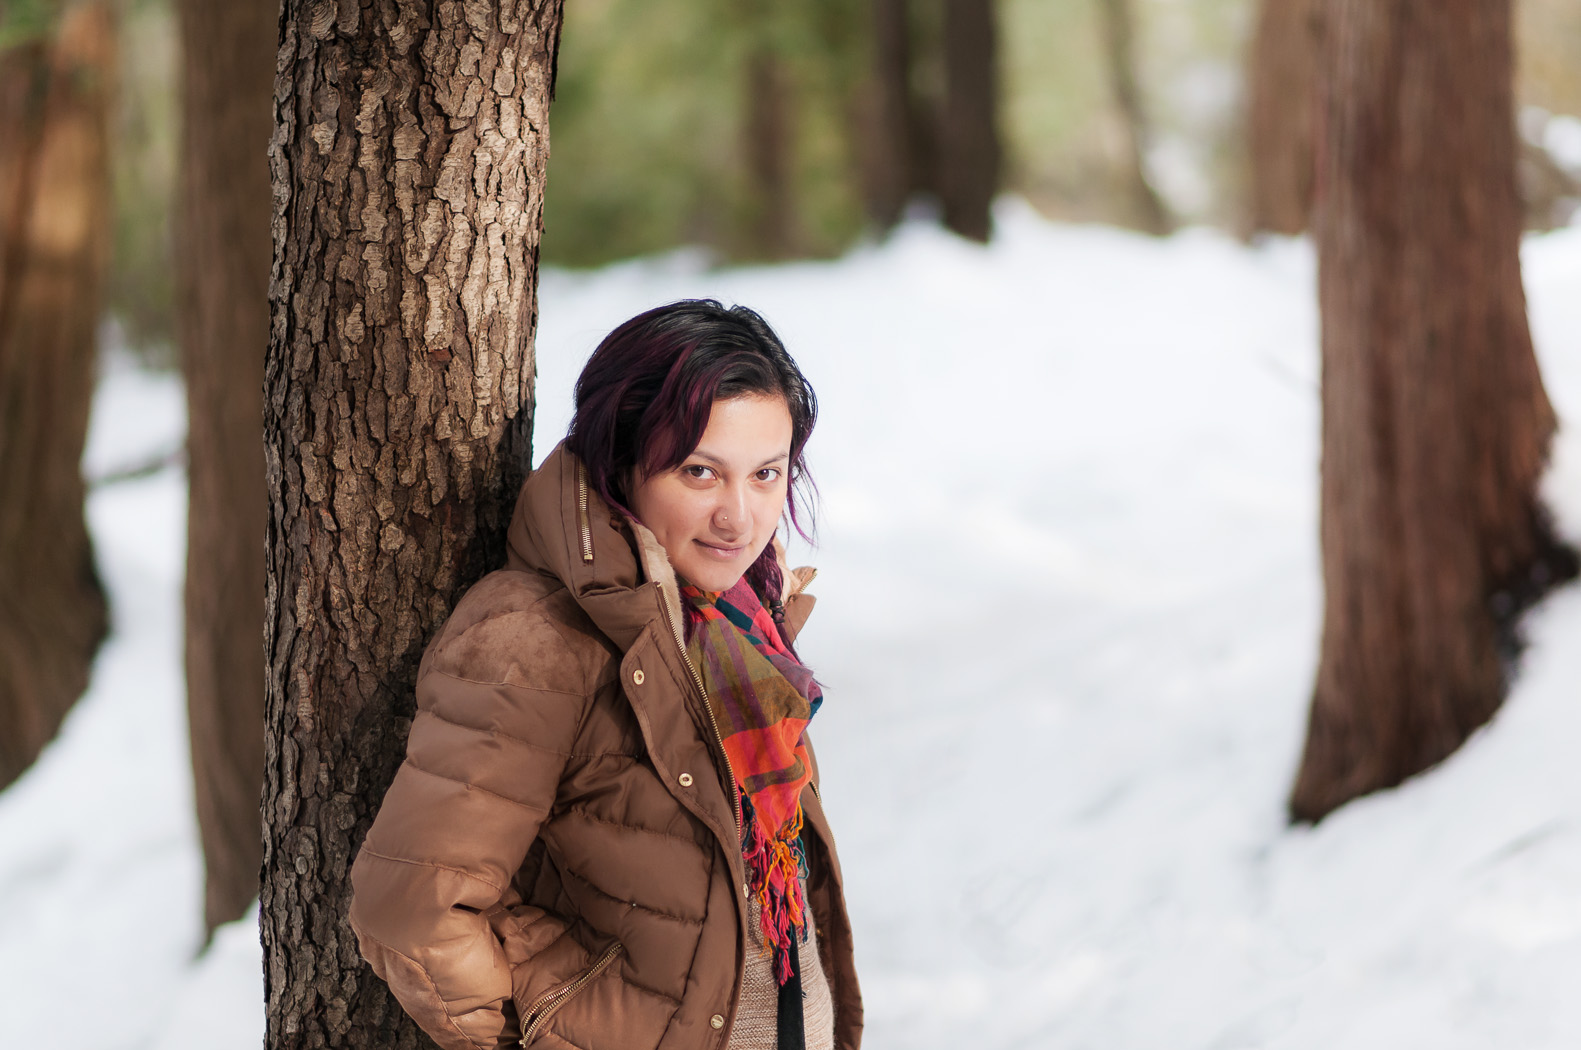
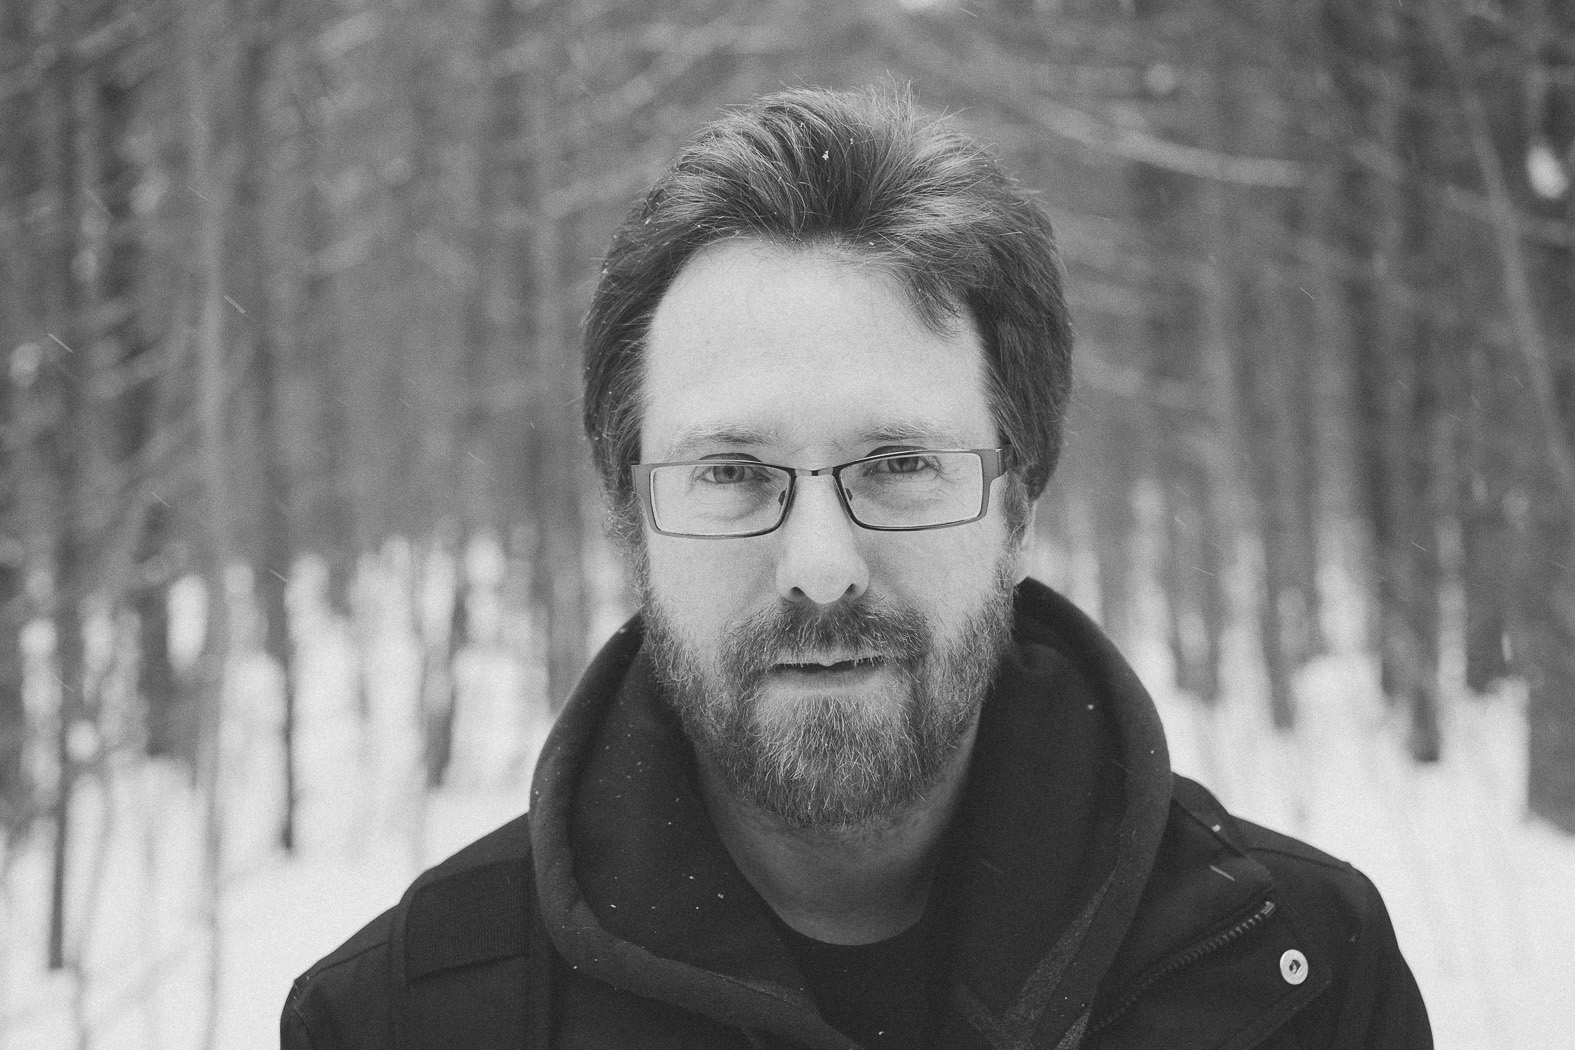
This past weekend (plus the Thursday and Friday I took off from work) I borrowed my co-worker Bill’s Sony α850 to get a little taste of shooting with a full frame camera. He gave me the Sigma 50/1.4 in Sony mount to go along with it… the perfect choice since I own the same lens for Nikon and already have a good feel for how it performs. Over the weekend I had a few good opportunities to shoot, and in a variety of situations too. Mitzy and I went to Eugenia Falls near Collingwood, Ontario for a hike and one of the tastiest dinners I’ve had in a while. Here’s my favourite shot from the day (f/2 1/350s ISO 100):
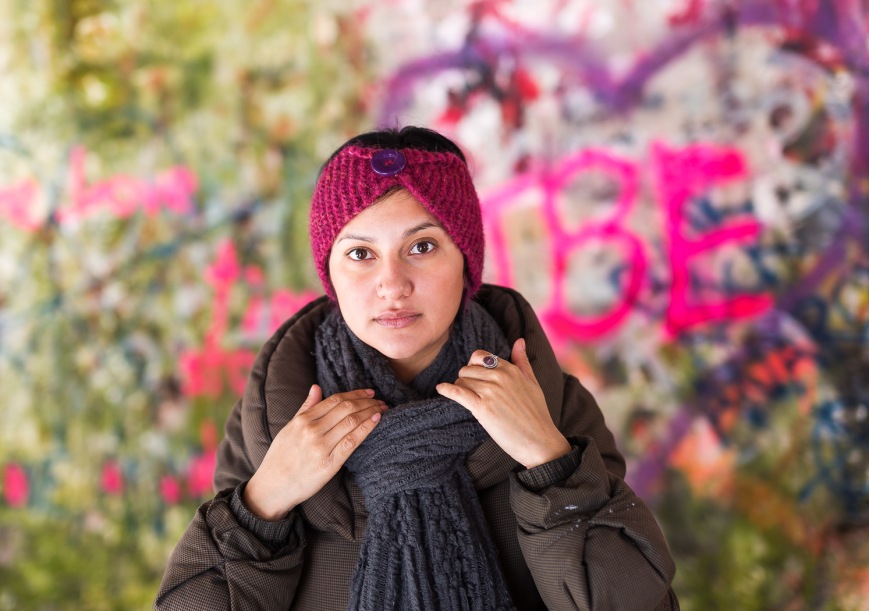
I think that this photo demonstrates what I like most about a fast 50mm on a larger sensor. The shallow depth of field combined with a natural field of view has a classic look to it. It’s exactly the kind of image I’d hoped to be able to take with the combination.
Now, am I going to take the plunge and move to full frame? Is the step up in image quality and shooting experience worth the pain of selling at least one of my DX cameras and four of my lenses? The cost of FX gear is considerably higher than DX and I’m just not sure if it’s the way I want to go. Take a look at the following images and maybe you can help me decide…

ObG Thursdays – Photographing a Jaguar E-Type in a Barn
My good friend Portt was asked to photograph a fully-restored Jaguar E-Type for an Ebay sale. Being the “guy with the lights” and also a car nut he asked me if I wanted to come along and meet the fantastically beautiful work of art, perfection on wheels. “Yes”, I said. I was fully expecting to park the car under a tree, near a fence, with a picturesque farm scene behind. Or on a twisty road, tunneled by tall trees. But in reality it was sitting in a dark and dusty barn basement under a tarp, boxed in by a bunch of other stored cars.
We set up the lights as best we could to not create too many hot spots and blown-out specular reflections. The key was to have the light sources as large and diffuse as possible. Since I don’t own and giant car-length softboxes or strip lights, instead I brought my umbrellas and brolly-box as close to the car as I could. For lights I used my two Alien Bees B800s and a Vivitar 285HV, all remote triggered by Paul C Buff Cybersyncs. The camera was a D300s with AF-S 17-55mm f/2.8 @ 17mm f/6.3 1/60s ISO 200.
Meet Easton Nathanael Persaud
Nat and Lauren, some of my best friends, have a new member of the family as of February 7. Easton Nathanael is an adorable baby boy and I feel so lucky to have met him when he was just 8 hours old. Lauren and Nat had Mitzy and me over on Saturday to take some photos of the new family of 4. I haven’t had a lot of experience with baby photography but I love shooting their kids. Their daughter, Harper, has become quite the photogenic toddler especially now that she’s warmed up to me. Here is one of my favourites (D7000 with AF-S 35mm f/1.8 @ f/2.8 1/200s ISO 400):
To give a bit of editing history, here is the image when first imported into Lightroom.
In Lightroom I did a few tweaks to prepare the shot for editing in Photoshop, namely
- highlight reduction/shadow boost
- reduced clarity/increased sharpness
- vibrance reduction
- lens correction
- ‘Camera Portrait’ camera calibration
This is how the photo looked coming out of Lightroom:
In Photoshop I removed some dry skin and red patches (under the nose and the lines on the shoulder). I used the color correction tool to shift some of the magenta tones in the skin towards the green and some local reduction of red saturation. I tried out a new Photoshop preset (a gift from a friend) to get the final look.
Enjoy!


