OBG Thursdays – The Flash (with 4 Flashes)

Today’s Oldie-but-Goodie is a fun little ‘portrait’ of an action figure. After reading about some cool lighting setups for defining muscle I wanted to try it out on a real live muscular person. Unfortunately, I am not this person…
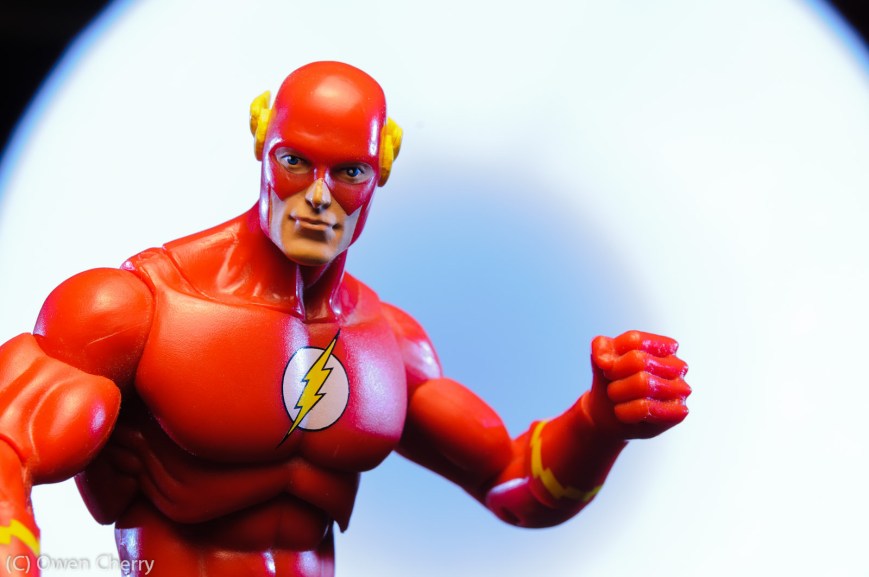
7313886510_b9be4a5d09_oThe Flash (fittingly) would have to stand in for me. This shot is actually one of the more complicated lighting setups that I’ve done. It uses four flashes in total and each of them is modified. The principle of the lighting is to use a softbox in a ‘tabletop’ position, meaning that it sits directly above the subject pointing straight down. The direction of light causes the muscles to cast strong shadows, adding definition. With just this one light, the shadows are quite strong. Rim lighting or fill lighting can lift the shadows.

For this shot I used the lighting diagram below:

lighting-diagram-1363206547A Lumiquest Softbox LTZ on SB-900 sits directly above the subject (even though in the diagram it’s placed slightly in front) and points down. For rim lighting I use two more strobes. On the right is a SB-700 with a grid spot. On the left is a Metz 48 AF-1 with a grid spot.

For the backround I used a fourth light, an Alienbees B800 with 22″ beauty dish with a diffuser sock placed over it. I’ve had a lot of fun placing this light modifier directly into photos as a creative element in the past.

The SB-900 used for tabletop lighting has a Full CTO gel on it. The Metz 48 AF-1 on the left is gelled with a light blue. In hindsight, the blue was probably unnecessary as it doesn’t look much different from the non-gelled flash (see the highlights on his waist at left and right).

The final shot was with the D300s and AF-S 60mm f/2.8 G Micro at f/13 1/125s ISO 100. The B800 with beauty dish was set to minimum power and is still quite bright at f/13 ISO 100. The tabletop light is at 1/2 power and the two rims are 1/16 power.

Blending with Soft Light – A Quick and Simple Way to Increase Contrast and Saturation in Photoshop

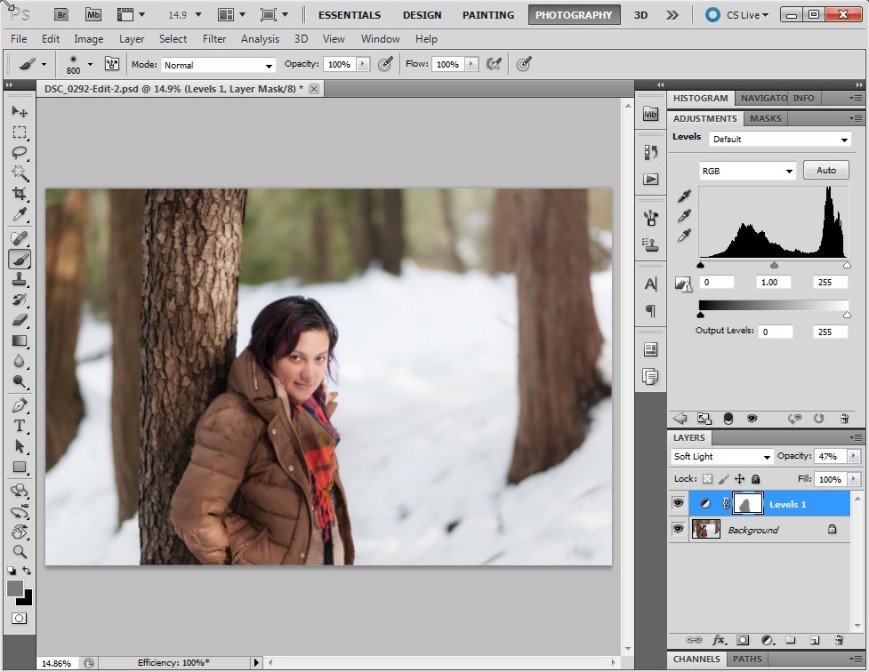
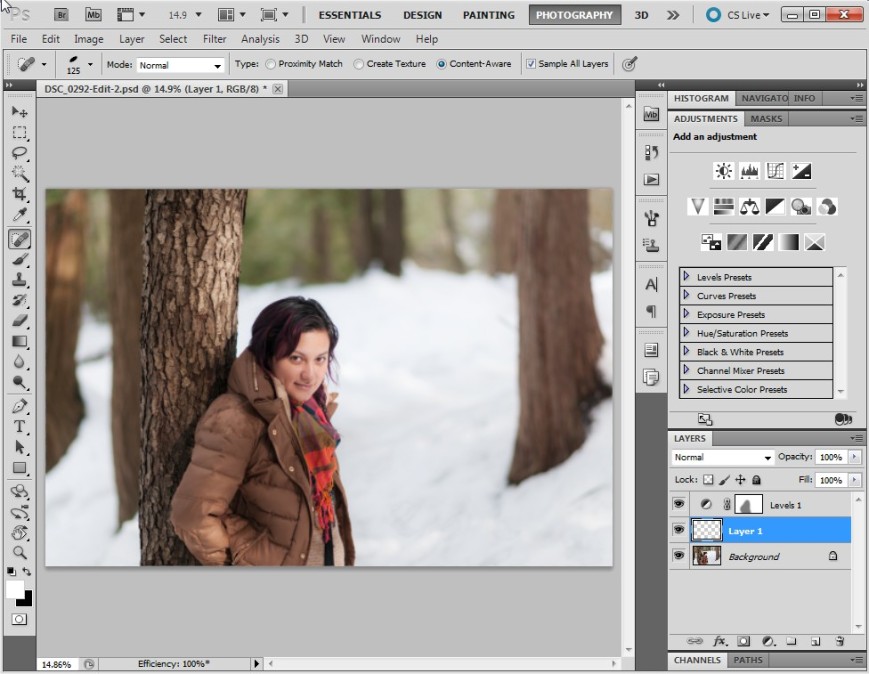
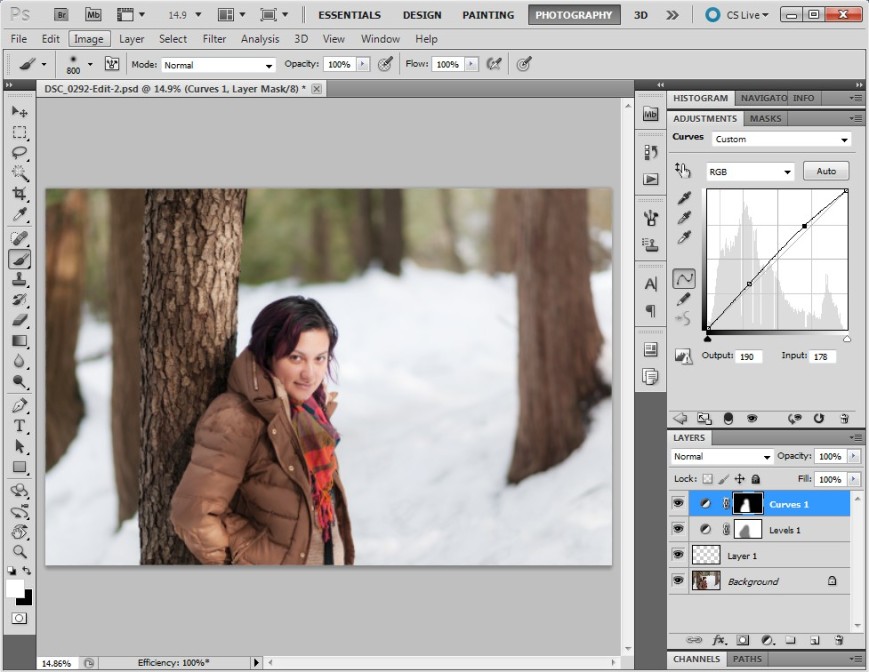
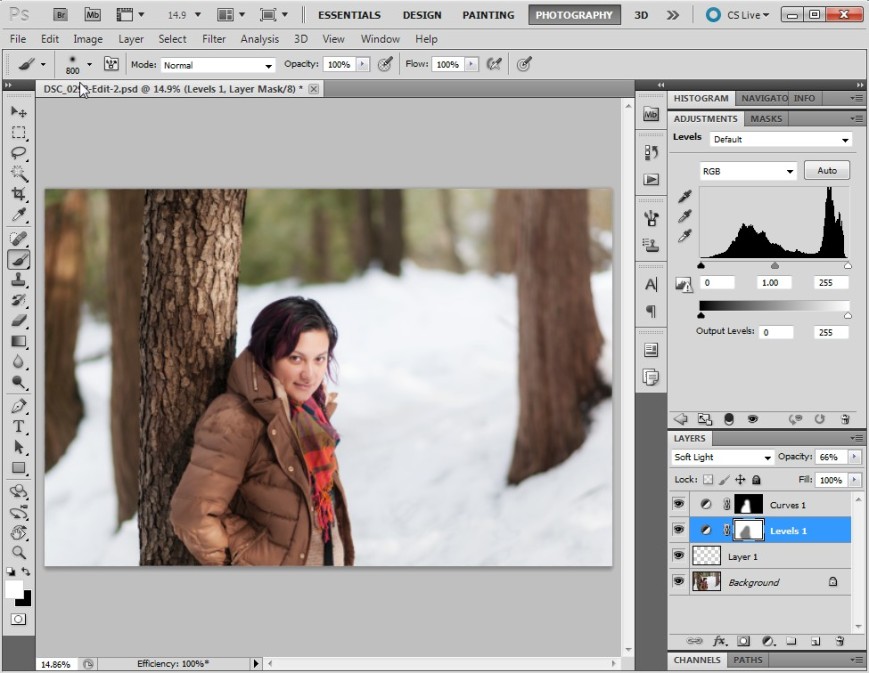
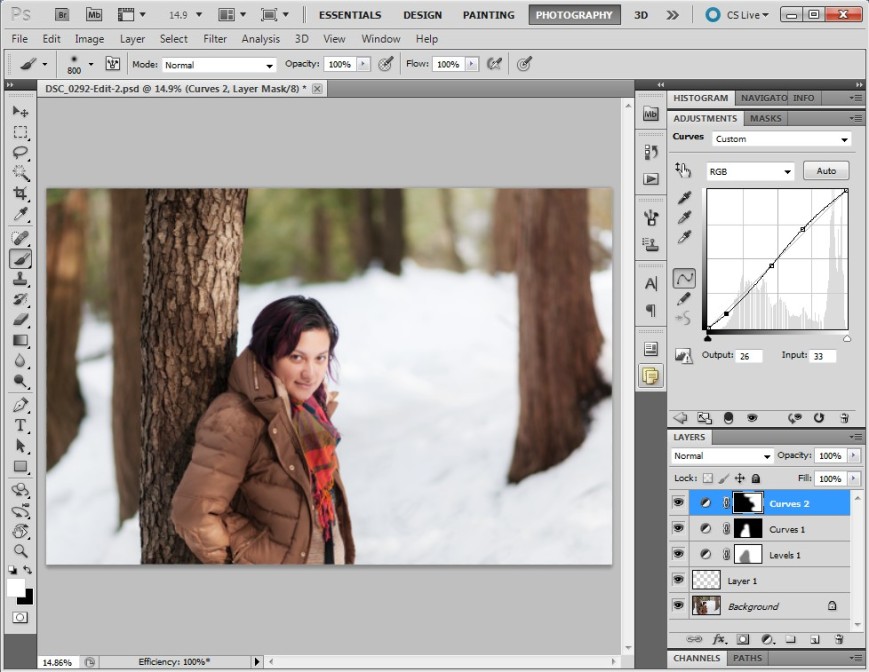
DSC_0292-Edit-2Today I’d like to show you a really effective, but simple, way to boost contrast and saturation in an image by walking through how I arrived at the above image. The trick is using a layer blending mode called ‘Soft Light’. Photoshop has the ability to blend different layers with each other using a number of methods. The Soft Light mode works like this:

  • Areas that are brighter than 50% grey get ‘screened’, meaning they become lighter depending on the lightness of the lower layer.
  • Areas that are darker than 50% grey get ‘multiplied’, meaning they become darker depending on the darkness of the lower layer.

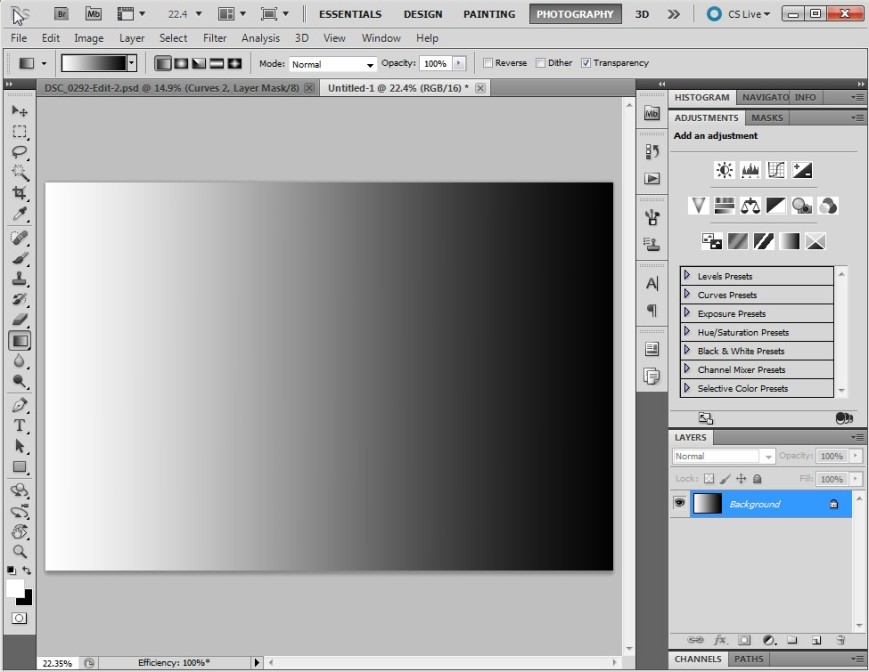
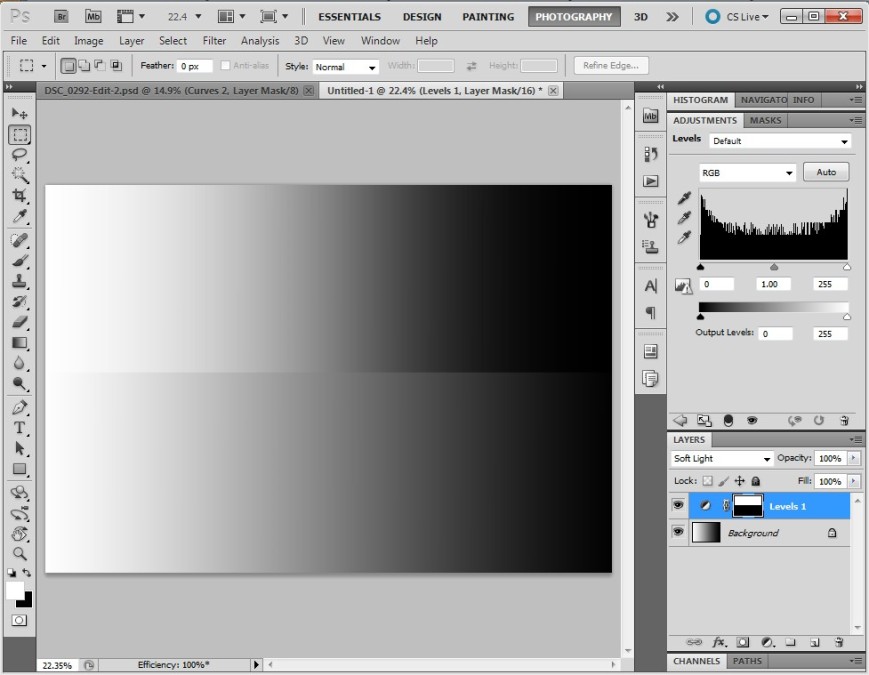
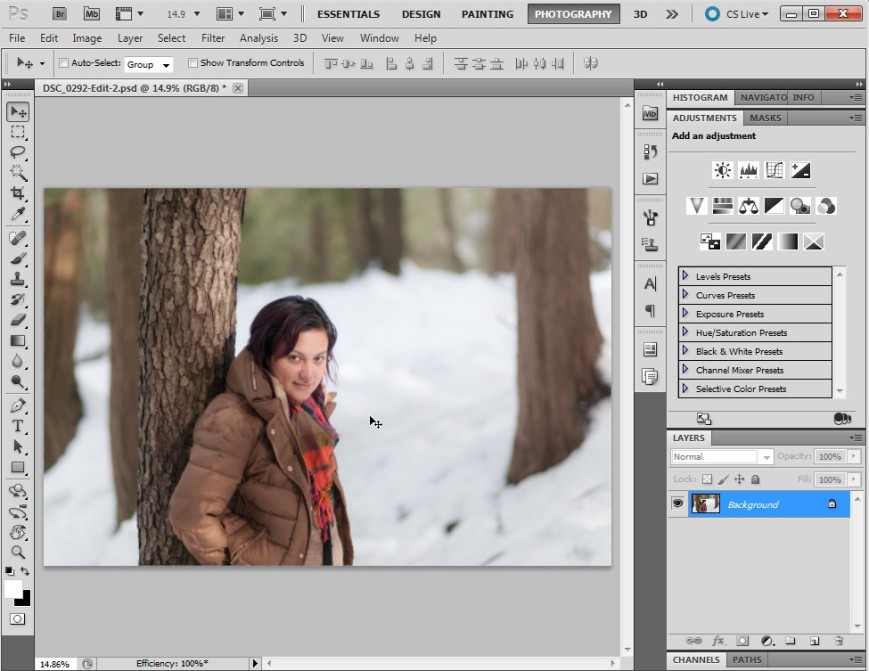
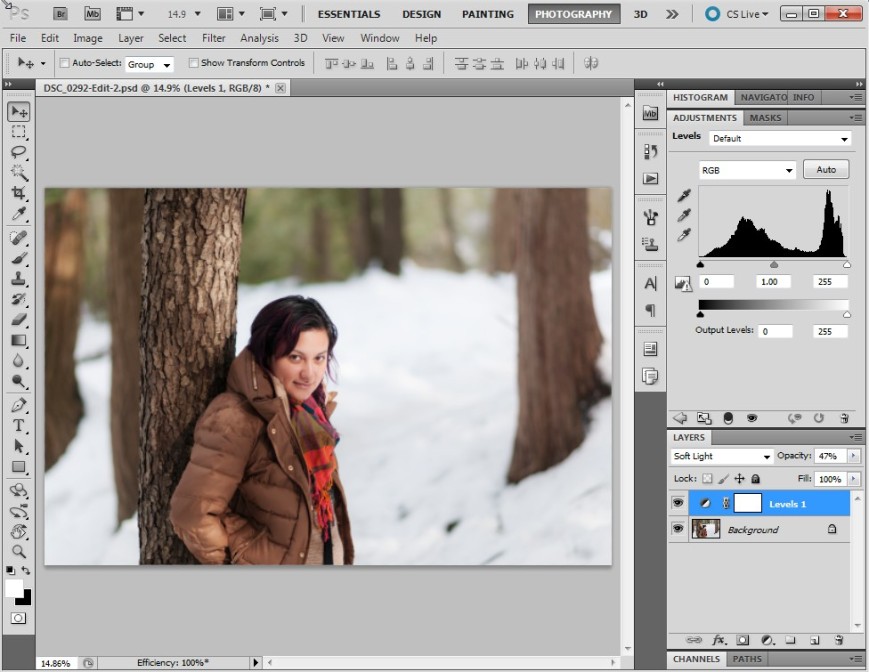
I’ll demonstrate. Here is a layer in Photoshop that is a simple gradient going from white to black, left to right. In the middle is 50% grey.ScreenHunter_16 Mar. 12 20.32If I add an adjustment layer on top of this, say ‘Levels’, and change its blending mode to Soft Light the lights get lighter and the darks get darker depending on how light or dark they are. In the middle, 50% grey, is unaffected. In the image below, the top half has been blended with Soft Light. The bottom half is the same as the previous image. Notice that the gradient becomes more steep… the transition between white and black is shorter. This is an increase in contrast.ScreenHunter_16 Mar. 12 20.35In an image with colour, Soft Light blending can also increase saturation. I’ll demonstrate with an image. First, I’ll show the image as it is first pulled out of Lightroom into Photoshop.ScreenHunter_13 Mar. 12 19.57If I add a Levels layer and blend it with Soft Light the contrast and saturation increase dramatically.ScreenHunter_15 Mar. 12 19.57I can scale the effect back by lowering the opacity. Here I’ve set it to 47%:ScreenHunter_15 Mar. 12 19.58I’m finding that there’s still too much of an effect on Mitzy so I’ll paint some grey into the layer mask over her. Grey will decrease the opacity of the mask by another 50% where I’ve painted it in.ScreenHunter_16 Mar. 12 20.00I’m happy with how the Soft Light blending has improved the image so let’s finish it off. First, I’ll remove some of the messy details in the bottom right corner using the Spot Heal Brush in a new layer.ScreenHunter_16 Mar. 12 20.04Next I’ll brighten Mitzy a bit further using a curves tool, masked so it only affects her.ScreenHunter_16 Mar. 12 20.05Here, I’ve decided that I want to bring a bit more of the contrast back in to the background so I increase the opacity of the Soft Light layer.ScreenHunter_16 Mar. 12 20.06Finally, I add a bit more contrast into the right side of the image with a masked Curves tool. The image is done!ScreenHunter_16 Mar. 12 20.08So there have it. Soft Light blending. Quick and simple!

ObG Thursdays – An old man, a bike, an alley and snow.

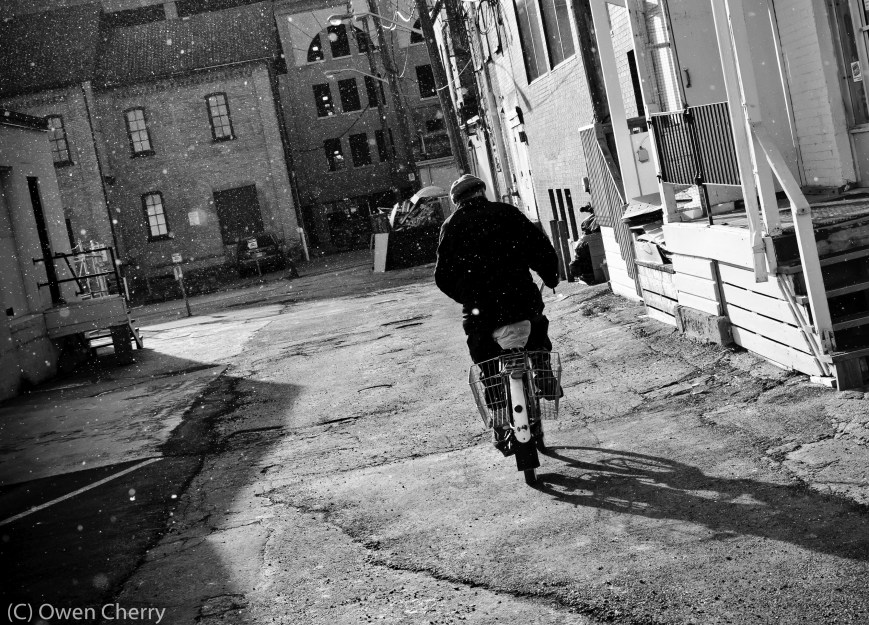
This week’s oldie-but-goodie is a simple, straightforward and totally spontaneous photo taken on a walk to the grocery store. It’s also a perfect example of why I try to take my camera everywhere with me.

Street photography is an art form that I (and many others) romanticize. From Henri Cartier-Bresson (the father of photojournalism, according to Wikipedia) to the recently discovered of Vivian Maier (who I recommend every green, experienced or even jaded photographer study) to the modern hipster photographer, I have this romantic vision of a confident, passionate and skilled artist. They turn everyday life into images that I can stare into for hours.

Street photography is an art form that I try to succeed at but rarely do. I’ve tried to “shoot from the hip”, by setting the camera to a small aperture and wide field of view and causally holding it down chest level. Usually what I get are out of focus images of people’s shoulders or store fronts. I’ve tried standing way back with a long telephoto and taking sniper shots, often getting the ‘why is that guy with the massive lens taking my picture?’ look.

Generally, the best images have come from confidently and casually approaching an interesting scene. I make myself and the camera visible. I smile. I say thanks. Hiding the camera or hiding myself just doesn’t work as well. This method helped me get some of my favourite street shots during last year’s trip to China.

So… the photo. As I said, I was walking to the grocery store with the D300s and Nikon AF-S 35mm f/1.8 DX. This lens has a near-normal field of view and is small, light and unassuming. As I crossed the entrance to the alley the man rode past me on his bike. I turned, followed and took 3-5 shots. I didn’t have to edit the shot much, just a black and white conversion and some contrast.

D300s with AF-S 35mm f/1.8 DX, f/7.1 1/650s ISO 200.5236619258_af9e382417_o

ObG Thursdays – Photographing a Jaguar E-Type in a Barn

My good friend Portt was asked to photograph a fully-restored Jaguar E-Type for an Ebay sale. Being the “guy with the lights” and also a car nut he asked me if I wanted to come along and meet the fantastically beautiful work of art, perfection on wheels. “Yes”, I said.  I was fully expecting to park the car under a tree, near a fence, with a picturesque farm scene behind. Or on a twisty road, tunneled by tall trees. But in reality it was sitting in a dark and dusty barn basement under a tarp, boxed in by a bunch of other stored cars.

We set up the lights as best we could to not create too many hot spots and blown-out specular reflections. The key was to have the light sources as large and diffuse as possible. Since I don’t own and giant car-length softboxes or strip lights, instead I brought my umbrellas and brolly-box as close to the car as I could. For lights I used my two Alien Bees B800s and a Vivitar 285HV, all remote triggered by Paul C Buff Cybersyncs. The camera was a D300s with AF-S 17-55mm f/2.8 @ 17mm f/6.3 1/60s ISO 200.5608737566_032338f1c5_o

ObG Thursdays – Top of the Great Wall

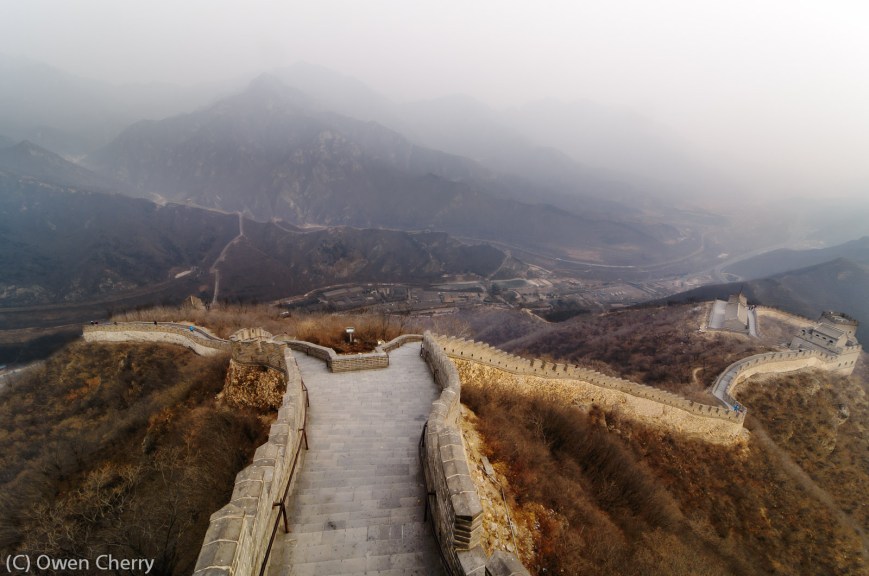
Today’s Oldie-but-Goodie post comes from a year ago this week when I was high up on the Great Wall of China. I was in China for work (lots of photos here) and stayed for a few days to meet up with my friends Mark and Ling in Wuqing, on the south side of Beijing. They were wonderful hosts and on the second day of my visit they hired a car to take us to the Great Wall north of Beijing. The driver got a little lost and ended up taking us to a different section of the wall than we’d intended but we didn’t complain. This mountain pass, known as Juyongguan Pass, had a great ring of wall that went up the north side (Badaling) and back down again, across the valley and then up and down the south side. The climb was steep and grueling.

I had with me the D300s, AF-S 35mm f/1.8, Tokina 11-16mm f/2.8 and a borrowed AF-S 18-135mm f/3.5-5.6 and made good use of them all. The day was extremely hazy and visibility was a lot worse than the photos make it out to seem. When editing I added a huge amount of contrast and saturation to keep them from looking washed out.

The shot below was with the 11-16mm at 11mm 1/125s f/9 ISO200. Although it doesn’t look it, I composed this as a 4-shot high dynamic range (HDR) image. Each of the images that went into it were separated by a 1EV exposure difference. I found that the HDR process brought out a richness of colour that wasn’t there in the individual shots. To add separation between the individual mountain peaks and the foreground I did some dodging and burning with the curves tool and blending duplicate layers with soft light and screen modes. I used added a bit of glow to add an ethereal feel.Great Wall of China

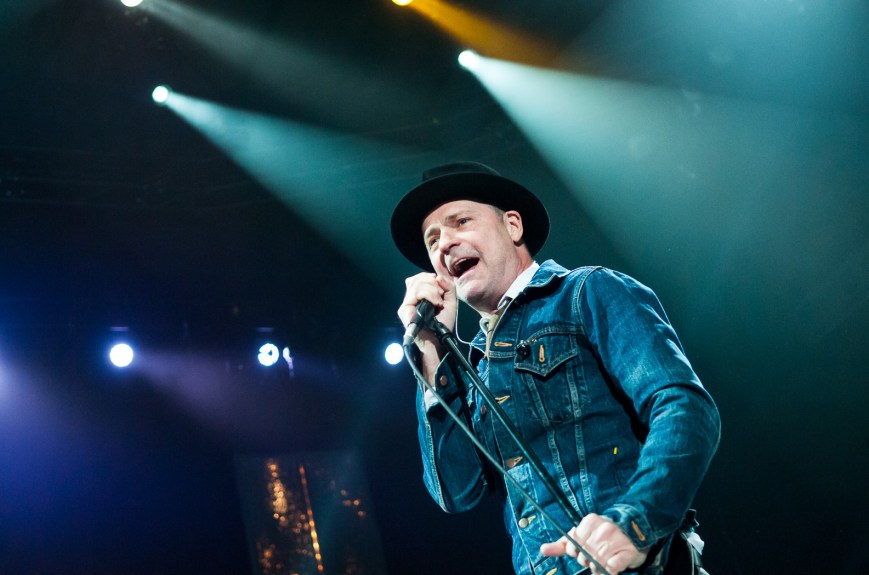
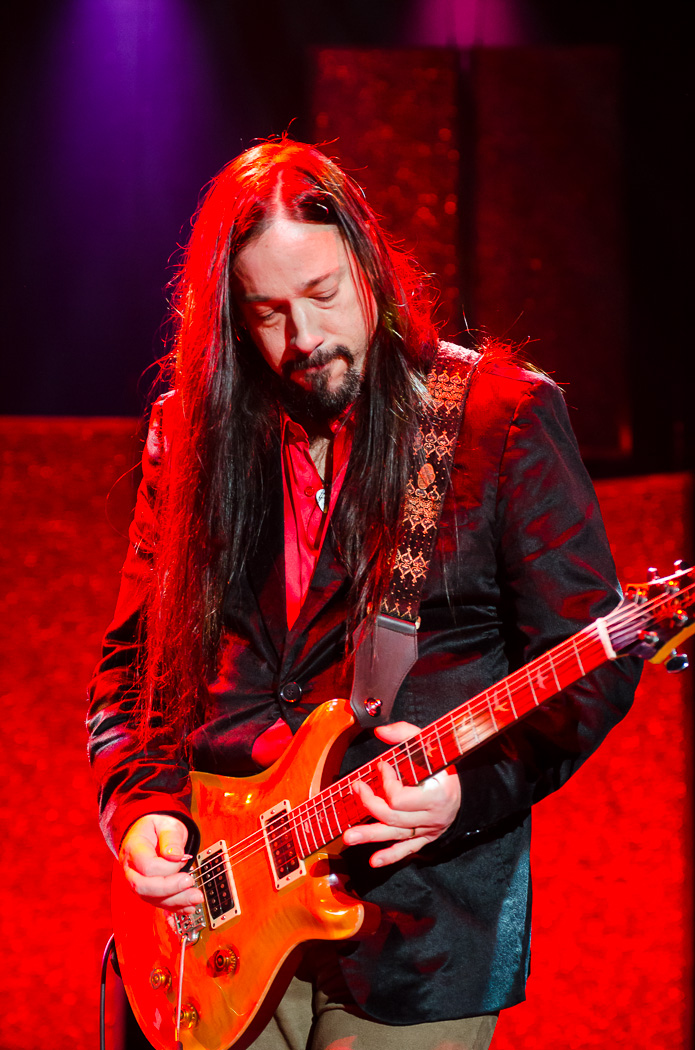
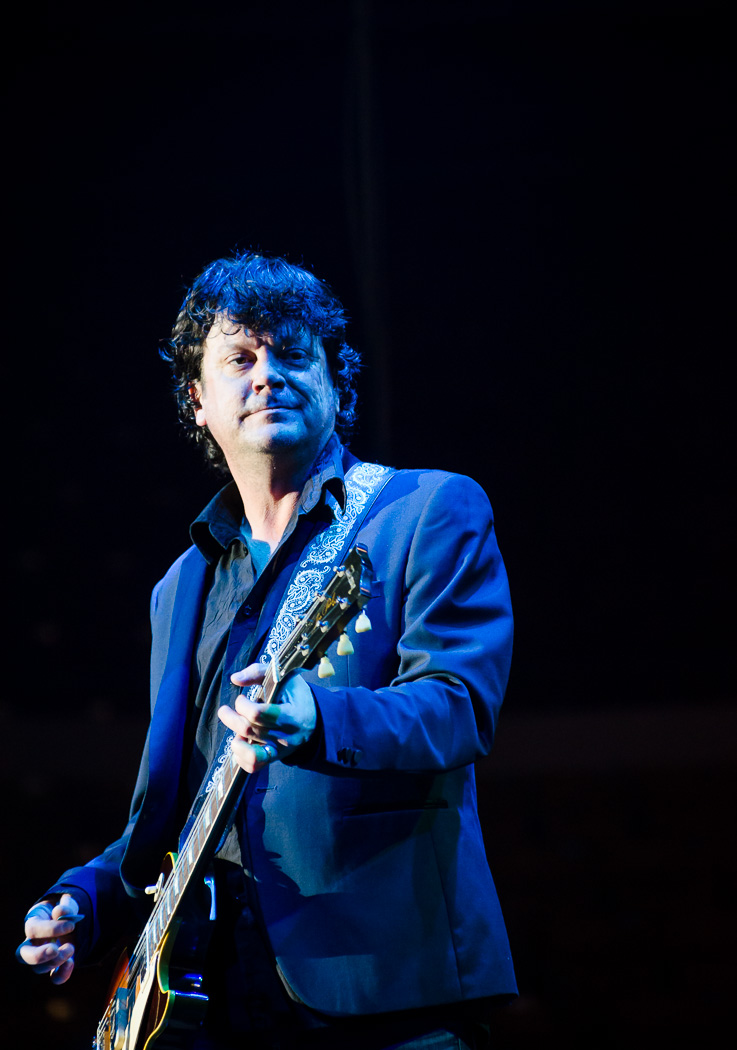
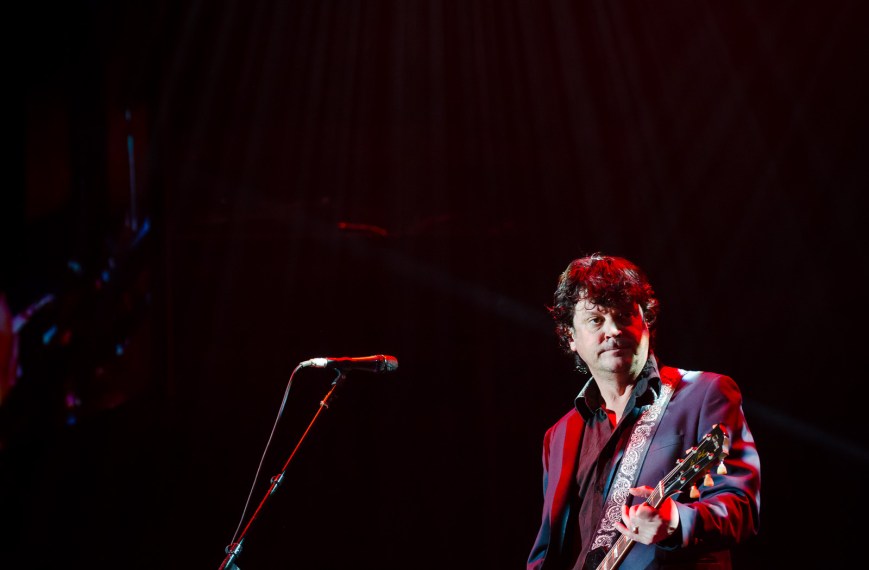
The Tragically Hip at the Aud – More Photos

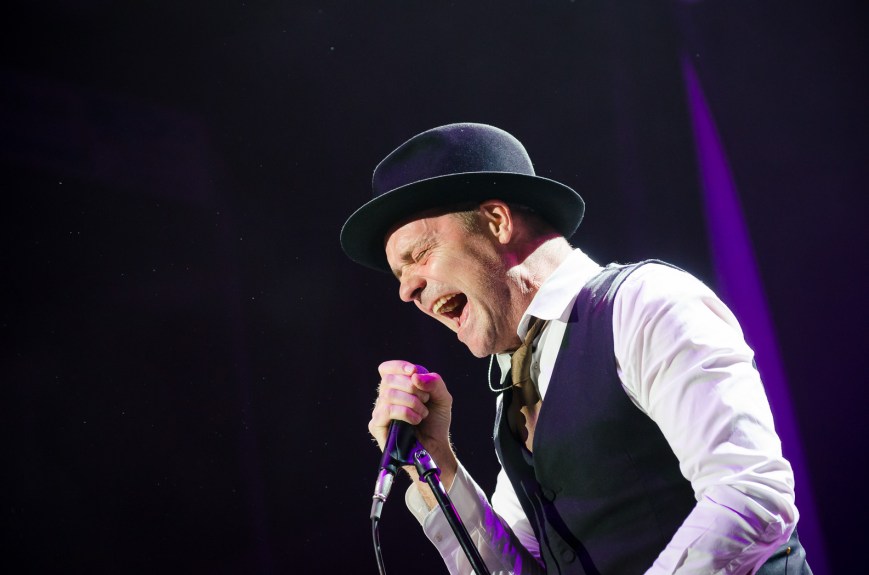
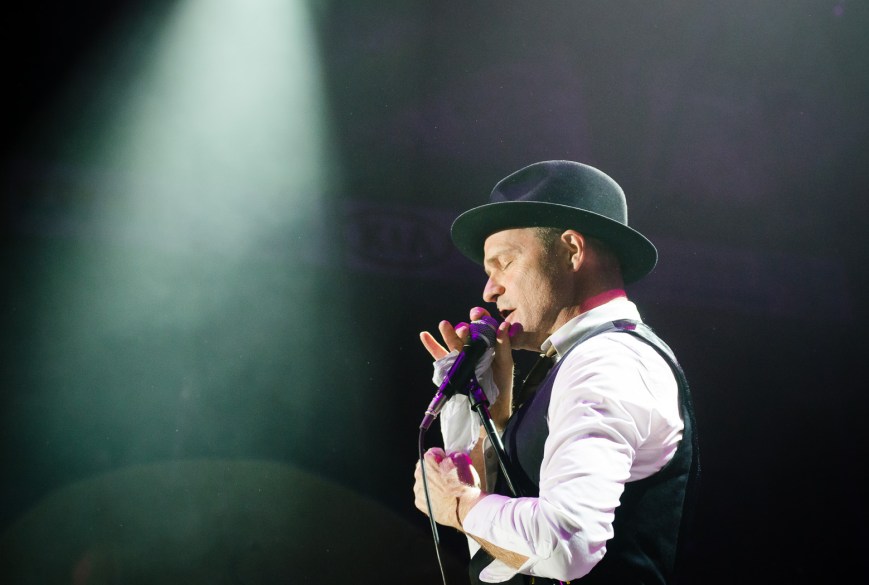
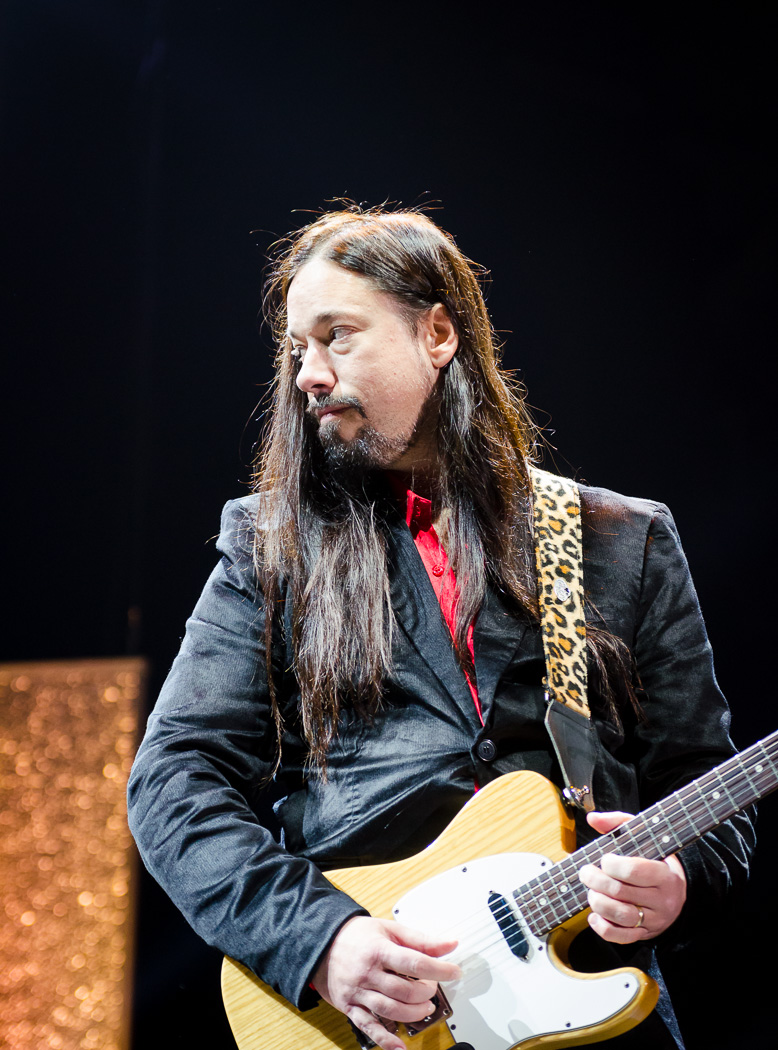
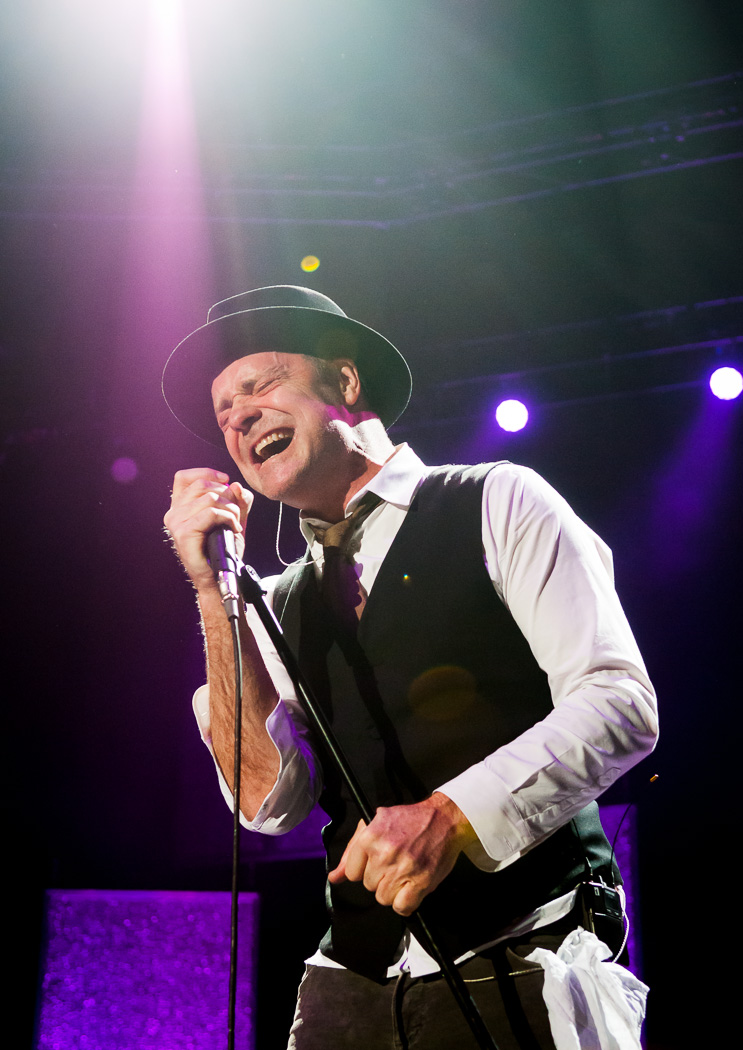
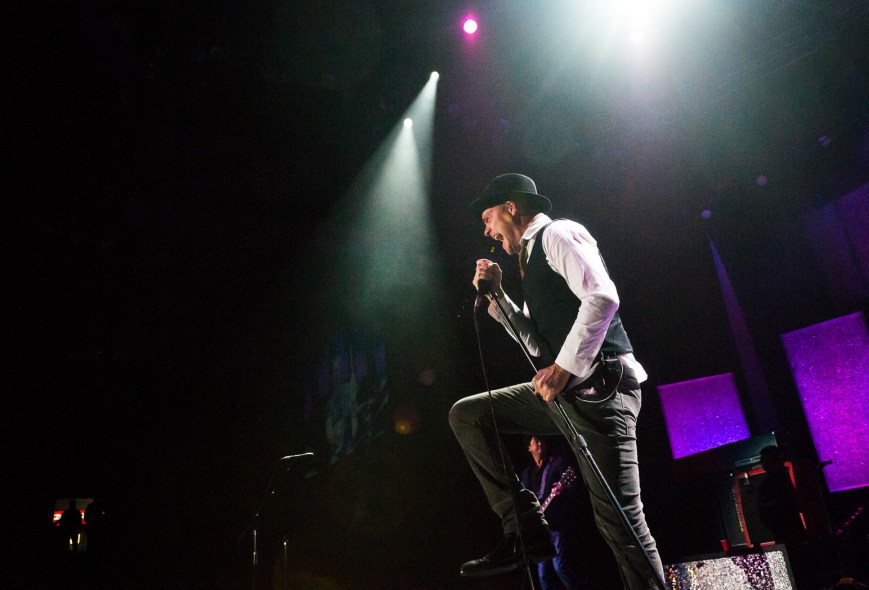
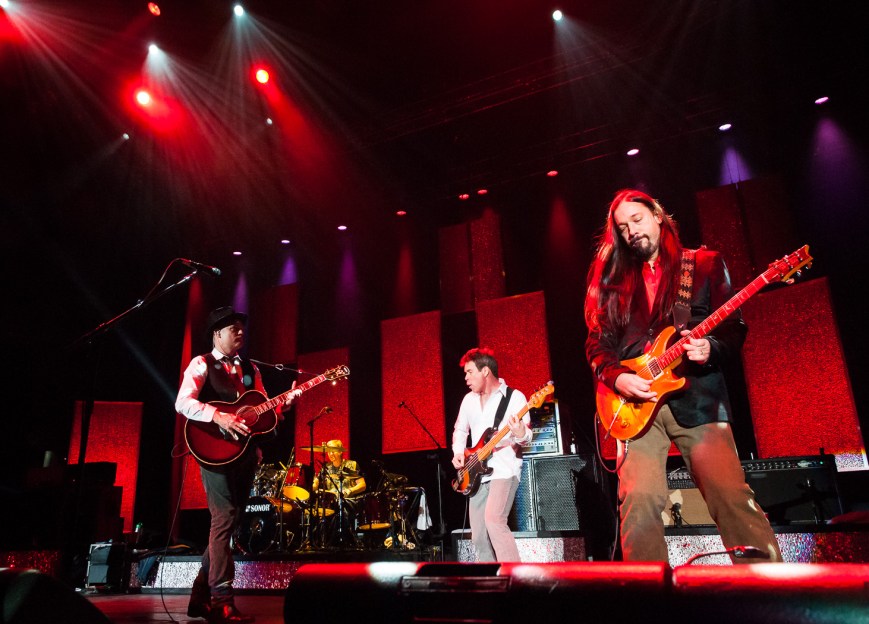
This post is a follow-up to last week’s about my impromptu shoot at a Tragically Hip show at the Kitchener Auditorium. I thought I’d show a bunch more photos but also give a few tips and tricks.

Let’s start with packing gear. Because I hadn’t ever shot at an indoor stadium show and had no idea what kind of vantage point I’d have, I brought nearly everything (11-16, 17-55, 50-135, 35, 50, 85 and both the D300s and D7000… oh, and some strobes and light modifiers too). I really didn’t know if I would even have the chance to change lenses during the shoot but I wanted to be safe. At the time I also didn’t know the extent of the shoot…. would I be covering just the show? or maybe shooting the band afterwords? would the writer need some details to support an interview? In the end, when I found that I would just be shooting the first three songs, I opted for a simple and versatile setup that would need no lens swapping. I put the AF-S 17-55 f/2.8 on the D300s and the Tokina 50-135 f/2.8 on the D7000 and left the rest in the car.

Concert photography presents a few technical challenges due to the extreme contrast and colour of light and fast-moving performers. In the concerts I’m used to shooting, there is barely enough light to shoot 1/60s with a wide open lens at ISO 1600; however during this show there was ample light. I chose to shoot at ISO 1600 with the lenses wide open or near-wide open but was able to get very fast shutter speeds like 1/250s. Freezing the subjects was a breeze.

When shooting a concert the hall is usually quite dark and the subjects quite bright. Imagine trying to properly expose a backlit penguin in the snow and then invert the light and dark. The camera will want to expose for the shadows and completely blow out the subjects. When shooting wide angle with the D300s I dealt with this extreme contrast by setting the exposure compensation to -1EV and crossing my fingers. For the most part it worked and I got a lot of keepers. With the D7000 and 50-135 I used the spot meter instead of the matrix meter. I actually have the function button programmed to quickly switch to spot meter while pressed. Occasionally I would combine the spot meter with the AE-L (exposure lock) when I needed to recompose.

In all I got 20-25 shots that I consider keepers (not bad for three songs). Here is a selection.Tragically Hip - Feb 5 2013-18Tragically Hip - Feb 5 2013-2 Tragically Hip - Feb 5 2013-17 Tragically Hip - Feb 5 2013-16 Tragically Hip - Feb 5 2013-14 Tragically Hip - Feb 5 2013-13 Tragically Hip - Feb 5 2013-11 Tragically Hip - Feb 5 2013-10 Tragically Hip - Feb 5 2013-9 Tragically Hip - Feb 5 2013-7 Tragically Hip - Feb 5 2013-6 Tragically Hip - Feb 5 2013-5 Tragically Hip - Feb 5 2013-4 Tragically Hip - Feb 5 2013-3 Tragically Hip - Feb 5 2013-20 Tragically Hip - Feb 5 2013-21 Tragically Hip - Feb 5 2013-22

ObG Thursdays – Fox in the Fog

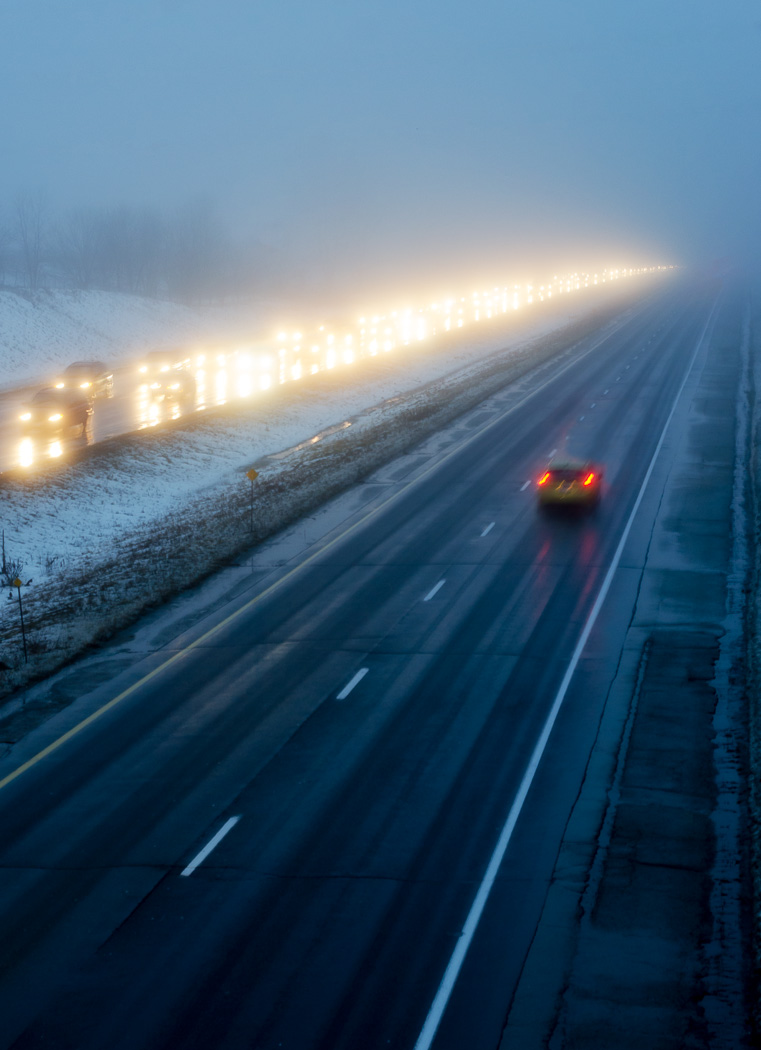
Here’s a photo I took at Halloween in 2011, late at night on our way home from a party. Mitzy had spent a solid week making her Fantastic Mrs. Fox costume and I’d had a hard time getting just the right photograph of it. It was a misty night, and cold, but I convinced Mitzy to stay in the parking lot across the street from our apartment while I grabbed a tripod. I positioned her under the street light and took just one shot.

D300s on tripod with AF-S 17-55mm f/2.8 @ 38mm f/4 1/4s ISO400Late Night Fox

The Making of a Scary Basement Photos – Part 2 (Editing)

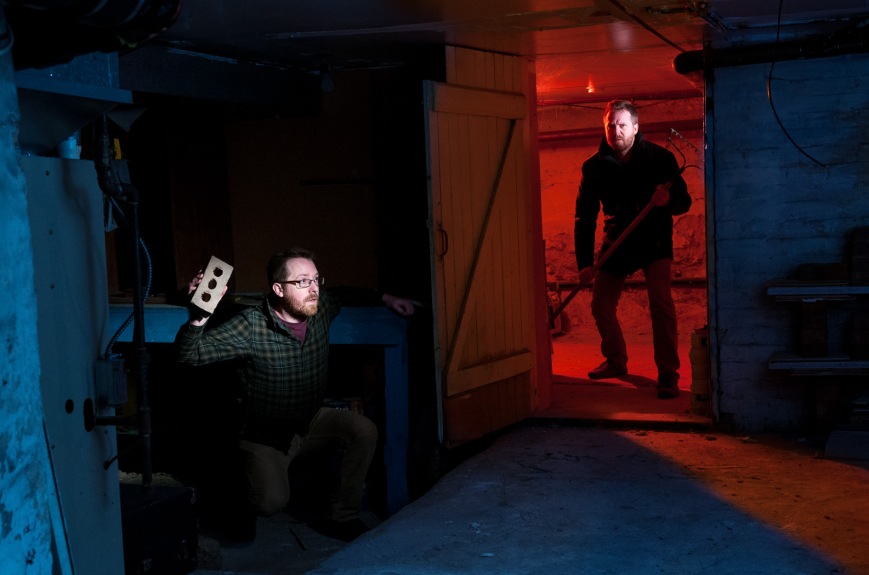
I’d like to follow up my previous post with a more detailed explanation of how I pieced the composite image together and achieved the final look. Certain aspects of Photoshop, or photo editing in general, may seem like black art but in this case the process is fairly straightforward. I use two common image editing programs:

  • Adobe Photoshop Lightroom 4 (currently at v4.3)
  • Adobe Photoshop CS5

As I mentioned in the last post I started the process of taking this image with the final product in mind, simplifying the editing process considerably.

DSC_9718-Edit-5The first step, as in all my post-production, was to import the images into Lightroom. For those who don’t know, Lightroom is an extremely versatile program that provides a near-complete workflow from import, sort, edit, print, upload plus simple tools for generating slide shows, webpages and books. I do 95% of my editing in Lightroom and usually only go to Photoshop for complicated edits like cloning and healing or anything where layers are required.

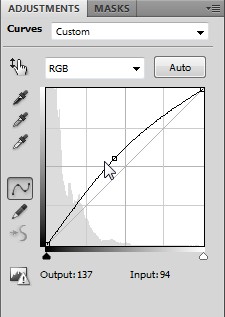
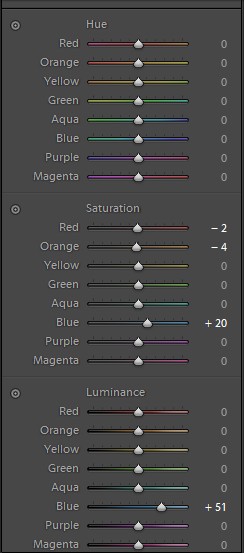
ScreenHunter_02 Jan. 11 16.42With the image of the blue room I adjusted the levels to get the brightness/contrast I wanted. I tuned the blue colour of the room with a white balance adjustment and the hue/saturation/luminance controls. I also used this control to reduce the red and orange saturation on my face.ScreenHunter_03 Jan. 11 16.44If you recall from the previous post I took a second image of the blue room with the snooted flash removed. I copied all of the adjustments from above over to this image. With the red room, I made minimal adjustments. I tweaked the white balance and increased saturation. I added some blacks to increase contrast.ScreenHunter_04 Jan. 11 16.46When finished in Lightroom I opened the three images as layers in a single Photoshop file in the following order: empty blue room > blue room with me > red room. I selected the three layers and used the Auto-Align Layers tool (in Automatic mode) to remove any misalignment from slight camera movements between shots. ScreenHunter_06 Jan. 11 16.52I masked off the right side of the “blue me” layer (to allow the underlying empty room to come through). The first image below is the resulting layer and the second image is the mask used to create it.ScreenHunter_05 Jan. 11 16.51ScreenHunter_08 Jan. 11 16.52The red room required a more complex mask to keep the red on the door and floor but not spill onto the door frame on the right side.ScreenHunter_09 Jan. 11 16.53 ScreenHunter_10 Jan. 11 16.53The three layers, when all visible, appear like this:ScreenHunter_10 Jan. 11 16.54My next step was to remove blemishes such as the smoke alarm in the blue room and some messy cables. For this I created a new layer above the three image layers. I set the healing brush and clone stamp tools to sample from all layers below. The edits appeared in the new layer, leaving the underlying layers untouched. This method makes the removal of healing/cloning edits much simpler because they can be deleted from the self-contained layer. Here is the layer containing the edits.ScreenHunter_11 Jan. 11 16.54As a final adjustment I added a curves adjustment, again as a new layer but masked off the red room.ScreenHunter_11 Jan. 11 16.55Here is the final image in Photoshop:ScreenHunter_12 Jan. 11 16.56Finally, I opened the image up in Lightroom and cropped on a slight angle to add a bit of drama.DSC_9718-Edit-5Thanks for reading!

On the Walter Bean Trail with Mitzy

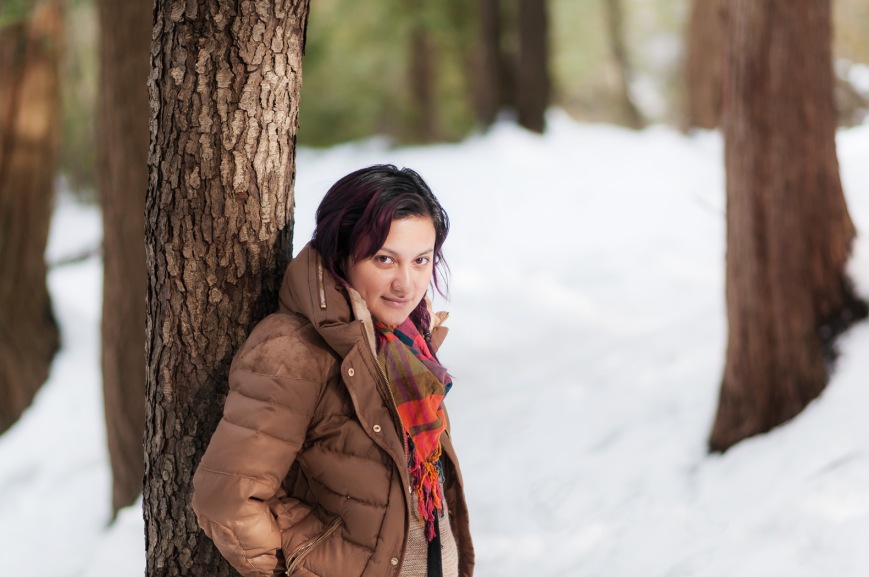
Mitzy and I went for a walk in the snow on the Walter Bean Trail last week. Despite being only 10 cm, it was still the biggest snowfall since March, 2011. Here are a couple of shots, both with cinematic crops that I feel work quite well.

First, one with the AF-S 85mm f1.8 G.  Mitzy was standing in a sunbeam poking through the trees. I’m finding this lens to have extremely accurate focus and wonderful subject separation. This is at f/4 and Mitzy still pops from the background. The bokeh is still great at f/4 as well. Unfortunately I overexposed her face, leading to some poor skin tones when I recovered the highlights.

DSC_9600Next is a manually focussed shot with the 35mm f/1.8 DX at f/1.8.

DSC_9623

Thanks for looking!